How to Make a Baseball Quilt
Contents
Learn how to make a baseball quilt using this step-by-step tutorial. This quilt is perfect for any baseball fan and makes a great gift!

Introduction
Whether you’re a baseball fan or just love the sporty look of a baseball-themed quilt, this tutorial will show you how to make a quilt that celebrates America’s pastime.
This quilt is perfect for any baseball fan young or old. It would make a great gift for Father’s Day, a birthday, or just because. You could even make it to show your team spirit during the playoffs or World Series
This quilt is also perfect for beginning quilters. It uses simple piecing techniques and there is no need for intricate quilting designs. You can easily finish this quilt in a weekend.
What You Will Need
To make a baseball quilt, you will need the following materials:
-1 yard of batting
-1 yard of backing fabric
-56 inch quilt hoop
-Quilter’s rule
-Rotary cutter
-Scissors
-Templates for baseball stitching
-Thread
-Yardstick or measuring tape
Step One: Choose Your Pattern
The first step in making a baseball quilt is to choose the pattern you want to use. There are many different patterns available, so take some time to look at all of your options before deciding on one. You can find patterns online, in quilting magazines, or in quilting books. Once you have chosen a pattern, gather all of the materials you will need to complete the project.
Step Two: Cut Your Fabric
After you have chosen your pattern and gathered all of your materials, the next step is to cut your fabric. You will need to cut six 5-inch squares for each baseball on the quilt. Once you have cut all of the fabric squares, arrange them into rows of three. Each row should have two dark squares and one light square.
Step Three: Sew Your Squares Together
Once you have arranged your fabric into rows, it is time to start sewing the squares together. Sew each row of three squares together using a 1/4-inch seam allowance. Be sure to press each seam open as you go. After you have sewn all of the rows together, your quilt top is finished!
Step Four: Quilt Your Quilt Top
Now that your quilt top is finished, it is time to start quilting it. You can either hand-quilt or machine-quilt your quilt top. If you choose to hand-quilt, stitch in the ditch around each baseball motif on the quilt top. If you choose to machine-quilt, stitch in the ditch around each baseball motif and then stitch a free-motion design in the background areas of the quilt top. Once you have finished quilting your quilt top, proceed to Step Five.
Step Five: Bind Your Quilt
The final step in making your baseball quilt is to bind it. To do this, cut 2 1/2-inch strips of fabric (you will need seven strips if you are using a 45-inch wide fabric). Sew the strips together end-to-end to form one long strip. Fold the strip in half lengthwise with wrong sides together and press. Open up the strip and fold each long edge in toward the center fold line and press again. Fold the strip in half again so that all raw edges are enclosed and press one last time. Trim away any loose threads and then stitch the binding strip around all four edges of the quilt using a 1/4-inch seam allowance.(Quilting for Beginners)
Step Two: Cut Out Your Pieces
After you have gathered all of your materials, it is time to start cutting out your quilt pieces. You will need to use a rotary cutter and mat for this step. If you do not have a rotary cutter, you can use scissors, but it will be more difficult and take longer.
First, you will need to cut out seven 10-inch squares from each of the four different colors of fabric. You can use a ruler or a measuring tape to make sure that the squares are exactly 10 inches. Once you have cut out all of the squares, set them aside.
Next, you will need to cut out two rectangles that are 4.5 inches wide and 22 inches long from the white fabric. These rectangles will be used for the quilt’s border. After you have cut out the rectangles, set them aside with the squares.
Now, you are ready to start cutting out the batting. The batting should be cut into seven 10-inch squares. The batting does not have to be cut perfectly, but it should be close to 10 inches.
Once all of your pieces are cut out, you are ready to move on to Step Three: Sewing the Quilt Pieces Together!
Step Three: Assemble Your Quilt Top
Welcome to the third and final step in this baseball quilt tutorial! In the first step, we pieced together the quilt top. In the second step, we added batting and a backing. Now it’s time to assemble your quilt top.
For this step, you will need your quilt top, batting, backing, and a sewing machine. You will also need a Age Chart to determine how much fabric you need for binding.
To begin, lay your backing fabric wrong side up on a flat surface. Add the batting on top of the backing, making sure it is centered. Then lay your quilt top right side up on top of the batting.
Now it’s time to start sewing! Starting in the middle of one side of the quilt, sew a ½” seam around all four sides of the quilt. Be sure to backstitch at the beginning and end of each seam.
After you have sewn all four sides of the quilt, it’s time to add the binding. On one long side of the quilt, fold over ½” of fabric and press with an iron. Sew along the fold with a ¼” seam allowance. Repeat this process on all four sides of the quilt.
Now your baseball quilt is finished! Congratulations on completing this project!
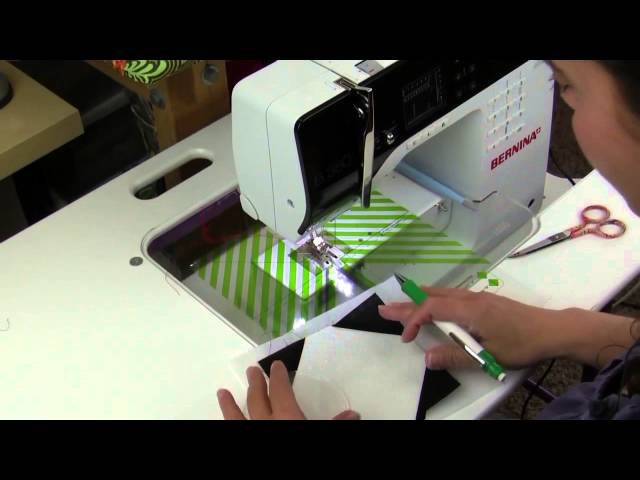
Step Four: Quilt Your Quilt
Now that your quilt top is finished, it’s time to quilt your quilt! This step will require a sewing machine and some patience, but the results will be worth it.
To begin, you will need to gather some supplies. First, you will need a backing for your quilt. This can be a piece of fabric or an old blanket. It should be about the same size as your quilt top. Next, you will need batting. This is a thick, padded material that goes in between your quilt top and backing. You can find batting at most fabric stores. Finally, you will need a sewing machine needle and thread. Make sure to use a needle that is designed for quilting (these are usually called “quilting needles”).
Once you have all of your supplies, it’s time to start quilting! Begin by layering your backing fabric, batting, and quilt top in that order. Pin the layers together if desired. Then, start sewing along the edges of the batting and backing fabric using a straight stitch (or whatever stitch you prefer). Be sure to sew slowly so that you don’t make any mistakes. When you’re finished sewing, trimmed any excess batting or backing fabric from the edges of your quilt.
Now simply enjoy your new baseball-themed quilt!
Step Five: Bind Your Quilt
Now that your quilt top is complete, it’s time to bind it. This will give your quilt a nice, finished edge. To bind your quilt, you will need:
-Binding fabric
-Scissors
-Iron
-Thread
-Sewing machine
First, cut your binding fabric into strips that are 2.5 inches wide. You will need enough strips to go around the entire edges of your quilt top.
Next, iron the binding strips in half lengthwise. Then, starting at one corner of your quilt top, sew the binding strips to the edge of the quilt (right sides together), using a ¼ inch seam allowance. Continue sewing around the entire perimeter of the quilt top.
When you get back to the beginning, cut the binding strip so that it overlaps the first strip by about 4 inches. Iron the two strips together at the overlap, then finish sewing them together. Trim any excess binding fabric and press the binding flat.
Now all you have to do is hand stitch (or machine stitch) the binding to the back of your quilt top. Start in the middle of one side and work your way around until you reach where you started. Then knot off your thread and snip any excess. Congratulations – your baseball quilt is now complete!
Tips and Tricks
Whether you’re a die-hard baseball fan or just want to show your support for your local team a baseball quilt is the perfect way to show your love for the game. Making a quilt is a fun and creative process, but it can also be challenging if you’ve never done it before. Here are some tips and tricks to help you make a baseball quilt that you’ll love.
1. Choose your fabric carefully. Baseball fabric is widely available, but not all fabrics are created equal. Look for fabrics that are high quality and have a tight weave. This will ensure that your quilt will last for years to come.
2. Cut your fabric accurately. This is especially important if you’re using printed fabrics. Make sure to use a rotary cutter and ruler to get straight, clean cuts.
3. Use batting sparingly. Batting is what gives quilts their loft, but too much batting can make your quilt heavy and difficult to manage. Use just enough batting to give your quilt some body without making it too bulky.
4. Quilt slowly and carefully. Quilting is the process of sewing the layers of your quilt together. It’s important to take your time and sew slowly so that you don’t end up with messy stitches or puckers in your fabric.
5. Bind your quilt securely. The binding is what keeps all the layers of your quilt together and gives it a finished look. Make sure to use a strong thread and sew the binding securely so that it doesn’t come undone later on
Conclusion
Now that you know the basics of how to make a baseball quilt, you can get creative and add your own personal touches. For example, you could applique a baseball diamond onto the center of the quilt or add embroidered details around the edge. Whatever you do, have fun and enjoy creating a one-of-a-kind quilt that will be cherished for years to come.
Resources
To make a baseball quilt, you will need the following resources:
-Baseball-themed fabric
-Scissors
-Thread
-Sewing machine
-Iron
-Quilt batting
-Quilt backing