How to Use a Baseball Stitching Stencil
Contents
Learn how to use a baseball stitching stencil so you can make perfect Baseball Stitches on any project.

Introduction
Whether you’re a baseball coach or a player, chances are you’ve seen a stitching stencil before. For those who don’t know, a stitching stencil is simply a piece of plastic that has holes in it. When placed on top of a baseball, the holes in the stencil line up with the stitching on the ball. This allows coaches and players to draw lines around the baseball, which is helpful for practicing batting or pitching techniques.
In order to use a baseball stitching stencil, simply place the stencil on top of the ball and trace around it with a pen or pencil. You can also use the stencil to draw lines on a batting tee or Pitching Mound which can be helpful for practicing your swing or delivery.
What You’ll Need
To start, you’ll need a baseball stitching stencil. You can find these online or at some Sporting Goods stores. Next, choose the color of thread you want to use. You’ll also need a needle and some scissors.
Once you have all of your supplies, it’s time to get started! Begin by cutting a small piece of thread off the spool. Then, thread your needle and tie a knot in the end of the thread. This will prevent the thread from coming undone while you’re working.
Now, position your stencil on the fabric where you want the stitches to be. Once you’re happy with the placement, use the needle to poke through the holes in the stencil. Make sure to go slowly so that you don’t rip the fabric.
Once you’ve poked through all of the holes, it’s time to start stitching! Begin at one end of the design and stitch towards the other end. When you get to the end, tie off your thread and trim any loose ends.
And that’s it! You’ve now successfully used a baseball stitching stencil to add some fun details to your fabric project.
Step One: Preparing the Stencil
The first step is to secure the stencil so that it does not move during the painting process. Tape the edges of the stencil down with painter’s tape or another type of low-tack tape. If you are using a large stencil, it may be necessary to weight it down with a can of paint or something similar.
Step Two: Applying the Paint
Once the stencil is secure, you are ready to start painting Dip a brush into your paint, making sure to load it with enough paint so that you do not have to keep going back for more. Use a light, even pressure as you brush over the openings in the stencil. If you press too hard, the paint will bleed under the edges of the stencil and ruin your design.
Step Three: Removing the Stencil
Once you have finished painting, carefully remove the stencil. If you are using a large stencil, it may be helpful to roll it up as you remove it so that you do not accidentally smudge any wet paint.
Step Two: Applying the Stencil
After you have found the perfect location for your design, it is time to apply the baseball stitching stencil. Start by taping the stencil in place with painter’s tape. Be sure to smooth out any bubbles or wrinkles.
Once the stencil is secure, use a foam pouncer or a dense makeup sponge to dab paint over the stencil. Be sure to apply an even layer of paint — you may need to go over the design a few times to get full coverage.
Step Three: Painting the Stitch
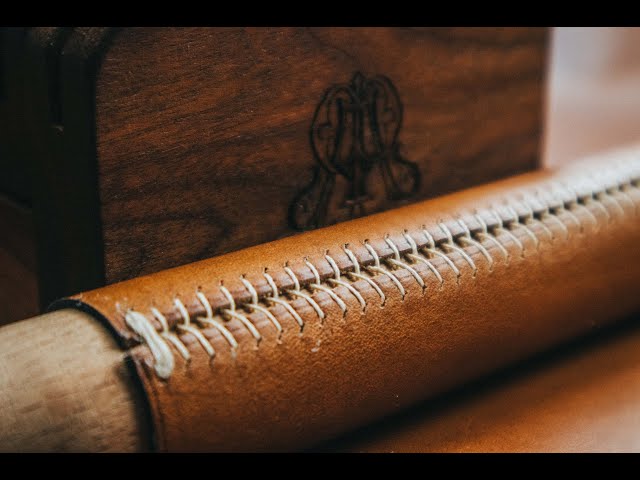
Now that the leather is dry, it’s time to paint the stitch. One way to do this is by using a baseball stitching stencil. You can find these online or at your local crafts store.
To use the stencil, start by taping it to the leather. Then, using a sharp craft knife, carefully cut around the stencil. Remove the excess leather and discard it.
Next, use a small paintbrush to fill in the stitch with black paint. Allow the paint to dry completely before moving on to the next step.
Step Four: Removing the Stencil
Once you’ve completed your design, carefully remove the stencil. You may need to use a utility knife or other sharp tool to loosen the edges of the stencil. Take care not to damage the surrounding area.
Tips and Tricks
Whether you’re a coach or a player, learning how to correctly use a baseball stitching stencil is an important skill. Use these tips and tricks to get the most out of your stencil and produce perfect seams every time.
Before you get started, it’s important to choose the right baseball stitching stencil for your project. There are many different brands and sizes of stencils available, so be sure to select one that is the correct size for your baseball.
Once you have your baseball and stencil, you’re ready to get started. Follow these steps to produce perfect seams:
1. Place the baseball on a flat surface and position the stencil over the top of the ball.
2. Using a pen or pencil, trace around the outside edge of the stencil.
3. Remove the stencil and connect the dots to create a seam line.
4. With a sharp knife or scissors, cut along the seam line you just created. Be sure to cut through both layers of leather.
5. Once the leather is cut, remove any excess material from around the seam line.
6. To stitch the baseball together, thread a needle with strong thread (preferably waxed) and knot one end. Start at one end of the seam line and stitch through both layers of leather, making small stitches approximately 1/4 inch apart. Knot the thread when you reach the other end of the seam line and trim any excess thread
Conclusion
Now that you know how to use a baseball stitching stencil, you’ll be able to create Perfect Baseball stitches every time. Be sure to practice on scrap fabric before trying it on your actual project. With a little practice, you’ll be a pro in no time!
Further Reading
If you’re looking to add some extra style to your baseballs, try using a baseball stitching stencil. This guide will show you how to use a baseball stitching stencil to create perfect, consistent stitches on your baseballs.
First, gather your supplies. You’ll need a ball of yarn, a pair of scissors, and a baseball stitching stencil. You can find baseball stitching stencils online or at your local craft store.
Next, lay the baseball stitching stencil over the baseball. Make sure the design is centered and that the edges of the stencil are lined up with the seams of the baseball.
With the scissors, cut small slits around the edge of the design. Be careful not to cut through the paper template.
Now it’s time to stitch! Start by threading the yarn through one of the slits you just cut. Then, following the design on the template, start stitch around the edge of the design. At each slit, insert the needle through to the other side and pull tight. Continue until you’ve gone all the way around the design. tying off at one of the original slits. Keep in mind that you may need to re-cut some of the slits if they become too stretched out during stitching.
There you have it! A perfect, consistent design on your baseballs every time using a baseball stitching stencil!
Credits
This baseball stitching stencil was created by illustrator Mike Mills. It is free for personal use only. If you would like to use it for commercial purposes, please contact Mike for permission.