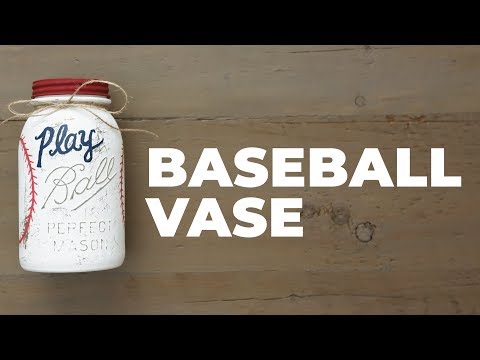
How to Make a Baseball Vase
Contents
Check out this tutorial to see how you can make a baseball vase. This is a great project for any baseball fan
Introduction
Why buy a vase when you can make one out of a baseball? This simple project is perfect for show casing your favorite flowers. All you need is a baseball, a sharp knife, and some glue.
What You’ll Need
To make a baseball vase, you will need:
-A baseball
-A vase
-Scissors
-Tape
First, cut a hole in the baseball using the scissors. The hole should be big enough for the vase to fit snugly inside. Next, tape the vase to the baseball so that it is secure. Finally, fill the vase with water and flowers, and enjoy your unique baseball vase!
Step One: Preparing the Vase
Before you can begin creating your baseball vase, you will need to gather a few supplies. You will need a clean, empty vase, a utility knife, and a roll of duct tape.
Start by giving your vase a good wash. Once it is clean, dry it completely. Next, take your utility knife and make two slits in the top of the vase. These slits should be about an inch apart and equally spaced from the top and bottom of the vase.
Now take your duct tape and cover the entirety of the vase with it. Be sure to smooth out any bubbles or wrinkles in the tape as you go. Once the entire vase is covered, trim off any excess tape with your utility knife.
Step Two: Adding the Baseballs
After you have cut your foam to size, it’s time to start adding the baseballs! You will want to start with the bottom layer first. Take your hot glue and glue one row of baseballs around the bottom of the vase. You can make this row as close together or as far apart as you want, depending on how full you want your vase to look. Once you have glued all of the baseballs in place, move on to the next row. Repeat this process until you have covered the entire vase.
Step Three: Finishing Touches
Now that the bulk of your vase is complete, it’s time to add the finishing touches. In this step, you will need the following supplies:
-acrylic paint in your desired color
-paintbrush
-clear acrylic sealer
-scissors
Once you have gathered your supplies, you will want to paint the entirety of your vase with the acrylic paint. Be sure to use long strokes and even coverage for best results. Once the paint is dry, apply a layer of clear acrylic sealer over top. This will help protect your design and keep the paint from chipping or fading over time.
To finish, cut a small piece of baseball off of the extra ball and glue it to the rim of your vase using clear craft glue. Allow the glue to dry completely before adding water or flowers to your new baseball vase!
Tips & Tricks
Whether you’re a baseball fan or just looking for a unique vase design, this DIY project is perfect for you. With just a few supplies and some simple steps, you can turn an ordinary glass vase into a baseball-themed decoration for your home.
Here’s what you’ll need:
-Glass vase
-White craft paint
-Red craft paint
-Paintbrush
-Baseball card
-Double-sided tape or glue dots
-Scissors
First, paint the entire vase with a white base coat. Allow the paint to dry completely before moving on to the next step.
Next, use a red paintbrush to add stitches around the center of the vase. Make sure that the stitches are evenly spaced and all going in the same direction. You can also add a second row of stitches if you’d like. Allow the paint to dry completely.
Now it’s time to add your baseball card decoration. Cut out a portion of the baseball card that includes the team logo or player photo. Attach the cutout to the front of the vase using double-sided tape or glue dots. You can also wrap the entire vase in batting material for an additional Baseball feel!
Variations
You can use any type of baseball for this project, but a regulation-size baseball works best. If you want to use a baseball that has been well-worn by a favorite player, you can display it in a clear plastic case instead of making a vase.
You will need:
-Baseball
-X-acto knife or other sharp knife
-Ruler or tape measure
-Pencil
-Crystal vase or other clear glass vase that is at least 3 inches taller than the baseball
-Plastic wrap
-Double-sided tape or glue dots
-Fresh flowers (optional)
The Bottom Line
Make a grand slam with this baseball vase! Perfect for Father’s Day, this easy project uses an empty 2-liter soda bottle, yarn, and a few other household supplies.
FAQs
-How do I make a baseball vase?
-Can I use a real baseball?
-What type of flowers should I use in my baseball vase?
There are a few things to consider when making a baseball vase, but with a little planning, you can create a beautiful and unique arrangement that will be sure to score some points with your favorite baseball fan. Here are answers to some frequently asked questions about making a baseball vase.
Can I use a real baseball?
Yes, you can! In fact, using a real baseball is the best way to ensure that your vase has that authentic baseball look. If you don’t have a real baseball on hand, you can also use a replica ball or even a ball made of Styrofoam.
What type of flowers should I use in my baseball vase?
The sky’s the limit when it comes to choosing flowers for your arrangement. However, we recommend sticking with blooms that are red, white, and blue to really capture the spirit of America’s pastime.
Resources
To make a baseball vase, you will need the following materials:
-A baseball
-A knife
-A sharpie
-A vase or jar
-Optional: acrylic paint and a brush
Instructions:
1. Cut the top off of the baseball using the knife. Be careful not to cut yourself!
2. Using the sharpie, mark where you would like to make the openings for the flowers. These can be any size or shape that you like.
3. Using the knife, carefully cut out the openings that you marked in step 2.
4. Place the baseball vase into the vase or jar. If desired, you can now paint the baseball vase with acrylic paint. Let dry before adding flowers.