How to Create a Basketball Sketch
Contents
In this blog post, we’ll show you how to create a basketball sketch using the must have keywords.
Introduction
The term “sketch” in the Basketball World has a few different meanings. For our purposes, a sketch is simply a drawing of a player or coach in action. These are often used by broadcasters and commentators during live games to help explain what’s happening on the court, or to break down a key play after the fact.
Creating a successful basketball sketch is all about capturing the essential elements of the subject matter while still maintaining a sense of realism and functionality. In other words, your sketch should be both accurate and easy to understand at a glance. Here are a few tips to help you get started:
1. Use simple lines and shapes to construct your figures. The human form is complex, but you don’t need to render every muscle and tendon in order to convey its overall size and proportions. A few well-placed lines can go a long way.
2. Pay attention to stance and posture. The way a person is standing or moving can say a lot about their mood, intentions, and level of athleticism. Capturing these subtle details will make your sketches more believable and lifelike.
3. Remember that action is more important than accuracy. A perfectly drawn player who’s just standing around isn’t nearly as interesting as one who’s leaping for a rebound or making a slick move to the hoop. Don’t be afraid to take some liberties with the details if it means making your sketch more dynamic.
4. Use color sparingly. In most cases, black-and-white sketches are more effective than those that are colorized. When used judiciously, however, color can add an extra layer of meaning or emphasis to your work.
5 Finally, have fun with it! Basketball is an exciting sport, so try to inject some of that energy into your sketches. The best ones are usually those that capture the essence of the game without getting bogged down in too many details
Step One: Sketch the Outline of the Basketball
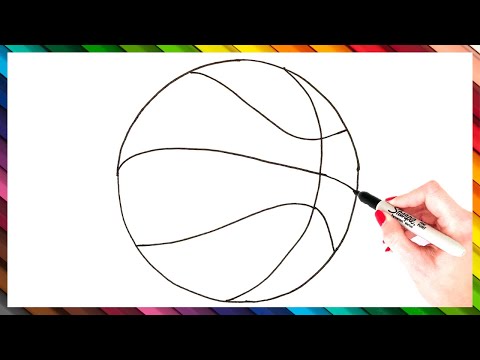
Start by sketching a simple outline of the basketball. Use a light pencil so that you can erase easily if needed. Use a circle template or draw freehand to create the basic shape of the ball. Keep the lines light at this stage.
Next, start to flesh out the details of the ball. Add the lines that divide it into sections and cross over one another to give it that typical basketball look. If you want, you can also add some texturing to the ball by drawing small lines all over it. Just make sure that the overall shape remains round.
Now is also a good time to start thinking about adding shading. Remember that light will hit the ball in different ways depending on its position, so think about where the light would be coming from and how it would affect your drawing. You can start to add some shadowy areas with a dark pencil or pen if you want.
Step Two: Sketch the Lines for the Seams
The next step is to sketch the lines for the seams. Start by drawing a horizontal line across the center of the ball, about 1/3 of the way down from the top. This line will be used to divide the ball into upper and lower halves.
For the seams, start at the bottom left corner of the ball and draw a curved line up to the center horizontal line. Then, draw a second curved line from the bottom right corner of the ball up to meet the first line at the center. Finally, connect these two lines at the top of the ball using a third, slightly curved line.
Step Three: Sketch the Laces
Using a light pencil, sketch the laces of the basketball. Start at the top of the ball and work your way down, making sure to evenly space out the laces. Once you’re happy with the sketch, go over it with a darker pencil or pen.
Step Four: Sketch the Rim
Now that you have the basic framework of the basketball sketch completed, it is time to add the details. This is where you will need to use a light touch with your pencil, as too much pressure will make it difficult to erase later on.
Sketch the rim of the basketball by drawing a slightly curved line across the top of the oval. Then, add four vertical lines equally spaced around the circumference of the oval. These lines will serve as guideposts for drawing the net later on.
Step Five: Sketch the Backboard
Now that you have the basic elements of the basketball court laid out, it’s time to add the backboard. Start by drawing a rectangle in the center of the court. The backboard should be about six feet wide and three and a half feet tall. Then, add the hoop by drawing a circle in the center of the rectangle. The hoop should be about eighteen inches in diameter. Finally, add the net by drawing a series of vertical lines inside the circle.
Step Six: Sketch the Net
Now that the backboard and hoop have been added to the paper, it is time to draw the net. The net should be attached to the backboard and wrap around the hoop. It can be made out of any material, but is most commonly drawn as if it were made out of rope. After the net has been sketched in, the basketball sketch is finished!
Step Seven: Add Final Details
The final details are the small features on the ball that give it character. In this step, you will add the final details to your sketch.
To start, draw a small circle in the center of the ball for the logo. Next, add the lines that give the ball its distinctive pattern. Finally, add the shiny gloss to the ball by drawing a curved line around the edge of the sketch.
Conclusion
Now that you know the basic steps of how to create a basketball sketch, you can start experimenting with different poses and styles to come up with your own unique designs. Remember to have fun and enjoy the process!
Resources
In order to create a basketball sketch, you will need the following materials:
-A piece of paper
-A pencil
-A pen
-A ruler
-A eraser
With these materials, you will be able to create a basic sketch of a basketball.