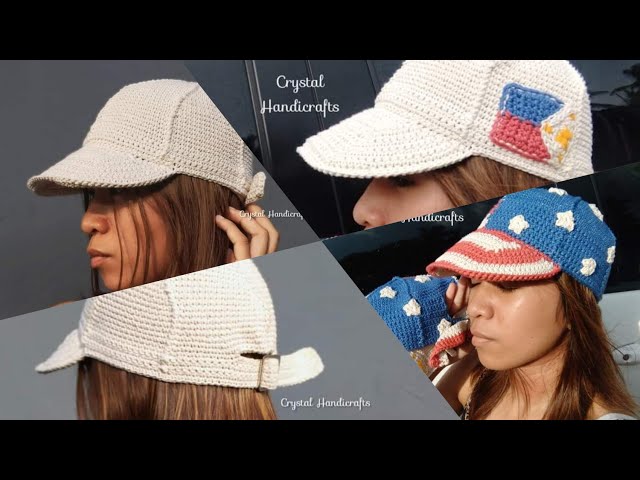
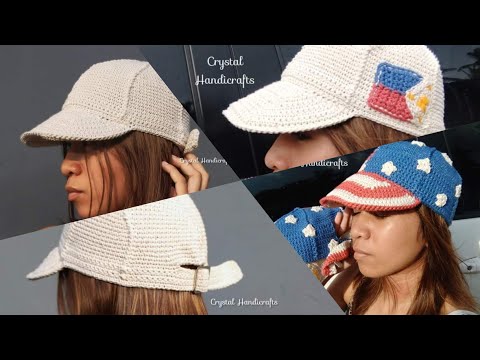
How to Crochet a Baseball Cap
Contents
This easy step-by-step guide will show you how to crochet a Baseball Cap perfect for keeping your head warm at the game!
What You’ll Need
-Size G crochet hook
-4-ply worsted weight yarn in the main color (MC)
-4-ply worsted weight yarn in a contrasting color (CC)
-Tape measure
-Yarn needle
Crocheting the Band
Start by crocheting a long, narrow band that will wrap around your head. single crochet is typically used for the band because it creates a tight, firm stitch that won’t stretch out of shape. Make the band long enough to wrap comfortably around your head with a little bit of overlap. You can try the band on as you go to make sure it’s the right size. When you’ve reached the desired length, finish off the end with a slip stitch and cut the yarn.
Crocheting the Brim
The brim of the baseball cap is worked in a series of single crochet stitches To start, chain 2. Then, work 10 single crochet stitches into the second chain from the hook. Join the last stitch to the first stitch with a slip stitch, being careful not to twist your work.
Seaming the Band and Brim
Now it’s time to seam the band and brim together. Again, you will use a whip stitch, but this time you will be working through both the band and brim fabric. Start by threading your needle with a long piece of yarn, leaving a tail of about 6 inches. Insert the needle through the back loops of both the band and brim at the same time, then pull the yarn through to the front (Fig 1). Continue working in this manner until you have reached the end of the band. To finish, insert your needle through both loops of the last stitch, then pull the yarn through to the back side and knot securely (Fig 2).
Adding the Pom-Pom
To add the pom-pom to your baseball cap first thread a 12” (30 cm) length of yarn through the center top of the hat. Then, tie the yarn in a secure knot. Cut two pieces of cardstock or thin cardboard into circles that are 3” (7.5 cm) in diameter. Set one circle aside for now. With the other circle, cut a ½” (1.3 cm) hole in the center. This will be your pom-pom guide.
Wrap the end of your yarn around the edge of the Pom-Pom guide, making sure to go over the edge and back around again so that the yarn is snug against the guide. Continue wrapping until you’ve wrapped the guide about 20 times. Once you’ve reached 20 wraps, cut the end of your yarn, leaving a 6” (15 cm) tail.
Thread your tail end of yarn through a blunt needle and slip it under all of the wraps on one side of the guide. Carefully slide the pom-pom guide off of your wrapped yarn and tie a secure knot with both tails on one side of the pom-pom. Trim any excess yarn from your tails and fluff out your pom-pom to finish!
Tips and Tricks
If you are a beginning crocheter, or if you have never made a hat before, crocheting a baseball cap may seem like a daunting task. But with a little patience and practice, you’ll be able to create a professional-looking baseball cap that will keep your head warm all winter long. Here are some tips and tricks to help you get started:
-Choose the right yarn. For a durable Baseball Cap that will last for years, choose a wool or acrylic yarn. Stay away from cotton yarn, as it can stretch and lose its shape over time.
-Crochet loosely. When you are working with crochet thread or other fine yarns, it is important to crochet loosely so that your stitches don’t loosen and your work doesn’t pucker.
-Make a gauge swatch. Before you start crocheting your baseball cap it is important to make a gauge swatch to determine the correct size hook to use. To make a gauge swatch, chain 20 stitches and then work in single crochet for 20 rows. Measure the width of your swatch; if it is 4 inches wide, then you will need to use a size G (4 mm) hook. If it is 5 inches wide, then you will need to use a size H (5 mm) hook, and so on.
-Create the brim of the hat first. The brim of the hat is worked in turned rows of single crochet; that is, each row is worked back and forth in the opposite direction so that the edge of the brim lies flat. To start, chain 4 stitches and then turn your work so that you can work back across the chain just made; this creates the first row of single crochet (sc). Row 2: sc in each stitch across (4 sc), turn. Row 3: sc in each stitch across (4 sc), turn. Row 4: 2 sc in first stitch (increase made), sc in next 2 stitches (3 sc), turn. Row 5: sc in each stitch across (3 sc), turn. Row 6: 2 sc in first stitch (increase made), sc in next stitch (2 sc), turn continue making increases along one side of the brim until the brim measures about 22 inches around; at this point there should be 30 stitches on your hook
Troubleshooting
-If your crocheted baseball cap is too large, first check your gauge. If you are using the recommended hook size and yarn weight but your hat is still coming out too large, try switching to a smaller hook size.
-If your crocheted Baseball Cap is too small, first check your gauge. If you are using the recommended hook size and yarn weight but your hat is still coming out too small, try switching to a larger hook size.
-If your crocheted baseball cap doesn’t fit snugly around your head, try adjusting the number of stitches in each round.
-If your crocheted baseball cap is lopsided or has other shaping problems, make sure you are following the pattern correctly. If you think you are following the pattern correctly but the shaping is still not working out, try blocking the finished hat to help even out the stitches.
Variations
In this article, we’ll show you how to crochet a Baseball Cap in three different variations. The first variation is crocheting a flat panel and then stitching the sides together. The second variation is crocheting in the round, which creates a seamless cap. The third variation is crocheting a brim first and then crocheting the body of the cap around the brim.
Resources
There are a few things you’ll need before you start crocheting your baseball cap First, you’ll need some yarn. You can use any type of yarn, but sport weight yarn or worsted weight yarn works well for crocheting a baseball cap You’ll also need a crochet hook that is appropriate for the type of yarn you’re using. Generally, a size G or H hook works well for sport weight yarn, and a size I or J hook works well for worsted weight yarn. Finally, you’ll need a tapestry needle to weave in your ends when you’re finished crocheting.
Now that you have your supplies, it’s time to start crocheting! The first thing you’ll need to do is make a slip knot and put it on your crochet hook. Then, chain four stitches. Next, single crochet in the second chain from the hook and in each of the next two chains. Then, triple crochet in the last chain. This completes your first row of stitches.
To complete the next row, chain one stitch and turn your work so that the backside is facing you. Then, single crochet in each stitch across the row until you reach the end. When you reach the end of the row, triple crochet in the last stitch as before. Just keep repeating these two rows until your Baseball Cap reaches the desired length!
Credits
This pattern was created by Sarah Zimmerman of Repeat Crafter Me.
This video tutorial was filmed and edited by Mikey hope you enjoy! If you have any questions please leave them in the comments below.
Special thanks to my mom and grandma for teaching me how to crochet!