How to Break In a New Baseball Glove
Breaking in a baseball glove is a process that can be done a few different ways. It is important to do this correctly so that your glove will last for seasons to come. Find out the best way to break in your baseball glove by reading this blog post.
Why You Need to Break In Your Glove
A baseball glove is an important piece of equipment for any player and it is vital that you take the time to break it in properly before using it in a game. A glove that is not broken in can be stiff and uncomfortable, and it will not perform as well as one that has been properly broken in. In this article, we will show you how to break in a new baseball glove.
The leather will soften and form to your hand
When you first get your glove, the leather will be stiff. You need to break in the leather to make the glove more flexible. The process of breaking in a glove is called “seasoning.”
You can season your glove by working the leather with your hands. It’s helpful to use a softening agent, like glove oil or shaving cream, to help soften the leather. You can also use a baseball or a mallet to help break in the pocket.
Once you’ve broken in the leather, you need to keep your glove conditioned so it doesn’t dry out and become brittle. Glove conditioner will help keep the leather soft and supple.
The webbing will loosen and allow for easier catches
A baseball glove, also known as a fielder’s glove or catcher’s mitt, is a large leather glove worn by baseball players of all ages, professional and amateur, when playing in the field. Specifically, the glove is used to assist players in catching balls hit by the batter. Its design has changed little since the 19th century.
The first player credited with using a baseball glove was Doug Allison, a catcher for the Cincinnati Reds, in 1870. Allison’s glove was simple brown leather and was much too large for his hand. In 1875, Charles Waite – another Reds catcher – designed a smaller gloves with webbing between the thumb and first finger. This style of gloves soon became popular among all players and remained so for decades.
Today, gloves come in all shapes and sizes and are made from a variety of materials. They range from simple training gloves to highly sophisticated defensive gloves used by major league players. No matter what style or material, all gloves have one purpose: to help players catch the ball.
One common question asked by new players is how to break in a new baseball glove. The process is actually quite simple and only requires a few items that are probably already around your house. Here’s what you’ll need:
-A small can of oil (olive oil or WD-40 will work)
-A soft cloth
-An old sock
-A rubber ball (a tennis ball will work in a pinch)
– patience!
Here’s how to do it:
1) Rub a small amount of oil into the leather with your cloth – don’t soak it, just enough to make the surface soft and pliable.
2) Work the oil into all parts of the glove, paying special attention to areas that will see a lot of wear (the palm, for example).
3) Once the entire glove is oiled, put your hand inside and shape it into the form of a fist. This will help mold the leather around your hand for a more comfortable fit.
4) Next, put your ball inside the glove and close it shut. This will help stretch out the webbing between your thumb and first finger. Open and close the glove several times to work the ball around – you should feel the webbing loosen up after a few repetitions.
5) Finally, take your old sock and put it over the ball inside your glove (this helps protect your ball from getting too scuffed up). Close up your glove again and leave it overnight so that the oil can really sink in.
And that’s it! In just one evening you can have a brand new baseball glove that’s ready for action. Just be patient – it takes time (and sometimes multiple treatments) to get that perfect fit and feel, but once you do you’ll be glad you took the time to do it right!
The glove will become more comfortable to wear
A new baseball glove is stiff and needs to be worked in or “broken in” before it feels comfortable to wear. Breaking in a glove gives it flexibility and makes it easier to catch a ball.
There are a few ways that you can break in your new glove:
-Soak the glove in warm water for 30 minutes. This will soften the leather and make it more pliable.
-Wrap the baseball in a towel and tie it inside the glove. This will help the glove retain its shape.
-Work the glove by repeatedly opening and closing it. You can also try bending the glove, working the laces, and stretching out the fingers.
-Put some conditioning oil on the glove and work it into the leather. This will help to break down the fibers and make the leather more supple.
You should start to see results after a few days of working on your glove. Be patient – it can take weeks or even months to get your glove fully broken in. But once you do, you’ll have a comfortable, well-fitting baseball glove that will make playing catch a lot more enjoyable!
How to Break In Your Glove
You’ve just bought a brand new baseball glove and you can’t wait to use it in the game. But before you can use it, you need to break it in first. Here’s how to do it.
Softening the leather
The key to breaking in a new baseball glove is to soften the leather so that it becomes more pliable. This process can take some time, but it’s important to be patient and take your time to ensure that your glove will last for seasons to come.
There are a few different ways that you can soften the leather on your new baseball glove, but one of the most effective methods is to use a leather conditioner. Simply apply a small amount of conditioner to a clean cloth and rub it into the leather in a circular motion.
Another way to break in your glove is to repeatedly flex and bend the leather in different directions. This will help to loosen up the fibers and make the glove more flexible. You can also roll up a balled-up piece of newspaper and insert it into the palm of the glove overnight. This will help stretch out the leather so that it conforms to the shape of your hand.
Whichever method you choose, be sure to allow plenty of time for the leather to absorb the moisture and softening agent before using your glove in a game.
Soak the glove in warm water
To start, find a sink or bucket that you can submerge your glove in. Fill it with warm water until the glove is completely submerged, then let it soak for at least 15 minutes. This will help to soften the leather and make it more flexible.
Once the glove has soaked, take it out of the water and wring out any excess. Then, put the glove on your non-dominant hand and form a fist inside of it. keep your fist clenched for about 30 seconds to help stretch out the leather.
Use a softening agent
A softening agent helps to break down the fibers in the leather, making it more pliable. You can purchase a softening agent made specifically for baseball gloves, or you can use a household item such as petroleum jelly or hand lotion. Apply a generous amount of your chosen softening agent to the entire glove, working it into the leather with your hands. Once the glove is evenly coated, wrap it tightly in a plastic bag and let it sit for 24 to 48 hours.
Massage the glove
Leather, like skin, needs to be conditioned to be at its best. This is done by repeatedlyflexing the leather in different directions, which breaks down the fibers and makes them stronger and more supple. The more you work the leather, the more pliable it will become.
There are a few ways you can do this, but the easiest is to simply massage the glove with your bare hands. Start by cupping the glove in one hand and gently squeezing it, then run your hand over every inch of the leather, working it back and forth. You can also try folded a bath towel over your hand and repeating the process.
Loosening the webbing
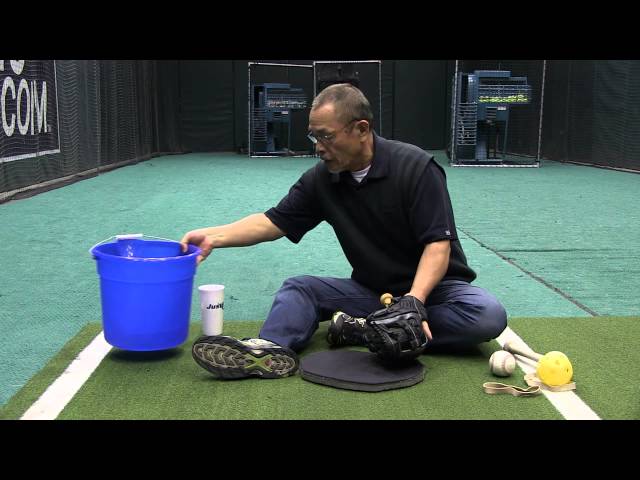
One of the most important parts of breaking in your glove is to loosen the webbing between the thumb and forefinger. You can do this by placing your ball in the pocket and then tying the glove shut with either sturdy string or a shoe lace. Once you’ve tied it shut, work the ball in and out of the pocket 20-30 times. This will help to loosen up the webbing so that you have more give when you’re trying to catch the ball.
Play catch with the glove
Playing catch is the number one way to break in your new baseball glove. All you need is another person to toss the ball back and forth with. Start by standing close to each other, about 10-15 feet apart, and gradually move further apart as you get more comfortable with catching the ball in your new glove. Do this for about 15-20 minutes per day until the glove feels broken in.
Use a ball mallet
Glove mallets are the traditional way to break in a new baseball glove, and they’re still one of the best. If you don’t have a ball mallet, you can use a regular hammer, but be very careful not to damage the leather.
To break in your glove with a ball mallet:
1.Start by placing your glove under the edge of a table or other solid surface.
2.Holding the mallet in one hand, use your other hand to stretch out the leather as much as possible.
3.Hit the center of the glove with the ball end of the mallet, using moderate force. Focus on one area at a time, and avoid hitting any metal parts of the glove.
4.Repeat this process until the leather is soft and pliable.
Maintaining Your Glove
A baseball glove, which is also sometimes called a mitt, is a large leather glove that baseball players wear on their non-throwing hand while they are playing in the field. In order to play effectively, it is important to have a well-maintained glove. A glove that is not properly broken in can be stiff and uncomfortable, and it may not provide the player with the best possible grip on the ball. In this article, we will provide some tips on how to break in a new baseball glove.
Store your glove in a cool, dry place
You’ve just gotten a new baseball glove. Now it’s time to break it in so you can use it in your next game. Here are some tips on how to do just that:
– Store your glove in a cool, dry place. This will help prevent the leather from drying out and cracking.
– Avoid putting your glove in direct sunlight or near heat sources.
– When you’re not using your glove, stuff it with paper or a ball so it keeps its shape.
– Don’t store your glove in a plastic bag, as this can cause the leather to mildew.
Now that you know how to take care of your glove, it’s time to start breaking it in. Here are some tips:
– Start by gently massaging the leather with your hands. This will help soften it up.
– Once the leather is soft, begin molding it into the shape you want. You can do this by wrapping it around a baseball or by placing something heavy inside the glove and letting it sit overnight.
– After the glove is molded into shape, begin working the leather with a soft cloth. This will help loosen up any remaining stiffness.
– Finally, use a conditioner specifically made for baseball gloves to help keep the leather soft and supple.
Condition the leather regularly
To keep your baseball glove in good condition, you should conditioned the leather on a regular basis. You can use a commercial leather conditioner, or make your own with equal parts white vinegar and water. Apply the conditioner with a clean cloth, working it into the leather in a circular motion. Be sure to condition the inside of the glove as well as the outside.