How To Build A Tennis Wall For Your Home Court
Contents
Looking to build a tennis wall for your home court? Check out this blog post for everything you need to know, from material considerations to construction tips.
Introduction
A tennis court is a rectangular playing surface with a high net stretched across the center. It is used for the sport of tennis. The dimensions of a regulation tennis court are 78 feet (23.77 meters) long by 27 feet (8.2 meters) wide for singles matches, or 84 feet (25.6 meters) long by 36 feet (10.97 meters) wide for doubles matches. The service line, which is 21 feet (6.4 meters) from the net, divides the court in half horizontally.
Materials Needed
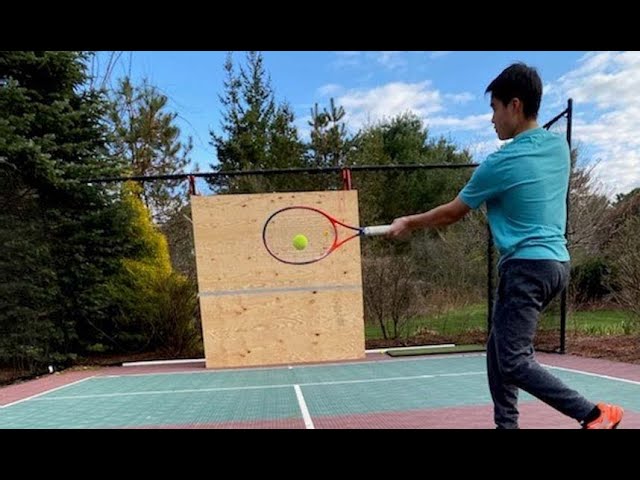
Building a tennis wall for your home court is a great way to improve your game. The extra height and rebound will challenge you to hit the ball harder and improve your accuracy. A tennis wall can also serve as a backstop for other court games such as badminton, volleyball, or Pickleball.
To build a tennis wall, you will need the following materials:
-4×8 sheet of plywood
-Construction adhesive
-Cement board screws
-Stucco wire
-Mesh tape
-Quick-setting concrete mix
-Trowel
-Water hose
-Concrete stamps
-(Optional) Paint or sealer
Step One: Planning The Layout
When you’re planning the layout of your tennis wall, you need to consider two things: where the wall will be located and how big it needs to be. The size of the wall will be determined by the size of your home court. If you’re not sure how big your home court is, you can use a tape measure to find out. Once you know the dimensions of your court, you can decide how big you want your tennis wall to be.
The location of the tennis wall is also important. You need to make sure that the wall will be located in a spot that won’t interfere with game play. For example, if you have a swimming pool in your backyard, you probably don’t want to put the tennis wall too close to the pool. You also need to make sure that thewall won’t block any important features of your home court, such as a net or a backboard.
Once you’ve decided on the location and size of your tennis wall, you’re ready to move on to step two: gathering materials.
Step Two: Pouring The Concrete
After the holes are dug and the framing is in place, it’s time to pour the concrete. Begin by mixing the concrete in a wheelbarrow or other large container, following the directions on the package. Once it is mixed, use a shovel to transfer it into the holes, filling them to just below the top of the frame. Tamp down the concrete with a trowel or your hand to remove any air pockets.
Step Three: Adding The Rebar
After the holes are all drilled, it’s time to add the rebar. This part is critical, as the rebar will reinforce the entire wall and make sure it can withstand weather and heavy hitting.
Start by tying one end of a piece of rebar to the first dowel. Then, thread the rebar through each successive hole until you reach the other end of the wall. Tie off the rebar to the last dowel, and then cut off any excess rebar with a hacksaw.
Step Four: Adding The Foam Board
Now that the frame is complete, it’s time to add the foam board. This will provide a barrier between the outside elements and the plywood, and will also help to insulate the wall.
Start by cutting the foam board to size using a sharp knife or a power saw. Make sure that the pieces fit snugly against each other, with no gaps in between. Once all of the pieces are cut, glue them together using a polyurethane adhesive or construction adhesive.
Next, using a screw gun or power drill, screw the foam board into the frame. Make sure that the screws are long enough to penetrate through the foam and into the plywood beneath. Space them about eight inches apart for best results.
Step Five: Adding The Masonry Block
Now that the footing is in place, you can begin to lay the block for your tennis wall. You will need to use a mortar mix to adhere the blocks together. Start by laying a course of block along the perimeter of your footing. Then, continue layering courses of block until you reach the desired height of your wall. Be sure to stagger the joints between each course of block as you build up. This will help to strengthen your wall and prevent it from cracking.
Step Six: Adding The Tennis Net
Installing a tennis net is one of the final steps in constructing your home tennis court. The type of net you choose will be determined by the type of court you are constructing, as well as your budget. There are three main types of nets:
Nylon nets are the most popular choice for home courts because they are durable and inexpensive. Nylon nets also come in a variety of colors, so you can choose one that compliments the color scheme of your court.
Polypropylene nets are another popular choice for home courts. They are more expensive than nylon nets, but they are also more durable and have a longer lifespan. Polypropylene nets also tend to be more UV resistant, so they will not fade as quickly in direct sunlight.
Kevlar nets are the most expensive option, but they are also the most durable. Kevlar is a synthetic fiber that is used in bulletproof vests, so it can withstand a lot of wear and tear. If you plan on playing a lot of tennis on your home court, Kevlar may be the best option for you.
Conclusion
We hope you enjoyed this guide on how to build a tennis wall for your home court. A tennis wall is a great addition to any court and can really help improve your game. If you have any questions or comments, please feel free to contact us.