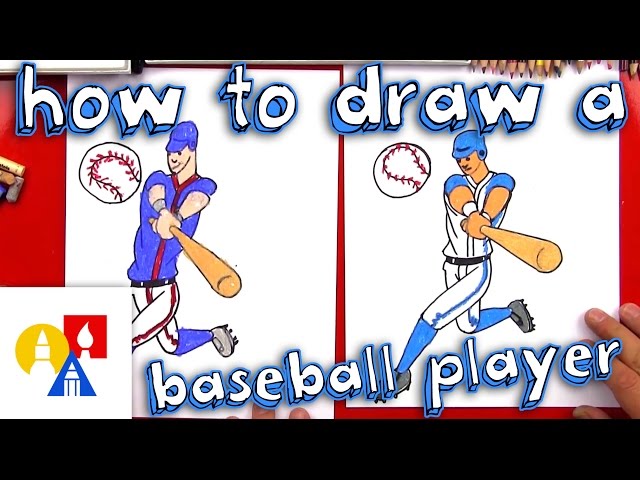
How to Draw a Baseball Player
Contents
- Sketch the basic outline of the baseball player.
- Draw the baseball player’s head.
- Draw the baseball player’s body.
- Draw the baseball player’s arms.
- Draw the baseball player’s legs.
- Draw the baseball player’s baseball bat.
- Draw the baseball player’s baseball glove.
- Draw the baseball player’s baseball cap.
- Add any final details to the baseball player.
How to Draw a Baseball Player- Learn how to draw a baseball player with this step-by-step tutorial.

Sketch the basic outline of the baseball player.
Start by sketching a circle for the head and an oval for the body. Then, sketch two lines for the arms and two more for the legs. Add a small circle for each hand and foot. Finally, sketch a baseball bat and a ball. Erase any extra lines.
Draw the baseball player’s head.
After you finish the head, start working on the body. First, draw a vertical line down the center of the figure. This will help you keep the proportions of the body in check. Then, draw two diagonal lines for the shoulders, and two more for the hips. These will be guidelines for drawing the arms and legs later on.
Draw the baseball player’s body.
Start by drawing a circle for the baseball player’s head. Add two crossed lines inside the circle for the nose and mouth. Then, draw the neck and shoulders. Next, add the arms and torso. Finally, draw the legs and feet.
Draw the baseball player’s arms.
This will be the most difficult part of the drawing, so take your time. The player’s arms should be in a such a position that it looks like he’s holding a baseball bat. First, draw two lines coming down from the shoulders. These will be the player’s arms. Next, draw two more lines coming off of these, one for each hand. At the end of each of these lines, draw a small circle for the player’s hands. Finally, connect these circles to the body with a few curved lines.
Draw the baseball player’s legs.
To draw the legs, start by drawing two curved lines for the thighs. Then, add two straight lines for the shins. Next, draw two more curved lines for the feet. Finally, add two small oval shapes for the shoes.
Draw the baseball player’s baseball bat.
Start by drawing a rectangle that is narrower at one end. This will be the baseball bat. Then, draw a circle where the bat meets the narrowed end. This will be the baseball.
Draw the baseball player’s baseball glove.
Before drawing the baseball player, it is necessary to first draw his baseball glove. To do this, start by drawing a rectangle that is slightly wider than it is tall. This will be the basic shape of the glove. Next, add two curved lines coming down from the top corners of the rectangle. These lines will form the sides of the glove. Finally, add a third line across the bottom of the rectangle to complete the glove.
Draw the baseball player’s baseball cap.
Use a pencil to lightly sketch a curved line across the top of the head. This will be the brim of the baseball cap. Then, extend two curved lines downwards from either side of the head, meeting at a point near the center of the face. These lines will form the sides of the baseball cap. Finally, draw a curved line along the bottom edge of the brim.
Add any final details to the baseball player.
Now that you have the basic outline of the baseball player, it’s time to add some final details. Start by drawing two lines coming down from the head to create the neck. Then, draw two small dots for the eyes and a curved line for the mouth. Next, draw a horizontal line across the chest to divide it into two equal halves. Finally, add some lines to the arms and legs to give them more dimension and volume. erase any remaining guidelines and you’re finished!