How To Draw A Tennis Ball Step By Step?
Looking to add a bit of sports-themed flair to your artworks? In this blog post, we’ll show you how to draw a tennis ball step by step! Whether you’re a beginner or a seasoned artist, this easy tutorial will help you create a realistic tennis ball in no time.
Introduction
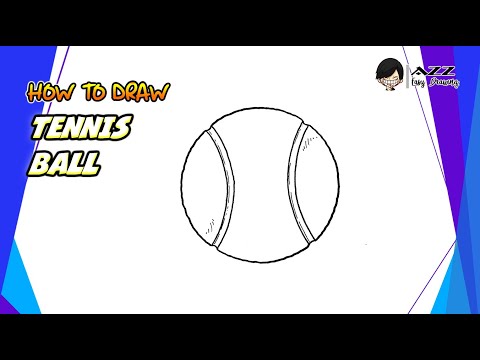
In this quick tutorial you’ll learn how to draw a Tennis Ball in 6 easy steps – great for kids and novice artists.
The images above represents how your finished drawing is going to look and the steps involved.
Below are the individual steps – you can click on each one for a High Resolution printable PDF version.
##Heading:Step By Step Guide
##Expansion:
Step 1: Start off by drawing a perfect circle using a light pencil so it’s easy to erase later on
Step 2: To get the proportion of the tennis ball right, start by drawing a horizontal line through the center of your circle
Step 3: Next, add two vertical lines intersecting at the center line to give you four equal sections
Step 4: Draw two more horizontal lines, one at the top and one at the bottom of your circle
Step 5: To finish off your tennis ball, add vertical lines that connect all of the horizontal lines
There you have it! You have now drawn a Tennis Ball 🙂
Step 1
To start, you will need a white sheet of paper, a pencil, and a black Sharpie.
Start by drawing a small circle near the top of the paper. This will be the top of the tennis ball.
Next, draw a larger circle around the first one. This second circle should be about twice the size of the first one.
Now draw a third circle that is about the same size as the second one. This will be the bottom of the tennis ball.
Finally, use the black Sharpie to draw a horizontal line across the middle of the ball. This line will help give the ball its round shape.
Step 2
Now that you have the basic shape of the ball down, start to draw the lines that will give it dimension. For a tennis ball, these lines will be horizontal and vertical. Start with a light pencil so you can easily erase as needed. Slowly darken the lines as you get them in the right place. If you need to, use a ruler or other straight edge to help keep your lines straight.
Step 3
Now it’s time to add the final details to your tennis ball. Start by adding some lines within the shape of the ball to give it some dimension and detail. Also add a few small bumps on the surface of the ball. Finally, erase any stray lines and you’re done!
Step 4
dark color, this roast has some oil on the surface and with a slight bittersweet aftertaste.
-Full City
Step 5
Now it’s time to add the finishing touches to your tennis ball. Start by drawing a curved line across the top of the ball. Then, draw two smaller curved lines inside the first one. Next, draw a series of short, curved lines around the middle of the ball. Finally, draw a curved line around the bottom of the ball. When you’re finished, your drawing should look like this:
Conclusion
Now that you know how to draw a tennis ball, you can add it to any drawing of a sporting event or equipment. You can also use this ball in a drawing of a character playing tennis.