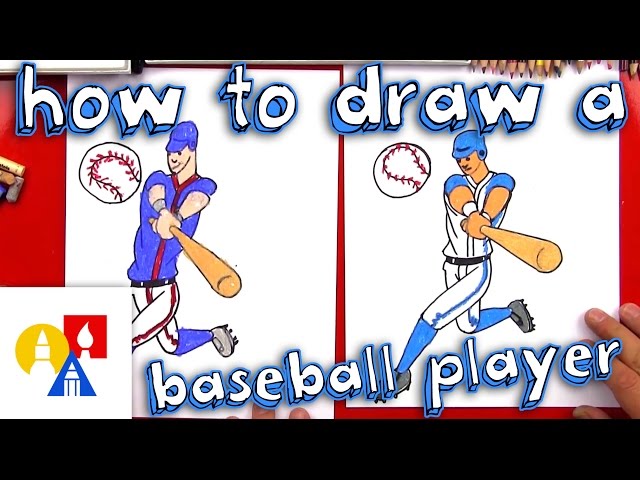
How To Draw a Baseball Player
Contents
Looking to improve your baseball drawings? Check out this tutorial on how to draw a baseball player. With just a few simple steps, you’ll be on your way to creating realistic and professional-looking drawings.

Sketch the basic outline of a baseball player.
Start by drawing a circle for the baseball player’s head. Then, sketch a rectangle for the body and two smaller rectangles for the legs. Next, add two ovals for the arms and two more smaller circles for the hands. Finally, draw a diamond shape for the baseball diamond. To finish your drawing, add detailing to the baseball player’s uniform and face.
Draw the player’s head and hat.
Start by drawing the player’s head. Using a pencil, start with a small oval. This will be the top of the baseball player’s head. From the oval, draw a line down to create the neck. At the bottom of the neck, draw another oval that is twice as big as the first oval. This will be the baseball player’s body.
Next, draw the player’s hat. Start by drawing a half-circle above the head. This will be the brim of the hat. From the half-circle, draw two lines down to create the sides of the hat. At the bottom of each side, draw a small oval to create the buttons on the hat. Finally, draw a line across the top of the hat to finish it off.
Draw the player’s body.
To draw a baseball player, start by drawing a rectangle for the player’s body. Make the rectangle taller than it is wide, and add two small circles at the top for the shoulders. Then, draw a slightly smaller rectangle beneath the first one for the player’s torso. Add two small circles at the bottom of this rectangle for the hips, and connect them with curved lines. Finally, draw 2 lines coming down from the shoulders and 2 lines coming down from the hips to form the arms and legs.
Draw the player’s arms and legs.
Next, draw the player’s arms and legs. For the arms, start with two small lines extending from the sides of the body. Then, add two rectangles for the hands. For the legs, start with two slightly curved lines extending from the bottom of the body. Add two small rectangles at the end of each leg for the feet.
Draw the player’s gloves.
One of the most defining characteristics of a baseball player is their glove. So, it’s important to get this detail right when you’re drawing a baseball player.
First, draw a rectangle for the glove. This doesn’t have to be perfect, as it will be shaped by the fingers later on. Then, add four circles inside the rectangle for the fingers. two smaller circles at the top for the thumb and index finger, and two larger circles at the bottom for the middle and ring fingers.
Finally, add some lines inside the glove to give it more detail. These lines don’t have to be perfect, as they will be covered by the stitches of the baseball later on.
Draw the player’s shoes.
Start by drawing the player’s shoes. Make two small oval shapes for the soles of the shoes and two large oval shapes for the uppers. Connect the ovals with a curved line to complete the player’s shoes.
Draw the player’s bat.
Next, give your player a bat. If you want to get really creative, you can draw a unique bat for your player. For example, you could make the bat curved or have spikes coming off of it. Make the bat whatever color you want. You can even add handles to the bat if you want.
Draw the player’s baseball.
Use a light pencil to sketch a circle in the middle of the paper. This will be the baseball. Make sure the circle is light so you can erase it later if necessary.
Next, begin to sketch out the player’s baseball uniform. Start with the top half by drawing a line down from the neck to create the shoulder seams. Then, add lines for the sleeves and the seams that run down the sides of the shirt.
For the bottom half of the uniform, start by drawing a line across the waist. Then, add lines for the legs and seams that run down the sides of the pants.
Finally, add details like buttons, laces, and stripes. Erase any pencil marks that are showing through from underneath.