How to Draw a Basketball Net
Contents
Looking to add some extra flair to your home court? Drawing a basketball net is a simple way to do just that! Check out our step-by-step guide below to see how it’s done.
What You’ll Need
-A basketball
-A sheet of paper
-A pencil
-A ruler
-Scissors
-Tape
First, draw a large circle on the sheet of paper. This will be the backboard of the basketball net Next, use the ruler to draw a horizontal line through the center of the circle. This will be the top of the backboard. Then, use the ruler to draw a vertical line through the center of the circle. This will be the support pole for the basketball net
Next, cut out a small rectangular shape from one side of the paper. This will be the opening for the basketball net Then, tape the paper to the backboard of the basketball so that the net hangs down in front. Finally, cut out a small circular shape from an unused piece of paper. This will be the ball for your basketball net drawing!
Step One: Sketching the Net
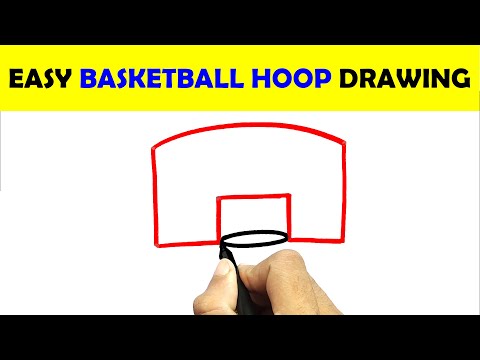
The first thing you will need to do is sketch out the basic shape of the net. You can use a pencil or pen for this. Start by drawing a rectangle near the top of your paper. This will be the top of the net. Then, draw two diagonal lines coming down from the corners of the rectangle. These lines should meet in the middle of the rectangle. Finally, add a horizontal line across the middle of the rectangle. This will be the bottom of the net.
Step Two: Outlining the Net
Now that you have the basic shape of the basketball net it’s time to start adding some detail. Use a dark pen or pencil to lightly draw two horizontal lines across the center of the net. These will be the guidelines for the thickness of the net itself. Then, starting at the top of the net, begin drawing vertical lines that connect the horizontal lines. Space these out evenly, and make sure that they get gradually closer together as they reach the bottom of the net. Finally, add a few small horizontal lines across the bottom of the net to indicate where it is attached to the backboard. Erase any remaining guidelines and your basketball net is complete!
Step Three: Adding the Strings
In order to add the strings, you will need a pen and a Ruler. Draw two straight, parallel lines coming down from the top corners of the square. These will be thestrings. Make sure that the lines are far enough apart so that the basketball will be able to fit through them. Once you have drawn the strings, use the Ruler to draw a line across the top and bottom of each string. This will be used as a guide for drawing the rest of the net.
Step Four: Filling in the Net
Now that the basic framework of the net is complete, it’s time to start filling it in. Use a pen or pencil to darken the lines of the net, making them as even as possible. Once you’re happy with the look of the net, go over it with a thin marker to make the lines really stand out.
Step Five: Finishing Touches
Now that your Basketball Net is mostly drawn out, it’s time for the finishing touches. In this step, you will add the final details to make your drawing look realistic.
To start, finish drawing the rim of the net. Remember to make the lines curve inwards so that the ball can go through easily. Next, add some texture to the net by drawing horizontal and vertical lines. Finally, erasing any unwanted lines and adding any other final details.
Basketball Net Drawing Tips
Are you an aspiring artist looking to learn how to draw a basketball net? Whether you want to add a personal touch to your home court or you’re simply a fan of the game, this guide will show you everything you need to know.
Basketball nets come in all shapes and sizes, but they all share one common trait – they’re all symmetrical. This means that if you can draw one half of the net, you can easily mirror your drawing to complete the other half.
When drawing a basketball net start by sketching out two parallel lines for the top and bottom of the net. Next, add four vertical lines evenly spaced apart for the sides of the net. From there, add in the horizontal lines that connect each side of the net. Finally, erase any remaining pencil lines and color in your drawing.
With these tips in mind, grab a pencil and paper and give it a try!
More Basketball Net Drawing Tips
In order to make your drawing of a basketball net look more realistic, you can start by adding some shading. To do this, start by drawing a few very light lines to indicate where the different parts of the net will be. Next, start adding some darker lines to give the drawing more definition. Finally, use a black pen or marker to add even more darkness to the drawing, making sure to vary the thickness of the lines.
even More Basketball Net Drawing Tips
Here are some even more tips to help you draw a basketball net. When drawing the net, make sure that the lines are smooth and even. Also, be sure to use light pressure so that the lines do not become too thick.
-Start by drawing two parallel lines for the top and bottom of the net.
-Then, draw a line across the middle of the net.
-Next, draw diagonal lines from the top corners of the net to the bottom middle line.
-Finally, add vertical lines from the bottom corners of the net to the top middle line.
You’re Done!
Now that you know how to draw a basic basketball net, you can try adding your own personal touches. For example, you could make the net taller or shorter, thicker or thinner, add more or fewer strands, etc. Get creative and have fun!