How to Draw a Tennis Ball
Contents
Need some help drawing a tennis ball? This blog post provides a step-by-step guide on how to draw a tennis ball, complete with pictures!
Introduction
In this tutorial, you will learn how to draw a tennis ball. This is a fairly easy shape to draw, and it can be helpful to practice drawing different types of balls. With a little bit of practice, you should be able to draw a tennis ball that looks realistic.
What You Will Need
-Paper
-Pencil
-Eraser
-Ruler or a compass
-Black marker or pen
Step 1: Draw a Circle
Start by drawing a small circle in the center of your paper. This will be the core of the tennis ball.
Step 2: Draw the Outline of the Ball
Use a pencil and a ruler or a compass to draw an outline around the circle. The outline should be fairly thin, about 1/4 inch (6 mm) wide.
Step 3: Draw the Lines for the Ball’s Textured Surface
Draw lines crisscrossing each other on the surface of the ball. These lines will give the ball its textured appearance. Make sure to leave some gaps between the lines so that the ball doesn’t look too busy.
Step 4: Erase any Extra Lines
Use an eraser to get rid of any extra lines that you don’t need. You should now have a neat drawing of a tennis ball.
Step 5: Trace over your Drawing with a Black Pen or Marker
Finally, trace over your drawing with a black pen or marker to make it look more defined and professional. You can also color in the tennis ball if you want to add some extra realism.
Step One: Sketch the Ball
The first thing you need to do when learning how to draw a tennis ball is sketch out the ball’s basic shape. Start by drawing a small circle in the center of your paper. Then, draw a slightly bigger circle around it. Make sure that the two circles are not perfectly even – the top circle should be a little bit bigger than the bottom one.
Step Two: Add the Details
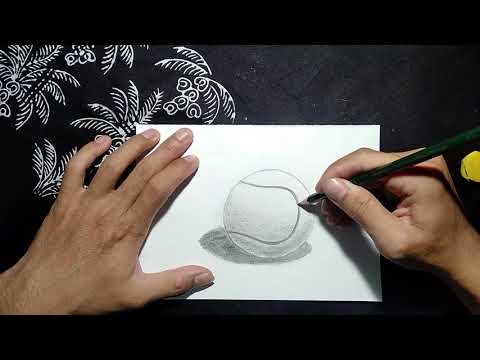
Now that you have the basic shape of the tennis ball, it’s time to add some details. Start by drawing a small circle in the center of the ball for the seam. Then, draw a series of curved lines around the edge of the ball to give it some texture. Finally, add some shading to give the ball some depth.
Step Three: Finish the Drawing
To finish the drawing, add some shading to give the tennis ball a three-dimensional look. Start by darkening the left side of the ball, using a value that’s a few shades darker than the lightest areas. Then, use a medium-dark value to fill in the right side of the ball. For the darkest areas, use a very dark value along the bottom edge of the ball. Add some highlight details to give the ball a rounder shape. Finally, erase any unwanted lines from your drawing.