How To Frame A Baseball Jersey?
Contents
Looking to add a personal touch to your baseball jersey? Check out this guide on how to frame a baseball jersey for display.
Introduction
A baseball jersey is more than just a shirt with a player’s name and number on it. It is a tribute to a player, team, or even a city. Framing a baseball jersey is a way to show off your fandom and keep the shirt in good condition for years to come. There are several ways to frame a baseball jersey, but the most important thing is to use archival materials that will not damage the shirt. With the right supplies and some careful planning, you can create a beautiful display that will be the envy of all your friends.
Tools You Need
– jersey
-tape measure
-scissors
-straight pins
-needle and thread
-iron and ironing board
-foam board
-poster board
-glue
-picture hangers
-hammer
Step One: Choose Your Jersey
The first step in learning how to frame a baseball jersey is of course choosing the jersey you want to frame. If you are an avid collector, you may already have a few jerseys in mind. If not, you may want to visit your local sports memorabilia store or do some online shopping to find the perfect jersey for your collection. Once you have chosen your jersey, it is time to move on to step two.
Step Two: Choose Your Frame
Now that you have chosen your jersey, it is time to choose a frame. There are many different ways that you can frame a baseball jersey, but not all of them will be right for every situation. You will need to take into account the size of the jersey, the type of material it is made from, and the overall style of the piece before you can choose the right frame.
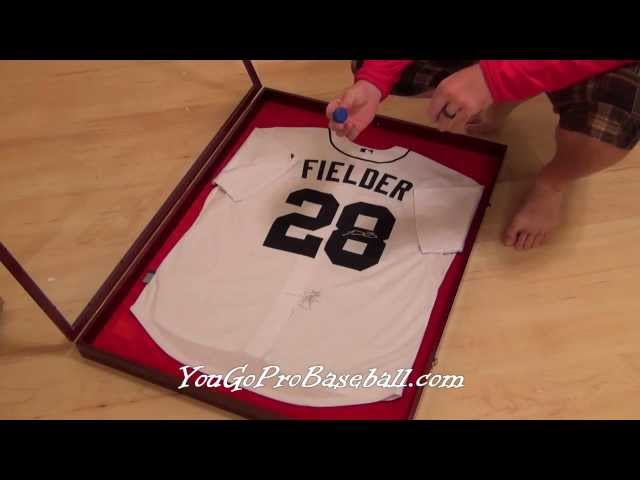
One popular way to frame a baseball jersey is using a shadow box. A shadow box is a deep frame that allows you to place your jersey inside without having to worry about it being damaged by the glass. This is a great option if you want to be able to see both the front and back of the Jersey, but it can be more expensive than other framing options.
Another option for framing your baseball jersey is using matting. Matting allows you to select a color or pattern that will compliment your Jersey and help it stand out when displayed. You can find pre-cut matting at most craft stores, or you can have it cut custom to fit your frame and Jersey.
The last option we will discuss for framing your baseball Jersey is using Plexiglas. Plexiglas is a clear plastic that can be used in place of glass in your frame. This option is great if you are concerned about the Jersey being damaged by glass, but it can also be more expensive than traditional framing methods.
Now that you know how to choose your materials, it’s time to move on to step three and start putting together your framed baseball Jersey display!
Step Two: Choose Your Frame
Once you have your baseball jersey, it’s time to decide on a frame. You’ll want to consider the size of the frame, the material and the style.
The size of the frame should be large enough to accommodate the jersey, but not so large that it overpowers the piece. A good rule of thumb is to add 3-5 inches to each side of the jersey. For example, if your jersey is 20×30 inches, you’ll want to look for a frame that is at least 26×36 inches.
The material of the frame is also important. You’ll want to choose a material that is durable and will not warp or discolor over time. Wood frames are a good option, but you can also find metal and plastic frames that will work well.
Finally, you’ll want to choose a style that compliments the jersey. A simple black or white frame will allow the jersey to take center stage, while a more ornateframe can add a touch of elegance.
Step Three: Assemble Your Frame
Now that you have your mat and your backing, it’s time to assemble your frame. If you are using a pre-made frame, skip to Step Four.
If you are making your own frame, start by measuring the jersey. You will need to add two inches to the height and width to account for the matting. For example, if your jersey is 18” x 24”, you will need a 20” x 26” frame.
Once you have your dimensions, cut your frame pieces to size. If you are using plywood or another hardwood, you will need to use a saw to cut the pieces to size. If you are using a softer wood, like pine, you can use a handsaw or power saw. Once all of your pieces are cut, use wood glue and clamps to attach the corners of the frame together. Allow the glue to dry for at least 24 hours before moving on to the next step.
Step Four: Hang Your Frame
Now that your frame is complete, it’s time to hang your baseball jersey display. Wall mounted frames come with hanging hardware already installed. If you are using a tabletop frame, you will need to purchase hardware separately.
Before you hang your frame, find the studs in your wall using a stud finder. Once you have located the studs, mark their location with a pencil. This will ensure that your frame is secure and will not fall off the wall.
Next, use a level to make sure your frame is straight. Once you have verified that the frame is level, use a drill to secure the hanging hardware to the wall.
Finally, hang your baseball jersey display on the wall and enjoy!
Conclusion
To conclude, if you want to frame a baseball jersey, you will need to purchase a frame that is big enough to fit the jersey. You will also need to purchase some plexiglass or glass to protect the surface of the jersey. And finally, you will need to use some acid-free tape or pins to secure the jersey to the backing.