How to Gift Wrap a Baseball Bat
This step by step guide will show you how to gift wrap a baseball bat like a pro! Whether you’re looking for a birthday present or a Christmas gift, this guide will come in handy.

Materials
You will need the following materials:
You will need a baseball bat, wrapping paper, scissors, tape, and a ribbon or string.
##
To get started, you will need a baseball bat, wrapping paper, scissors, tape, and a ribbon or string. You can find all of these materials at your local craft store or online.
Start by covering the baseball bat with wrapping paper. cut the paper to size and then use tape to secure it in place. Once the bat is covered, you can decorate it with a ribbon or string. Tie the ribbon around the bat in a bow or make a pattern with the string. You can also add other embellishments like stickers or bows.
Your wrapped baseball bat is now ready to be gifted!
Step One
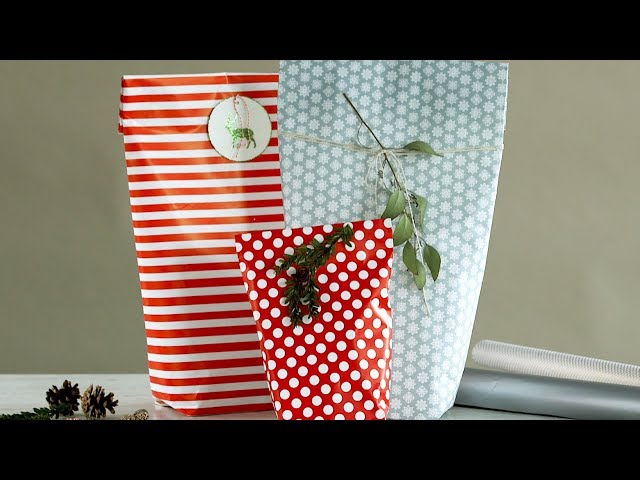
Start with the baseball bat pointing up. If you are wrapping the bat for someone special, find out if they have a favorite team. If they do, try to find wrapping paper with the team colors or logo on it.If you can’t find team-themed paper, choose a solid color that the recipient will like. Wrapping paper with a fun pattern can also work well.
Cut a piece of wrapping paper that is long enough to wrap around the bat one and a half times with a little bit of extra.
Cut a piece of wrapping paper that is long enough to wrap around the bat one and a half times with a little bit of extra. Place the center of the paper on the bat, making sure that there is an even amount of paper on each side. Wrap the paper around the bat, making sure to smooth out any wrinkles or air bubbles. Once you reach the end of the paper, cut off any excess and secure the end with tape.
Step Two
Once you have chosen the perfect baseball bat, it is time to think about how to gift wrap it. You want to make sure that the receiver of the bat will be able to use it, so take into account the size and weight of the bat. You also want to make sure that the bat is securely wrapped so that it does not break during shipping or transit. In this section, we will cover how to gift wrap a baseball bat so that it arrives safely and in one piece.
Lay the wrapping paper down on a flat surface. Place the bat in the center of the paper.
If you are using a normal size sheet of wrapping paper, you will need to measure and cut the paper to fit the length of the bat. Measure the circumference of the bat and add about 6 inches to allow for overlap. Cut the paper to this length. Lay the wrapping paper down on a flat surface. Place the bat in the center of the paper.
Fold one side of the paper over the bat.
Use your fingers to crease the paper along the edge of the bat. Then, use your hands to smooth out the crease so that it’s nice and sharp. Next, take the other side of the paper and fold it over the bat so that the entire bat is now wrapped in paper.
Take the other side and fold it over the first side, making sure that the bat is completely covered.
Now that the bat is covered on one side, take the other side of the paper and fold it over the first side. Make sure that the entire bat is covered and that there are no gaps. You may need to adjust the paper a bit to make sure that it is lying flat.
Step Three
After you have chosen the paper and cut it to size, it is time to start gift wrapping the baseball bat. You will want to start by folding one end of the paper over the top of the bat. Once you have the paper in place, start taping it down. You can use clear tape or festive patterned tape. After the end is secure, start wrapping the paper around the bat.
Tape the two sides of the paper together.
Tape the two sides of the paper together, making sure the paper is smooth and wrinkle-free.
Step Four
This is the final step in gift wrapping a baseball bat. You will need to take the batting helmet and place it on top of the bat. Make sure that the helmet is facing the right way so that the person receiving the gift will be able to see the team logo. Once the helmet is in place, you can now place the bat in the box.
Cut a piece of ribbon or string that is long enough to go around the bat once with a little bit of extra.
Cut a piece of ribbon or string that is long enough to go around the bat once with a little bit of extra. You can always trim the excess later. Place the ribbon or string near the top of the bat and start wrapping it around, making sure to keep it tight against the bat. Continue wrapping until you reach the bottom. If you have excess ribbon or string, you can trim it now or wait until after you’ve tied a bow.
Step Five
It’s important to find the center of the batting grip before you start wrapping. This will be the thinnest part of the bat. If you don’t have a bat with a built-in knob, you can find the center by measuring from the end of the bat. Once you’ve found the center, hold the bat horizontally in front of you.
Tie the ribbon or string around the bat.
Wrapping a baseball bat is not as difficult as it may seem. With a few simple supplies, you can gift wrap a baseball bat in no time.
What You’ll Need:
-Ribbon or string
-Scissors
-Tape
-Baseball bat
Instructions:
1.Start by tying the ribbon or string around the bat. If you are using ribbon, make sure to leave enough slack so that you can make a bow later on. If you are using string, you can either tie it in a bow or make a simple knot.
2.Next, use the scissors to cut off any excess ribbon or string. Make sure that there is enough left so that it can be easily tied or untied.
3.Now, use the tape to secure the end of the ribbon or string to the bat. You can either use clear tape or matching tape depending on your preference.
4.That’s it! Your baseball bat is now ready to be gifted!
Step Six
Assuming you have already followed the first five steps, your baseball bat should now be wrapped in green tissue paper and secured with green ribbon. You can now add the final touches to your gift by adding a card or tag.
Hang the bat up on the wall or door.
Now take the other end of the ribbon and make a loop around the top of the bat. You want to make sure that this loop is big enough to be able to hang the bat on a nail or hook. Once you have made the loop, tie it off with a knot.