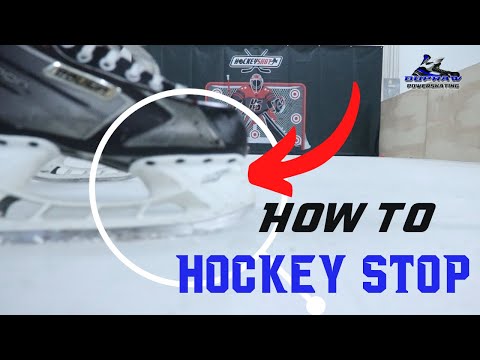
How to Hockey Stop: The Ultimate Guide
Contents
Want to know how to do a hockey stop? This guide will teach you everything you need to know about hockey stops, from the basic to the more advanced.
What is a hockey stop?
A hockey stop is a maneuver used in Ice Hockey to abruptly change the direction of travel of the puck carrier It is executed by dragging the skate blade perpendicular to the direction of travel, causing the skater to reverse direction.
This move is often used when the puck carrier is being pursued by an opponent and needs to quickly change directions to avoid being caught. It can also be used to slow down or stop completely when necessary. The hockey stop can be executed on either foot, but it is usually done on the strong foot (the one that points in the direction you are skating) for maximum efficiency.
To execute a proper hockey stop, the skater must first bend the knees and lower the center of gravity. This will give more control over the body and make it easier to change directions. Next, the skate blade is placed perpendicular to the direction of travel and dragged along the ice. The weight should be shifted onto the stopping foot while maintaining balance with the other foot.
As the skate blade slows down, its friction will create a braking effect that will help stop the skater completely. It is important to keep moving your feet during this process and not dig your toe picks into the ice, as this can cause you to lose balance and fall. Finally, once you have come to a complete stop, you can transition into another move or simply stay stationary.
The hockey stop can be a difficult maneuver to master, but it is an essential skill for any ice hockey player who wants to be able to play at a high level. With practice, you will be able to execute it with ease and use it in game situations effectively!
The Benefits of a Hockey Stop
There are many benefits to using a hockey stop, including the ability to change directions quickly slow down quickly, and maintain control while skating. Hockey stops can also be used to avoid obstacles or other players on the ice.
The Different Types of Hockey Stops
There are three different types of hockey stops: the classic, V-stop, and crossover. Each type of stop has its own benefits and drawbacks, so it’s important to know which one to use in different situations.
The classic stop is the most common type of stop and is best for beginners. To do a classic stop, start by skating forward at a moderate speed. Then, bend your knees and lean your weight onto your inside edges. As you lean into the turn, drag your outside foot behind your body and use it to help you stop. Finally, push off with your inside foot to return to skating forward.
The V-stop is a more advanced version of the classic stop. To do a V-stop, start by skating forward at a moderate speed. As you reach the point where you want to stop, bend your knees and lean your weight onto your inside edges. Then, quickly drag both feet behind your body so that they form a V shape. The V shape will help you slow down and turn more sharply. Finally, push off with your inside foot to return to skating forward.
The crossover is the most advanced type of hockey stop and is best for experienced skaters who need to make quick turns. To do a crossover stop, start by skating forward at a moderate speed. As you reach the point where you want to turn, quickly cross one foot in front of the other and lean your weight onto your inside edges. This will help you turn more sharply while still maintaining control. Finally, push off with your outside foot to return to skating forward
How to Do a Basic Hockey Stop
Hockey stopping is one of the most important skating skills a hockey player can learn, and yet it’s often one of the most misunderstood. There are two key components to a hockey stop: weight transfer and edging. In this article, we’ll break down each component and show you how to put them together for a smooth, powerful stop.
Weight Transfer
The first step to stopping is transferring your weight from your blades to your ankles. This may seem counterintuitive – after all, isn’t it your blades that grip the ice and slow you down? – but it’s actually your ankles that give you the most control over your skates. Here’s how to do it:
Start by skating at half speed. As you approach your stopping point, begin shifting your weight back onto your heels. You should feel your skates begin to dig into the ice – this is good! Keep shifting until all of your weight is on your heels and you’re in a deep squat position.
Edging
Once you’ve transferred your weight, it’s time to start using your edges to slow down. Just like with weight transfer, this may seem counterintuitive – why use your edges when they’re what allows you to turn? – but trust us, it works. Here’s how:
As you shift your weight back, start turning both skates so that the inside edges are facing the direction you want to go. For a right turn, this would mean turning both skates clockwise so that the right skate is pointing to 3 o’clock and the left skate is pointing to 9 o’clock. For a left turn, do the opposite: turn both skates counterclockwise so that the right skate is pointing to 9 o’clock and the left skate is pointing to 3 o’clock.
Once both skates are turned, dig the inside edges of each blade into the ice and lean into the turn. You should feel yourself start to slow down. To stop completely, keep leaning until both skates are nearly perpendicular to the direction you were going in and both blades are dug deep into the ice.
How to Do an Advanced Hockey Stop
In order to do an advanced hockey stop, you need to first master the basic hockey stop. Once you have the basic stop down, you can add in some extra moves to make it more advanced. Here are some tips on how to do an advanced hockey stop:
1. Start by skating at a moderate speed. You don’t want to be going too fast or too slow.
2. As you approach your stopping point, begin to drag your back foot slightly behind your front foot. This will help you turn more sharply.
3. When you’re about a foot away from your stopping point, begin to dig your blade into the ice with short, quick strokes. This will help slow you down and give you more control over your stopping.
4. As you come to a stop, keep your front leg straight and your back leg bent at the knee. This will help keep your balance and prevent you from falling over.
5. Practice these steps until you can do them without thinking about them. With enough practice, stopping will become second nature and you’ll be able to do it without any problem!
How to Do a Power slide hockey Stop
Hockey stops are one of the most important skills for any Hockey Player to master. They allow you to quickly change directions on the ice, which can be essential for keeping up with the play or getting in front of an opponent. Hockey stops can also be used as a way to slow down or stop completely, which can be helpful when you’re trying to control the puck or avoid a collision.
There are two main types of hockey stops: the power slide and the T-stop. Power slides are faster and more controlled, while T-stops are slower and safer. In general, power slides are better for experienced players who are confident in their skating ability, while T-stops are better for beginners or players who want to avoid risking a fall.
To do a power slide hockey stop, start by skating forward at a moderate speed. When you’re ready to stop, dig your inside edges into the ice and lean your Body Weight to the outside of the turn. As you begin to turn, transfer your weight from your inside leg to your outside leg and keep your head up so that you can see where you’re going. Once you’ve turned around completely, dig your outside edges into the ice to help slow yourself down and come to a stop.
How to Improve Your Hockey Stop
If you’re new to hockey or just want to improve your game one of the most important skills you can learn is how to stop. This is especially true if you play defense but even forwards and goalie should know how to perform a proper hockey stop.
The good news is that with a little practice, anyone can learn how to stop like a pro. In this guide, we’ll cover everything you need to know about hockey stops, from the basics of how they work to more advanced techniques for when you’re ready to take your game to the next level.
Common Hockey Stop Mistakes
One of the most difficult things to master in skating is coming to a complete stop. It takes time, patience and practice to be able to execute a proper hockey stop. Even once you think you’ve got it down, there are common mistakes that can cause you to lose control and wind up on your backside. Here are some of the most common hockey stop mistakes, and how to avoid them.
1. Not Digging Your Edges In
This is probably the number one mistake made when attempting to stop. You need to make sure that you are really digging your edges into the ice, so that you can create enough friction to slow down and eventually stop. The sharper your edges, the better. If you don’t dig your edges in, you will just glide right past where you meant to stop.
2. Leaning Back
Leaning back when youstop is a recipe for disaster. It will cause you to lose your balance and likely fall backwards onto the ice. Instead, keep your weight over your skates and lean slightly forward as you begin to slow down. This will help keep you balanced and in control of your speed.
3. Breaking Too Soon
If you start breaking too soon, it will be very difficult — if not impossible —to achieve a proper hockey stop. You need to wait until you have achieved full speed before attempting to slow down and stop. This way, you will have enough momentum to generate the friction necessary to come safely to a halt.
4 . Not Being Firm Enough
It is important that you apply firm pressure when stopping. If you apply too much pressure, though, it can cause your skates to slip out from under you and send you sprawling onto the ice — not ideal if you’re tryingto avoid a collision with another player or puck! Instead, find that happy medium of just enough pressure so that your skates grip the ice without causingyouto lose balance and fall over
The Best Hockey Stops
Hockey stops are one of the most important skills that a hockey player can learn. They are used to change directions quickly and to stop the puck from going into the net. There are many different types of hockey stops, but the two most common are the Inside Edge hockey stop and the outside edge hockey stop.
The inside edge hockey stop is the most common type of stop used by players. To do this stop, you will need to be on your left foot if you are a right handed shooter or on your right foot if you are a left handed shooter. You will then turn your body so that your skate is pointing in the direction that you want to go. You will then use your inside edge to dig into the ice and push off in the direction that you want to go.
The outside edge hockey stop is not used as often as the inside edge stop, but it can be just as effective. To do this stop, you will need to be on your right foot if you are a right handed shooter or on your left foot if you are a left handed shooter. You will then turn your body so that your skate is pointing in the direction that you want to go. You will then use your outside edge to dig into the ice and push off in the direction that you want to go.
Which type of stop you use will depend on a number of factors, such as how fast you are going, what type of surface you are stopping on, and how tight of a turn you need to make. Practice both types of stops so that you can use either one depending on the situation.
How to Use a Hockey Stop in a Game
A hockey stop is a sudden stop made while skating forwards using the skater’s edges to dig into the ice. It is used to change direction quickly or to stop the skater entirely.
The hockey stop is a fundamental skating skill that all Hockey Players must master in order to be successful on the ice. When executed correctly, a hockey stop can be an extremely effective way to change direction or slow down, allowing you to gain an advantage over your opponents.
To execute a proper hockey stop, begin by skating forwards at a moderate speed. As you approach the point where you need to stop, begin shifting your weight onto your inside leg (the leg closest to the direction you are turning). At the same time, start digging your inside skate blade into the ice, using your body weight to help carve a turn. As you get closer to stopping, apply more pressure to your inside skate and begin lifting your outside leg off of the ice. This will help keep your momentum going in the desired direction and prevent you from losing balance. Once you have sufficiently slowed down or changed direction, bring your outside leg back down onto the ice and continue skating.