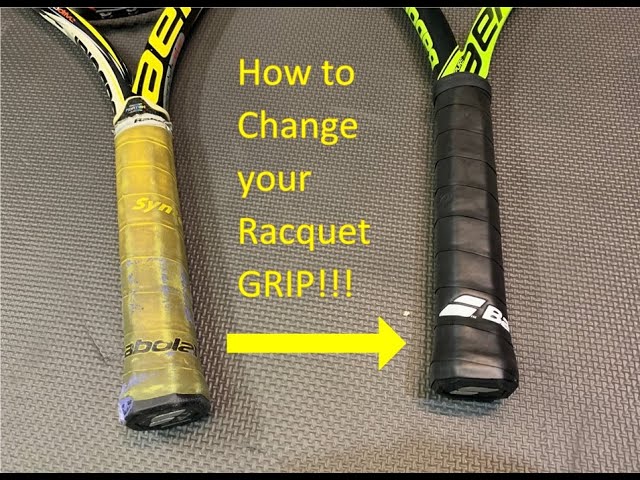
How to Install a Tennis Grip in 5 Easy Steps
Contents
Learn how to install a tennis grip in 5 easy steps with this guide. You’ll be playing like a pro in no time!
Introduction
Tennis is a great way to stay active, social, and healthy. But in order to play your best game, you need to make sure you have the right equipment. That includes a good tennis racket and a good grip.
Installing a tennis grip might seem like a daunting task, but it’s actually quite simple. All you need is a little time and patience. With just a few easy steps, you’ll have a new grip that will help you play your best game yet.
Here’s a step-by-step guide on how to install a tennis grip:
1. Start by removing the old grip from your racket. Use a sharp knife or scissors to carefully cut it off. Be careful not to damage the racket itself.
2. Once the old grip is removed, clean the surface of the racket with rubbing alcohol or another similar cleaning agent. This will help ensure that the new grip adheres properly.
3. Cut the new tennis grip to size, making sure it’s long enough to cover the entire handle of the racket.
4. Apply adhesive to the back of the new grip and then place it on the racket handle, being careful to align it correctly. Start at one end and work your way towards the other, smoothing out any air bubbles as you go along.
5. Once the new grip is in place, allow it to dry completely before using it in play. This usually takes about 24 hours.
Step One: Choose the Right Grip
There are many different types of tennis grips available on the market, so it’s important to choose the one that’s right for your playing style. You may want to experiment with different grips to find the one that gives you the most control over your shots. Once you’ve found the perfect grip, it’s time to install it on your racket.
Step One: Choose the Right Grip
The first step is to choose the right grip for your playing style. If you’re a power player, you’ll want a thicker grip that will give you more traction and help you generate more spin on your shots. If you’re a finesse player, you’ll want a thinner grip that will give you more control over your shots. There are also grips designed for players with larger hands and those with smaller hands.
Step Two: Measure the Grip
Once you’ve chosen the right grip, it’s time to measure it against your racket. Most grips come in one size, but if yours is too large or too small, you can either trim it down or add an overlay grip to make it larger. To measure the grip, hold it against your racket so that the end of the grip lines up with the top of the racket handle. The bottom of the grip should extend past the bottom of the handle by about 1/8 inch (3 mm).
Step Three: Remove Old Grip Tape
If there is existing grip tape on your racket, use a utility knife or scissors to remove it. Be careful not to damage the underlying surface of the racket handle. Once all of the old grip tape has been removed, clean off any adhesive residue with rubbing alcohol or baby oil.
Step Four: Apply New Grip Tape
Now it’s time to apply new grip tape to your racket. Start by wrapping the tape around the top of the handle until you’ve reached your desired length. Then continue wrapping downward in a spiral pattern until you reach bottom ofthe handle. Make sure that each layer of tape overlaps slightly withthe layer beneath it so that there are no gaps in coverage. Onceyou’ve reached bottom, trim off any excess tape with a utilityknife or scissors.
Step Five: Attach New Grip
The final step is to attachthe new grip to your rackethandle using double-sidedtape or adhesive sprayglue. Start by peeling offabout 6 inches (15 cm)of backing from one endofthe tape or glue canisterand attachingit toone endofyour newgrip . Then peel offthe remaining backingsand attachit toyour rackethandle , beingcareful notto let anyair bubblesform beneaththe grip . Wrapanyexcessgrip materialaroundthe buttofyourracketand secureit intoplace withanother stripofdouble-sidedtapeor glue . Let th dryfor atleastan hourbefore usingyourracket .
Step Two: Prepare the Handle
Now that the handle is clean, it’s time to prepare it for the new grip. To do this, start by wrapping a small piece of sandpaper around the end of the handle. Sandpaper will help to rough up the surface of the handle so that the grip can adhere to it more easily.
Once the handle is sanded, use a paper towel or cloth to wipe away any debris. Then, apply a small amount of grip solvent to a clean spot on the handle. Grip solvent will help to ensure that the grip adheres firmly to the handle.
Next, take your new grip and begin unrolling it from the bottom up. As you unroll it, be sure to keep an eye on the alignment of the adhesive strip. You want this strip to be positioned in such a way that it will be easy to access once you start applying the grip to the handle.
Once you have fully unrolled the new grip, remove any backing material from the adhesive strip. Then, align one end of the grip with one end of the handle and begin pressing it into place.
Step Three: Wrap the Handle
Once you have the base of the grip positioned correctly on the handle, it’s time to begin wrapping. Start by holding the end of the grip in one hand and placing your other hand in the middle of the grip. Wrap the grip tightly around the handle, making sure to keep the end aligned with the base of the grip. Continue wrapping until you reach the end of the handle, then cut off any excess grip material.
Step Four: Secure the Grip
Use your other hand to hold the end of the grip in place as you secure it with strips of adhesive tape. Start at the bottom of the grip and work your way up, overlapping each strip by about half an inch. Make sure the grip is properly aligned before you begin taping, as it will be difficult to adjust once the tape is in place. Once you reach the top of the grip, use a utility knife to trim any excess tape.
Step Five: Test the Grip
Now that the grip is installed, it’s time to test it out. Make sure that the grip is not too tight or too loose. You should be able to hold the racket with a firm grip, but you should not have to use a death grip to keep hold of the racket. If the grip is too loose, it will slip in your hand and you will not have good control over the racket. If it is too tight, your hand will cramp up and you will not be able to swing the racket properly.
Conclusion
Now that you know how to install a tennis grip, you can replace your old grip in just a few minutes. Be sure to clean the handle of your racket before beginning and take your time so that the new grip is installed correctly. Once you’ve finished, you’ll be ready to hit the court with a new, comfortable grip.