How To Iron A Baseball Cap?
Contents
- Place the baseball cap on an ironing board.
- Cover the bill of the cap with a thin towel.
- Set the iron to a low heat setting and lightly press the towel-covered bill.
- Remove the towel and repeat Step 3 on the underside of the bill.
- Flip the baseball cap over and smooth out the crown and sides of the cap.
- Place a thin towel over the entire cap.
- Set the iron to a low heat setting and lightly press the towel-covered cap.
- Remove the towel and repeat Step 7 on the underside of the cap.
- Allow the baseball cap to cool before wearing.
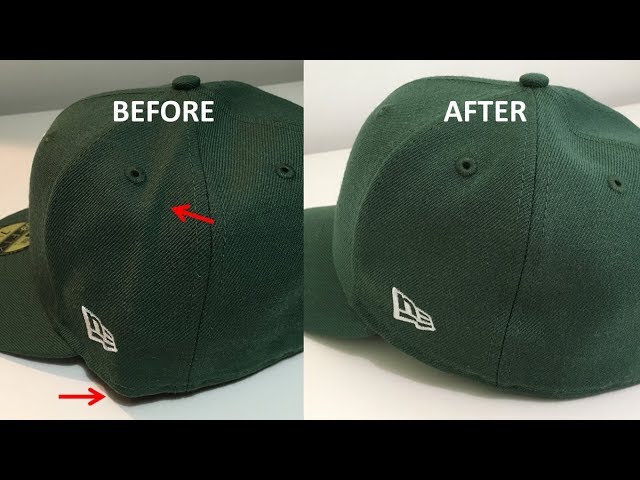
How to Iron a Baseball Cap? It’s not as difficult as you might think. In fact, with a little bit of patience and a few household items, you can have your baseball cap looking good as new in no time!

Place the baseball cap on an ironing board.
Baseball caps are made from a variety of materials, including cotton, wool and polyester. You can use an iron to remove wrinkles from all types of baseball caps. The key to ironing a baseball cap is to use the lowest heat setting that will remove the wrinkles. You also need to place a thin cloth over the baseball cap before you iron it. This will protect the cap from being burned by the iron.
Cover the bill of the cap with a thin towel.
Ironing a baseball cap is a great way to get rid of wrinkles and give it a new lease on life. Whether your baseball cap is made of cotton, polyester, or another fabric, you can use an iron to get rid of any wrinkles. You’ll need to take a few precautions to avoid damaging your baseball cap while you’re ironing it.
Set the iron to a low heat setting and lightly press the towel-covered bill.
If your baseball hat is made of cotton or a cotton blend, you can use an iron to remove wrinkles. Start by setting the iron to a low heat setting and lightly pressing the towel-covered bill. Be careful not to press too hard or stay in one spot for too long, as this could cause the fabric to scorch. Once the bill is pressed, turn the hat over and lightly press the crown. If your hat is made of wool, avoid using an iron altogether as this could damage the fibers. Instead, try steaming the hat over a pot of boiling water or using a hand-held steamer.
Remove the towel and repeat Step 3 on the underside of the bill.
Now that the top of the bill is complete, it’s time to move on to the underside. Remove the towel and repeat Step 3 on the underside of the bill. Make sure to pay special attention to the crease in the bill, as this is often where wrinkles can form. Again, use a light touch so you don’t damage the fabric.
Flip the baseball cap over and smooth out the crown and sides of the cap.
Use a low or medium setting on your iron, and place a thin towel over the baseball cap. This will protect the bill of the cap from getting too hot and possibly burning. Start at the front of the baseball cap and slowly work your way around, making sure to pay extra attention to any creases or wrinkles. Let the baseball cap cool completely before wearing it.
Place a thin towel over the entire cap.
Use a thin, cotton towel to protect the entire cap. Place the towel over the bill and secure it in place with a piece of tape. This will help keep the shape of the bill while you work. If you don’t have a thin towel, you can use a sheet of wax paper instead.
Set your iron to a low heat setting, and test it on a small area of the towel to make sure you don’t scorch or damage the fabric. Once you’ve determined that the heat setting is safe, slowly run the iron over the entire towel-covered surface of the cap. Be sure to avoid any areas with embroidery or other embellishments.
After you’ve ironed the entire surface of the cap, allow it to cool for a few minutes before removing the towel. If any wrinkles remain, simply repeat the process until they are gone.
Set the iron to a low heat setting and lightly press the towel-covered cap.
Start by setting your iron to a low heat setting. To avoid scorching or damaging the material, it is always best to start with a lower temperature and work up if needed. Place the baseball cap on an ironing board or other protected surface. Place a towel over the top of the baseball cap. This will protect the cap from direct contact with the iron and help distribute the heat more evenly. Lightly press the towel-covered baseball cap with the iron, moving it around to cover all areas. Work slowly and carefully to avoid scorching the material. If you see any smoke or smell burning fabric, remove the iron immediately and reduce the heat setting. Once you have pressed all areas of the baseball cap, allow it to cool completely before removing the towel. If desired, you can also use a steam setting on your iron to help remove any wrinkles or creases.
Remove the towel and repeat Step 7 on the underside of the cap.
Once you have completed Step 7 on the top of the baseball cap, remove the towel. Again, set your iron to a low heat setting and hold it about four inches above the surface of the baseball cap. Slowly move the iron back and forth over the surface of the cap, taking care not to leave it in any one spot for too long. Again, check frequently to make sure that you are not causing any damage to the cap. When you have finished Step 8 on the top of the baseball cap, remove it from the ironing board and repeat Steps 7 and 8 on the underside of the baseball cap.
Allow the baseball cap to cool before wearing.
Ironing a baseball cap is not a difficult task, but it is important to follow a few simple steps to ensure that the process goes smoothly. Perhaps the most important step is to allow the baseball cap to cool completely before wearing it. This will help to set the shape of the brim and prevent any potential damage that could be caused by heat.