How To Lace A Baseball Glove?
How to lace a baseball glove is an important question for any baseball player. There are a few different ways to do it, and each has its own benefits. In this blog post, we’ll show you how to lace a baseball glove the right way.
The Different Types of Lacing
The most common types of lacing are:
-Round laces: These laces are the thickest and have a rounded shape. They’re great for durability, but can be more difficult to thread through smaller eyelets.
-Flat laces: These laces are thinner and have a flat shape. They’re easier to thread through small eyelets, but may not be as durable as round laces.
-Waxed laces: Waxed laces have a coating that makes them more resistant to moisture and dirt. This can help extend the life of your laces, but they may be more difficult to thread through small eyelets.
To lace a baseball glove, you’ll need:
-One pair of pliers
-One leather needle
-One spool of thread (preferably synthetic, such as polyester or nylon)
-One type of lace (round, flat, or waxed)
-Scissors (optional)
Instructions:
1. Start by threading the needle with about two feet of thread. If you’re using waxed thread, make sure to thread it through the needle before applying the wax, as this will make it easier to work with.
2. Next, tie a knot at the end of the thread to secure it. Once you have a knot, you can start lacing the glove.
3. Begin by putting the laced end of the glove through one of the eyelets on the side of the thumb (this will vary depending on the size and style of glove).
4. Once the laced end is through the eyelet, pull it tight and secure it with a knot. You can then cut off any excess thread with scissors, if desired.
5
Preparing to Lace
Lacing a baseball glove is not difficult, but it does require some patience. You will need a leather needle, waxed thread, and a little time. Start by preparing yourthread and needle. If you are using synthetic thread, you can skip this step. If you are using natural thread, you will need to condition it with beeswax or another lubricant. This will help to prevent the thread from breaking as you lace the glove.
Next, you will need to find the center of the webbing on your glove. This is the strongest part of the glove, and where you will start lacing. Once you have found the center of the webbing, poke your needle through from the back side of the glove. Pull the thread through until there is a small loop on the back side of the glove.
Now, take your needle and poke it through the loop from front to back. Then, poke it through the webbing on either side of the loop. Finally, pull the needle and thread through the loop on the back side of the glove. You have now completed one stitch.
Repeat this process until you have reached the end of the webbing. When you reach the end of the webbing, make sure that your stitches are evenly spaced and that there is no slack in your thread. If everything looks good, you can now cut your thread and tie off your lace.
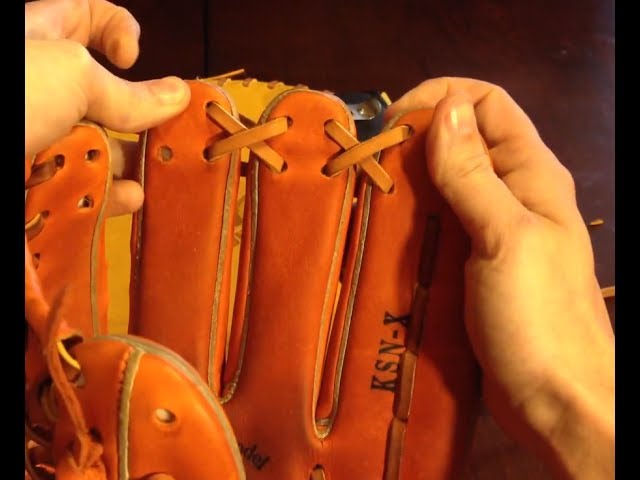
Lacing the Glove
First, laced the glove by running the lace through the thumb and forefinger hole. Second, laced the glove by running the lace to the back of the hand and through the little finger hole. Third, laced the glove by running the lace under all four fingers to the palm of the hand. Fourth, laced the glove by running the lace under all four fingers towards the back of the hand. Fifth, laced the glove by running the lace around all four fingers and back to the palm of the hand. Sixth, laced gloves by crisscrossing laces in your palm seven times then ran it through your thumb and forefinger hole. Lastly,lace gloves by making a loop in your palm then ran it around your pinky finger and back through your loop.
When to Replace the Laces
The first thing that you need to do in order to properly take care of your baseball glove is to break it in. Once you have done that, you need to know when the right time is to replace the laces. Depending on how often you play, and how well you take care of your glove, the laces will start to show signs of wear and tear. If you see any fraying, or if they start to come loose from the glove, it is time to replace them.