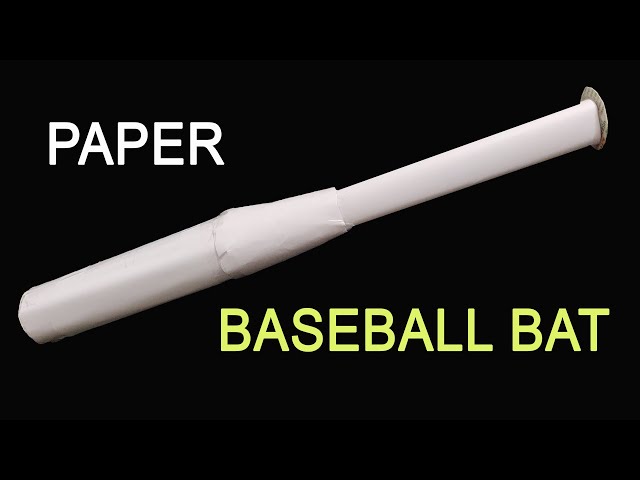
How to Make a Baseball Bat Out of Paper
Contents
Learn how to make a baseball bat out of paper with this easy to follow tutorial. You’ll be able to hit home runs in no time!
Introduction
Do you want to make a baseball bat out of paper? It’s easy! All you need is a sheet of construction paper, some tape, and a pencil.
First, fold the construction paper in half lengthwise. Then, use the pencil to trace a bat shape onto the paper. When you’re done tracing, cut out the bat shape.
Now it’s time to assemble your bat. To do this, simply tape the two halves of the bat together along the edges. That’s it! Now you have your very own baseball bat made out of paper.
What You’ll Need
To make a baseball bat out of paper, you’ll need:
-A4 paper
-Scissors
-Tape
Instructions:
1. Cut a strip of paper about 10cm wide and 70cm long. This will be the body of your bat.
2. Fold the strip of paper in half lengthways and crease it well. Unfold the paper and then fold each long side towards the middle, so that the crease you made in step 1 is in the middle of the strip. Crease well again.
3. Fold each end of the strip towards the center so that they meet in the middle, and crease well to make a point at each end. 4. Fold one side of the strip over so that it covers half of the other side. Tape down both sides to secure them in place and create a cylinder shape for your bat barrel. 5. Now turn your bat barrel so that one end is pointing downwards, and accordion-fold it until it’s about 15cm long – this will be your handle. Tape down both sides to secure them in place and create a cylinder shape for your bat barrel. 6. Your baseball bat is now complete! You can use it to play catch with a friend, or decorate it with paint or stickers to make it truly unique
Step One: The Base
In order to make a baseball bat out of paper, you will need to start with a strong base. Cut a rectangle out of construction paper that is about 18 inches long and 6 inches wide. Fold the rectangle in half lengthwise and then fold it in half again. This will give you a base that is about 9 inches long and 3 inches wide. Once you have your base, you can start to add the rest of the paper to it.
Step Two: The Barrel
To make the barrel of your bat, you will need to cut a rectangle out of your paper that is about 8.5″ x 11″. Then, fold the paper in half length-wise and crease it. Next, open up the paper and fold each side in to meet the crease in the middle. Once again, crease all of the folds. Now you should have a long, thin strip that is folded in half with four layers.
Step Three: The Grip
To make the grip, start by folding a strip of paper about an inch wide and three inches long in half lengthwise. Then, take the two ends of the strip and fold them in towards the center so that they meet in the middle. Once you have done this, fold the entire strip in half again lengthwise. Now, take one end of the strip and begin to coil it around itself, making sure to keep the coils close together. Continue doing this until you have reached the other end of the strip. Once you have reached the end, tuck the end of the strip under one of the coils to secure it in place.
Step Four: The Finish
To finish your baseball bat, you will need to cut a small slit in the top of the bat. This will be where the string or ribbon will be inserted to create a hanging loop. Once the slit is cut, insert the string or ribbon and tie it in a knot to secure it in place. Your baseball bat is now complete!
Conclusion
With a few simple supplies, you can make a baseball bat out of paper that looks just like the real thing. Just follow the steps above and you’ll be hitting home runs in no time.