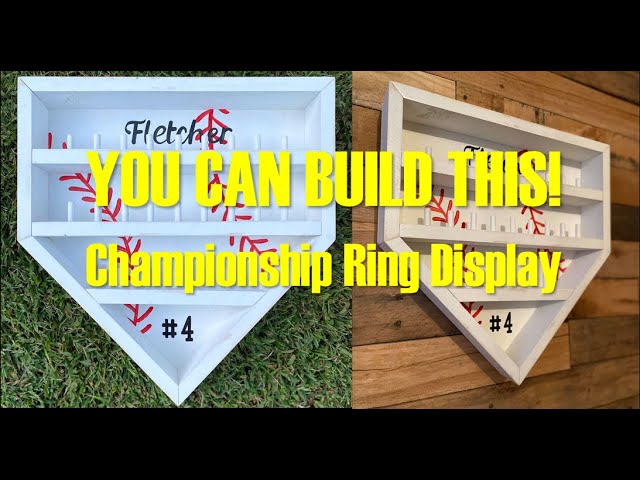
How to Make a Home Plate Baseball Display Case
Learn how to make a home plate baseball display case to showcase your favorite baseball. This easy to follow tutorial will walk you through the steps needed to create a beautiful display case for your home.
Gather Your Supplies
You will need the following supplies to make your home plate baseball display case: a home plate, a clear acrylic sheet, four screws, four washers, and four nuts. You will also need a drill, a screwdriver, and a saw.
Wooden base
You will need a wooden base to build your display case on. You can purchase a pre-made base, or you can make your own. If you decide to make your own, you will need to cut a piece of plywood to the desired size and then attach four wooden legs to the corners. You can find wooden legs at most hardware stores.
Plexiglass
You will need a sheet of plexiglass that is at least 23″ x 35″. This is the size of a standard home plate, so the plexiglass should be large enough to fit the entire plate with a little extra room on all sides. You can find plexiglass at most hardware stores.
Home plate
Home plate is where the batter stands when hitting the ball. It is a pentagon shaped piece of whitened rubber that is set in the ground within the infield. The front of home plate is 17 inches wide and the back is 8 inches wide.
Screws
The most important part of any display case is the glass. You need to make sure that the glass is clean and free of any smudges or fingerprints. To do this, you will need to gather a few supplies.
-Glass cleaner
-Lint-free cloths
-Screws
-Drill
-Hammer
Drill
Now that your wood is cut to size, it’s time to start drilling the holes that will allow you to assemble the case. You’ll need a power drill and a few different size drill bits. Start with a smaller bit and work your way up to the size that is just slightly larger than your screws. This will give you the strongest hold.
First, drill pilot holes in each corner of both the base piece and the back piece. These pilot holes will guide your larger screws and prevent splitting the wood. Next, use your larger bit to drill through the pilot holes and into the pieces of wood. Be sure to go slowly and keep the bit as perpendicular to the wood as possible to avoid splitting it.
Once all of your holes are drilled, it’s time to start assembling!
Jigsaw
A jigsaw is a power tool used for cutting curves in wood, metal, or other materials. Jigsaws can also be used to create cutouts in material such as laminate. The blade of a jigsaw is held in place by a clamp that can be tightened or loosened to change the blade. Jigsaw blades are available in many different sizes and shapes to suit different materials and tasks.
When using a jigsaw, it is important to use the correct blade for the material you are working with. For example, when cutting metal, you should use a blade designed for metal. Jigsaw blades are also not suited for cutting curves in any material that is thicker than about 1/8 inch (3 millimeters). If you need to cut a curve in thicker material, you should use a router or another power tool designed for that task.
Cut the Wooden Base
Cut a piece of plywood or hardboard that is 24 inches by 36 inches to use as the base of your home plate display case. This will be the foundation that the home plate and the rest of the display will sit on. Place the plywood on a stable surface and use a straightedge to mark out a 24-inch by 36-inch rectangle. Cut along the marked lines with a circular saw.
Trace the home plate
Use a permanent marker to trace the home plate onto the center of the wooden base. Make sure that you trace the entire home plate, including the
edges and rounded corners. You can also use a template if you have one. Once you have traced the home plate, use a jigsaw to cut along the lines that you traced. If you do not have a jigsaw, you can use a handsaw or another type of saw to cut the wooden base.
Cut out the traced home plate
Cut out the traced home plate using a jigsaw or other saw. If you’re using a jigsaw, be sure to use a fine-toothed blade designed for cutting wood. Stay as close to the tracing line as possible to avoid having to do too much sanding later.
Assemble the Case
Lay all the Plexiglas pieces out on a flat surface. Begin by taking two of the long side pieces and two of the short side pieces and fitting them together to create a rectangle. Make sure the inside edges of the Plexiglas are flush and there are no gaps. Once the rectangle is formed, take the remaining two long side pieces and fit them into the open end of the rectangle. Again, make sure the inside edges of the Plexiglas are flush and there are no gaps.
Place the plexiglass on the wooden base
Begin by measuring and cutting your plexiglass. You will want to leave about an inch of overlap on all sides. Once you have the plexiglass cut to size, use a mild soap to clean the surface of the wood. This will help the plexiglass adhere to the wood.
Next, apply a thin layer of adhesive caulk to the top edge of the wooden base. Center the plexiglass on top of the caulk and press down gently. Run a bead of caulk along all four edges of the plexiglass where it meets the wood. Use a putty knife or your finger to smooth out the caulk.
Now, apply four small L-brackets to each corner on the underside of the wooden base. Be sure that the brackets are secured into solid wood and not just particle board or plywood. This will help ensure that your case is sturdy and will not fall apart over time.
Finally, use screws or nails to attach felt or fabric padding to all edges of the case where the glass meets wood. This will help protect your baseballs (or other collectibles) from scratches and other damage.
Place the home plate on the plexiglass
Now that you have your baseball display case, it’s time to assemble it. The first step is to place the home plate on the plexiglass. Once you have done that, take the four screws that came with your case and screw them into the pre-drilled holes in the plexiglass. Make sure that you do not overtighten the screws, as this could cause the plexiglass to crack.
Screw the home plate to the wooden base
Use the 1-inch wood screws to attach the home plate to the center of the wooden base. Make sure that the smooth side of the home plate is facing up. Drill pilot holes into the wooden base before inserting the screws.
Hang the Case
Use a power drill to make four pilot holes in the wall. The holes should be the same distance apart as the holes on the brackets. For example, if the holes on the brackets are four inches apart, the pilot holes in the wall should also be four inches apart. Center the pilot holes over the wall studs.
Find the studs in the wall
Before you start, find the studs in the wall using a stud finder. Once you know where the studs are, mark them with a pencil so you know where to place your screws. Place the home plate on the wall and mark the top corners of the plate with a pencil. This will give you an idea of where to place your screws so that they will be hidden by the plate.
Hang the case on the wall
Place the case on the wall where you want to hang it. Find the studs in the wall with a stud finder and use a pencil to mark their location on the top and bottom of the case. Place your baseball home plate display case bracket over the top mark and screw it into the stud. Do the same for the bottom bracket.