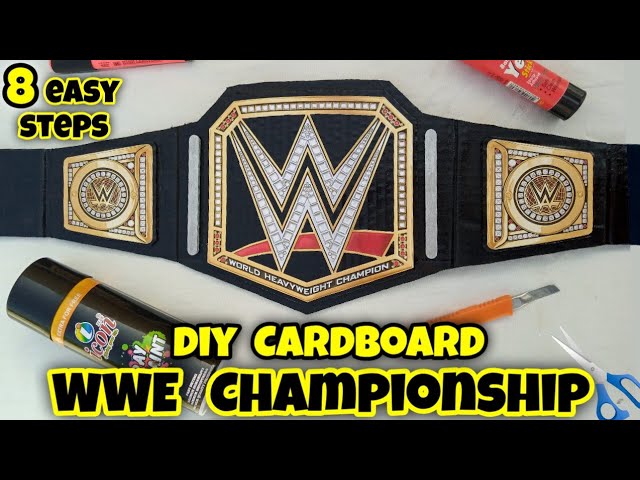
How To Make A WWE Belt?
How to make a WWE Belt? If you are a fan of WWE then you can make your own WWE Belt with the help of this blog.

Introduction
If you are a fan of WWE, then you have probably wanted to make your own WWE belt. Luckily, it is not as difficult as it may seem. With a little time and effort, you can easily create your own WWE belt that looks just like the real thing!
What You Need
-1/2 yard of black or brown leather
-1/2 yard of red or blue leather
-Leather cord
-Scissors
-Ruler or measuring tape
-Pencil or chalk
-Awl or leather punch
-Hole punch
-Lighter or matches
-Stitching needle and thread
-(optional) Belt loop template
##Instructions:
1. Cut two rectangles out of the black or brown leather, each measuring 6 inches by 21 inches. These will be the main panels of your belt.
2. Cut a third, smaller rectangle out of the red or blue leather. This will be your belt’s center stripe. It should measure 2 inches by 21 inches.
3. Place the center stripe on top of one of the main panels, centered horizontally. Use a ruler or measuring tape to mark where you’ll need to cut slits in the main panel so that the center stripe can be inserted. Make sure that the slits are evenly spaced and that they’re not too close to the edges of the main panel. You should have six slits total.
4. Use an awl or a leather punch to make holes along the marks you just made. Be careful not to make the holes too big; they should be just big enough for your stitching needle to pass through easily.
5. Cut six strips of leather cord, each about 12 inches long. Insert one strip through each hole, starting from the back side of the belt and coming out through the front. Trim any excess cord so that it’s flush with the back side of the belt.
6. Place the other main panel on top of the first, sandwiching the center stripe between them. Make sure that all of the holes line up, then use a hole punch to make new holes along those marks (you can also just reuse the existing holes).
7
The Process
Making a WWE belt is not as difficult as it may seem. With a few supplies and some patience, you can create a realistic looking championship belt that will be the envy of all your friends.
Here’s what you’ll need:
-3 yards of leather
-leather dye
-paintbrush
-scissors
-glue
-1 yard of Velcro
-needle and thread
-foam core board
-utility knife
Instructions:
1. Cut the leather into strips that are 3 inches wide and 36 inches long. You will need four strips for the main body of the belt, and two strips for the end caps. If you are making a child’s size belt, you can adjust the dimensions accordingly.
2. Dye the leather strips using your preferred color. We used black, but you can use whatever color you like. Allow the dye to dry completely before moving on to the next step. You may need to apply multiple coats of dye to get the desired color.
3. Once the dye is dry, use scissors to cut two triangles out of one of the strips of leather. These will be used for the end caps of the belt. Set them aside for now.
4. Take one of the remaining strips of leather and fold it in half lengthwise so that it is now only 1 ½ inches wide. Secure it in place with glue or needle and thread. This will be one side of your WWE belt. Repeat this step with another strip of leather so that you have two pieces that are mirror images of each other..5. To make the other side of your belt, take two more strips of leather and glue them together at one end so that they are 1 ½ inches wide (at the glued end) and 3 inches wide at the other end..6 Fold each strip in half lengthwise so that they are now only ¾ inch wide at the glued end, then glue or stitch them together in the middle so they form a long strip that is 1 ½ inches wide in total..7 Once both sides of your WWE belt are complete, it’s time to add some detailing..8 Use a utility knife to cut designs, symbols, or letters into one side of each strap..9 Paint over these cuts with acrylic paint or metallic spray paint to add some color and dimension to your belt..10 Place one side of your Velcro strip onto the wrong side (the side without designs) of each strap, then cut it to size so that it doesn’t extend past the edges..11 Place foam core board in between the two straps, then sandwich everything together with another piece of Velcro..12 Trim off any excess fabric, then stitch or glue all around
Finishing Up
Now that you have all the pieces of your belt ready, it’s time to put them all together! Place the inner foam core onto the back of the outer leather piece. Make sure that the design is lined up how you want it, and then use a heavy duty stapler to attach the two pieces together. Start in the middle and work your way out to the side, making sure to staple evenly.
Next, take your belt buckle and attach it to the front of the belt. Again, use a heavy duty stapler and start from the middle, working your way out to the side.
To make your belt adjustable, cut a strip of Velcro that is long enough to go around your waist plus about four inches. Attach one side of the Velcro to either end of the back of the belt, making sure that there is about two inches of overlap. Then, attach the other side of the Velcro to itself, creating a loop. You can now slide this belt on and off as needed!