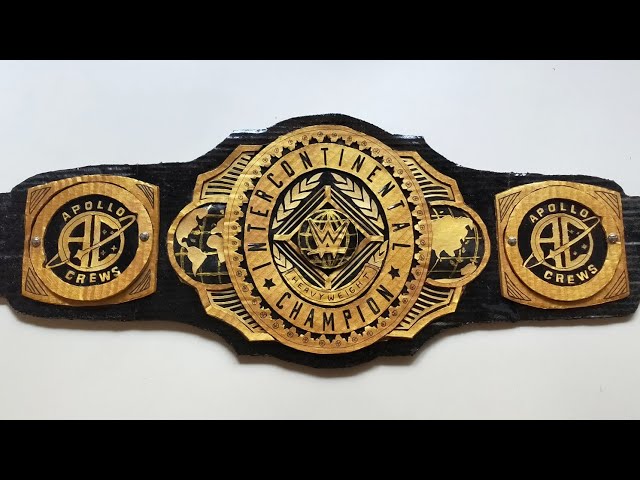
How to Make a WWE Intercontinental Championship Belt
Learn how to make your own WWE Intercontinental Championship Belt with this easy to follow tutorial.

Introduction
In order to make a WWE Intercontinental Championship belt, you will need the following supplies:
-3/4-inch skiver split leather
-(2) 3/4-inch Nickel plates
-(2) 3/8-inch Chrome plates
-Stitching awa
-Rivets & setter
-Leather paint or dye
-Sponge brush
-(2) 1/2-inch snaps
-Rotary cutter or scissors
-“W” Brass stencil (optional)
The first thing you will need to do is cut the skiver split leather into (5) strips that are 42 inches long and 3 inches wide. Once you have all of your strips, take two of them and lay them parallel to each other. Make sure that theGood sides of the leather are facing each other. Now, take your stitching awl and start stitching the two strips together at one end.
What You’ll Need
To make your own WWE Intercontinental Championship belt, you’ll need the following materials:
-3 yards of gold fabric
-1 yard of red fabric
-1/2 yard of black fabric
-gold thread
-red thread
-black thread
-a sewing machine
-scissors
-a ruler or measuring tape
-a piece of cardboard (optional)
Making the Belt
The WWE Intercontinental Championship is a professional wrestling championship created and promoted by the American professional wrestling promotion WWE on the SmackDown brand. It is one of two secondary titles in the WWE, complementing the WWE Championship on Raw. The current champion is Finn Bálor, who is in his first reign.
The title was introduced into WWE in 1979, with Pat Patterson becoming the inaugural champion. It originated from WWWF’s historic United States Championship (later untitled), which was transformed into an interim title when the World Heavyweight Championship was introduced in 1963. When the Intercontinental Championship was established, it became exclusive to RAW, with a new United States Championship for SmackDown being established during that show’s debut episode on August 26, 2002. After then-WWE Champion Brock Lesnar defeated Kurt Angle to unify the two titles at Vengeance in 2003, the Intercontinental and United States Championships became exclusive to their respective brands until October 11, 2011 when CM Punk defeated Alberto Del Rio to become both champion simultaneously. In 2016, then-WWE World Heavyweight Champion Triple H created and crowned a new Intercontinental Champion named The Miz on RAW; however this title change wasn’t recognized by WWE until 2017 when Miz retained his championship against Dean Ambrose at Elimination Chamber (2017), which led to Ambrose becoming the de facto Intercontinental Champion as he held both titles before losing them back to Miz later that year.
##How to Make a WWE Intercontinental Championship Belt
What You’ll Need:
-3/4 inch PVC pipe (find this at your local hardware store)
-1/2 inch PVC pipe (find this at your local hardware store)
-PVC pipe cutter (find this at your local hardware store)
-Heating gun (find this at your local hardware store or online)
-Silver spray paint (find this at your local hardware store or online)
-Black spray paint (find this at your local hardware store or online)
-Red felt fabric (find this at your local fabric store or online)
-White felt fabric (find this at your local fabric store or online)
-Clear gemstones (optional, find these online or at your local craft store)
-Hot glue gun & hot glue sticks (optional, find these online or at your local hardware store)
Instructions:
Adding the Details
Now that the framework of your WWE Intercontinental Championship belt is complete, it’s time to add the final details. This is where you will really make the belt your own, so have fun with it!
There are a few different ways that you can add the details to your belt. You can use craft foam, faux leather, or even real leather if you want to get really adventurous. Craft foam is probably the easiest material to work with, and it will give you nice sharp edges on your details. Faux leather is a bit more difficult to work with but it looks more realistic. Real leather is very difficult to work with but it looks and feels the most authentic.
Once you have decided on a material, you can start adding the details. The sky is the limit here, so use your imagination! You can add anything from simple shapes to complex logos or patterns. If you are using craft foam, you can even add 3D details like spikes or raised areas.
Here are a few ideas to get you started:
-Adding rivets or studs for a tough look
-Adding jewels or rhinestones for a glamorous look
-Adding spikes or other 3D details for a dramatic look
-Carving or etching shapes or patterns into the surface of your belt for a unique look
Finishing Up
Now that you have all the materials, you can start putting your WWE Intercontinental Championship belt together. Follow these simple instructions and you’ll have your very own replica in no time!
1. Start by cutting two strips of leather, each about 3 inches wide and 30 inches long. These will be the main body of the belt.
2. Next, cut two more strips of leather, each about 2 inches wide and 30 inches long. These will be used for the side panels of the belt.
3. To give your belt some extra detail, you can also cut out two smaller strips of leather, each about 1 inch wide and 10 inches long. These will be used for the trim on the side panels.
4. Once you have all your pieces cut out, it’s time to start assembling the belt. begin by glueing one of the 3-inch wide strips to one of the 2-inch wide strips, making sure that the adhesive is evenly distributed along the entire length of both pieces.
5. Repeat this step for the other strip of 3-inch wide leather and 2-inch wide leather, then let the adhesive dry completely.
6
Conclusion
Thank you for following along with this tutorial! We hope you enjoyed learning how to make your very own WWE Intercontinental Championship belt. Be sure to show off your completed belt to all of your friends and family.