How to Make Baseball Cards Like a Pro
Contents
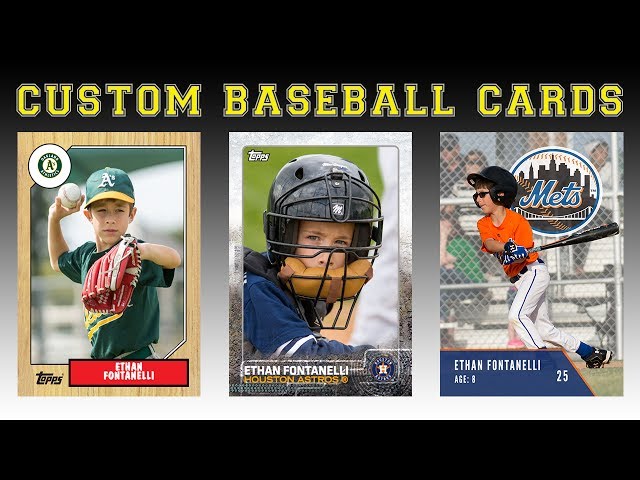
How to make baseball cards like a pro. Tips and tricks from the experts.

Introduction
Any kid who has ever played baseball has dreamed of having their very own baseball card Nowadays, with technology making it easier than ever to produce professional looking cards, that dream can become a reality. All you need is a good photo of the player, a computer, and a printer. You can even make cards for players who have never been on a team before! Here’s how to get started.
1) Choose a photo. The photo should be a close up of the player’s face, so that the features are easily recognizable. If the player is wearing a hat, make sure that the logo is not obscuring any part of the face.
2) Use an editing program to add any text you want to include on the card. This could be the player’s name, team name, position, or anything else you want to include.
3) Print the card out on heavy stock paper. If you don’t have access to a Heavy Duty printer, you can take the file to a local print shop and they will print it for you.
4) Cut out the card using a sharp knife or pair of scissors. Be careful not to cut off any of the text or photo!
5) Enjoy your homemade baseball card!
The Tools You’ll Need
Whether you’re a professional baseball card trader or a collector, you’ll need the right tools to get the job done. Here’s a list of must-haves:
-A good quality scanner: This is perhaps the most important tool you’ll need, as it will be used to create digital images of your cards. Look for a scanner that has a high dpi (dots per inch) setting – the higher, the better. This will ensure that your cards are captured in high resolution, which is essential for creating crisp, clear images.
-An editing program: Once you’ve scanned your cards, you’ll need to edit the images to perfection. Look for a program that offers basic editing capabilities like cropping, resizing, and color correction. Adobe Photoshop is a popular choice among professionals, but there are several less expensive options available as well.
-A printer: You’ll need a good quality printer to print out your cards. Again, look for one with a high dpi setting – at least 1200 x 1200 dpi is ideal. Inkjet printers are typically the best choice for card printing, as they can produce very crisp images.
The Printing Process
before you even think about designing or illustrations, you need to understand how your baseball cards are going to be printed. This process will have a big impact on the overall look, feel, and cost of your final product.
Offset Printing:
Offset printing is the standard for most print products, including baseball cards It uses a four-color process (cyan, magenta, yellow, and black, also known as CMYK) to produce full-color images. This type of printing is best for large quantities (usually 500 or more) because the set-up cost is higher than other methods.
Digital Printing:
Digital printing is a newer technology that is growing in popularity because it offers some advantages over offset printing. The biggest advantage is that there is no minimum quantity required, so it’s a good choice for small runs. Digital printing also offers more flexibility when it comes to design because there are no plates required.
Screen Printing:
Screen printing is another popular choice for Baseball Cards because it offers a high level of detail and vibrancy. This method is best for larger quantities (usually 500 or more) because the set-up cost is higher than other methods.
The Cutting Process
After you have decided what size you would like your baseball cards to be, it is time to cut them out. You will need a sharp craft knife and a cutting mat for this process. It is also helpful to have a ruler or a straight edge to help you get clean, straight cuts.
Start by cutting out a rectangle that is the same size as your desired Baseball Card Then, use your ruler or straight edge to score a line down the center of the rectangle. This will be your fold line. Next, use your knife to cut out two small triangles from the top corners of the rectangle. These will be the tab pieces that you will use to glue the two halves of the card together.
Once you have cut out all of your Baseball Cards it is time to start assembling them. For each card, you will need two pieces of cardstock (one for the front and one for the back), some adhesive, and either a photo or image that you would like to use for the front of the card. Start by adhereing the photo or image to the front piece of cardstock. Then, add a small amount of adhesive to the tab pieces on the back piece of cardstock and attach it to the front piece, lining up the fold lines. Finally, add any additional text or information that you would like to include on the back of the card before folding it along the score line and securing it closed with some more adhesive.
The Laminating Process
Lamination is the process of protecting your baseball cards with a thin layer of plastic. It is important to take proper care when laminating your cards, as this will ensure that they are well protected and look great for years to come. Here are some tips on how to laminate your cards like a pro.
First, you will need to purchase a laminating machine. You can find these at most office supply stores. Once you have your machine, you will need to purchase laminating pouches. These pouches come in different sizes, so be sure to get the right size for your baseball cards
Next, you will need to place your baseball card inside of the laminating pouch. Make sure that the side of the card that you want to protect is facing up. Once the card is inside of the pouch, you will need to seal it shut.
Now, you will need to run the sealed pouch through the laminating machine. Follow the instructions that come with your machine on how to do this properly. Once the pouch has gone through the machine, it will be sealed and protected from damage.
You can now remove your baseball card from the pouch and enjoy its new level of protection!
The Trimming Process
The trimming process is one of the most important steps in making baseball cards If the cards are not trimmed properly, they will not fit into the card sleeves and will be very difficult to display. Here are some tips on how to trim your baseball cards like a pro:
-Use a sharp razor blade or box cutter to make clean, straight cuts.
-Be sure to remove all of the excess paper from around the edges of the card.
-If you are going to be trimming a lot of cards, it may be helpful to use a paper trimmer.
-If you need to make a curved cut, use a craft knife or scissors.
-Once you have trimmed the excess paper from around the card, use a fine sandpaper to smooth out any rough edges.
The Finishing Process
After your baseball cards have been printed, die-cut, and perforated, they need to be properly finish in order to be protected from the elements and look their best. The finishing process involves a few different steps, but it’s easy enough to do at home with the right tools and materials.
First, you’ll need to trim the excess paper from around the edges of your cards. A sharp craft knife or paper trimmer will work for this. Next, you’ll need to round the corners of your cards. This can be done with a corner rounder or by hand with a craft knife.
Once your cards are trimmed and rounded, it’s time to apply a finish. There are several different types of finishes you can use, but we recommend a glossy UV varnish for durability and protection against the elements. Apply your finish with a foam brush or roller for even coverage. Allow the finish to dry completely before handling or storing your cards.
The Mounting Process
Before you can do anything with your baseball card you need to mount it. This is a process that involves attaching the card to a piece of cardboard or other firm material. You can use tape, glue, or even magnets to do this. Just make sure that the card is securely attached and that it will not fall off.
There are a few things to keep in mind when you are mounting your baseball card First, make sure that the card is not damaged in any way. If it is, then it will be worthless. Also, make sure that the card is not too small. If it is, then it will be hard to see.
Once you have mounted the card, you can then begin to work on it. You can add pictures, text, and even logos. just make sure that you do not damage the card in any way.
The Framing Process
Now that you have your baseball cards it’s time to start the framing process. For this project you will need a few supplies including:
-A base card
-Cardboard or foam backing
-A frame of your choice (available at any craft store)
-Clear packing tape or double-sided tape
-Scissors
First, take your base card and cut it down to fit the frame. Be sure to leave a slight border so the edges of the frame don’t show. Next, cut a piece of cardboard or foam backing to fit the frame. This will act as a sturdy back for your Baseball Card Tape the base card and backing together using clear packing tape or double-sided tape.
To finish, insert the baseball card into the frame and secure with the provided clips or hardware. Now you have a professional looking baseball card display that is perfect for any room in your home!
The Displaying Process
There are a few things you’ll need in order to display your baseball cards like a pro. First, you’ll need some kind of display case You can buy these online or at your local hobby store. Make sure to get a case that fits the size of your cards – standard card sizes are 2.5″ x 3.5″ or 3.5″ x 4.25″.
Once you have your case, you’ll need to choose how you want to arrange your cards. One popular option is to create a “set” – this is a collection of cards featuring players from the same team, or players who were active during the same time period. You can also just display your favorite cards, or arrange them by position. Get creative!
Once you’ve decided how to arrange your cards, it’s time to start putting them in the case. Start by sorting your cards into groups – once again, you can do this however you want, but it might be helpful to keep sets together or group similar cards together (like all of your rookie cards). Once you have your groups sorted out, start placing them in the case one by one, starting with the center and working your way out.
If you want to get really fancy, you can add other elements to your display – like identification labels for each group of cards, or pictures and memorabilia related to the players featured on the cards. But even just a simple arrangement of baseball cards can look great – so don’t be afraid to experiment until you find a look that works for you!