How To Make Tennis Ball Roses?
Contents
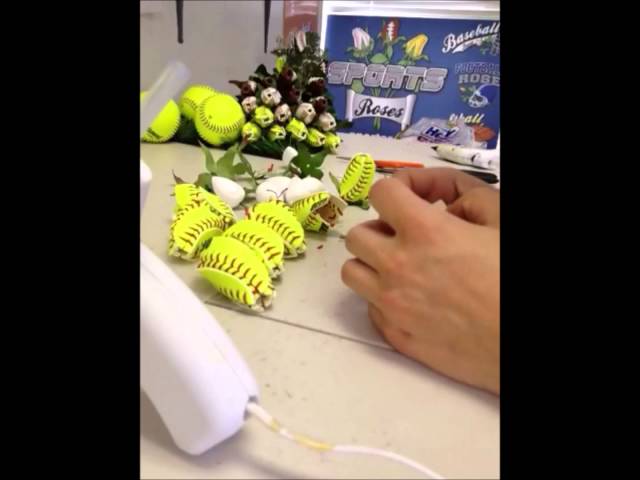
Have you ever seen those beautiful roses made out of tennis balls? They are so easy to make and only require a few materials.
Introduction
Tennis ball roses are a unique and fun way to show someone you care. They are also relatively easy to make. All you need is a tennis ball, some wire, and some ribbon or other material to cover the wire.
The steps to making a tennis ball rose are as follows:
1. Cut a small slit in the top of the tennis ball. This will be where you insert the wire.
2. Cut a length of wire that is twice the height of the tennis ball.
3. insert the wire into the slit in the top of the ball, and then bend the wire in half so that it forms a loop at the top.
4. starting at the top of the ball, begin wrapping the wire around itself, spiraling downward. As you wrap, push the wrapped portion of wire closer to the center of the ball so that it forms a tight spiral. continue until you reach the bottom of the ball.
5. Cut another length of wire that is twice the height of the ball, and insert it into
the bottom loop of wire so that it forms a second loop. This second loop will be used to attach your rose to something else, like a stem or leaves (optional).
6. Use ribbon or other material to cover the wired portion of your rose. Start at
What You Need
-Tennis balls
-Scissors
-Floral wire
-Floral tape
-Ribbon (optional)
Instructions
1. Cut a small X into the top of the tennis ball. You only need to cut through the fuzz, not all the way through the ball.
2. Insert the wire through the X and twist to secure.
3. Starting at the bottom of the ball, begin cutting strips around the circumference of the ball, angling your cuts up towards the center. As you cut, the strips will begin to curl up. Continue until you’ve cut all around the ball.
4. Once all strips are cut, shape them into a rose form and secure with wire. Wrap wire tightly with floral tape.
5. If desired, tie a ribbon around the base of the rose.
Step One
Tennis ball roses are a fun and unique craft project that you can make at home. With just a few supplies, you can create a beautiful bouquet of roses that will last forever.
To get started, you will need:
-Tennis balls
-Scissors
-Floral wire
-Floral tape
-Ribbon
-Fake leaves (optional)
First, cut the tennis ball in half with the scissors. If you want, you can also cut the ball into thirds or quarters to create different size roses. Next, take the piece of floral wire and insert it into the center of the tennis ball half. Wrap the wire around the circumference of the ball, and then twist it to secure it in place.
Next, take the floral tape and wrap it around the stem of the rose. Start at the bottom of the stem and work your way up, wrapping tightly as you go. Once you reach the top of the stem, cut off any excess tape. Finally, take the ribbon and tie it around the base of the stem to finish off your rose. If desired, you can also add some fake leaves to your rose for added realism.
Step Two
The next step is to start cutting the slits into your tennis ball. You want to make sure that you don’t cut too deeply, or else your rose will end up being too small. For this project, we cut our slits about halfway into the ball. Start by cutting four slits evenly spaced around the circumference of the ball. Then, cut four more slits in between those first four. (See photo.)
Step Three
3. Now that you have your petals, it’s time to start making your roses!Take one petal and make a small cut in the center. Do not cut all the way through, you just want to make a little pocket.
Next, take another petal and do the same thing. You should now have two petals with pockets in them.
Now, take your needle and thread and put a knot at the end. Insert the needle into the pocket of one of the petals and come out at the pointy end. Then, insert the needle into the pocket of the second petal and come out at the pointy end. You should now have both petals on the same thread.
Now, take your third petal and make a small cut in the center like before. Insert the needle into the pocket of the third petal and come out at the pointy end. You should now have three petals on your thread.
Repeat this process until you have desired number of roses!
Step Four
Now that all of your roses are made, it’s time to put them together! You will need:
-Tennis balls
-Roses
-Floral tape
-Scissors
To start, take one rose and cut the stem so that it is about two inches long. Next, take the tennis ball and make a small hole in the center of it. The hole should be just big enough for the stem of the rose to fit through. Finally, insert the stem of the rose into the hole in the tennis ball and secure it in place with floral tape. Repeat this process until all of your roses are attached to tennis balls.
Step Five
Now it’s time to add the leaves. Take two green pipe cleaners and twist them around the base of the rose, just below the petals. Spread the ends of the pipe cleaners out to create two “leaves” on either side of the rose. If you want, you can curl the ends of the leaves with your fingers to give them a more natural look.
Step Six
Now that the glue is dry, it’s time to fluff and shape your roses. Start by gently tugging on the outermost layer of fabric to loosen it up a bit. You want the petals to be free and not stuck together.
Next, take each rose and give it a good shake. This will help to loosen up the petals and give them a more natural look.
Now it’s time to shape your roses. For each one, start at the center and gently curl and twist the fabric until you get a nicely shaped rose. Don’t worry if they’re not perfect – they’ll still look beautiful!
And that’s it! Your tennis ball roses are now ready to enjoy!
Step Seven
Now take your floral wire and make a small loop at the end. Next, insert the wire through the bottom of the tennis ball, pushing it up through the center until it comes out of the top. The wire should now be sticking out of the top of the tennis ball at a 90-degree angle.
Conclusion
Now that you know how to make tennis ball roses, you can use them to decorate your home or as a thoughtful gift for someone special. All you need is a little time and patience, and you’ll be able to create beautiful roses that will last for weeks.