How to Paint Tennis Shoes the Right Way
How to Paint Tennis Shoes the Right Way – A quick and easy guide to painting your own shoes.
Introduction
One of the easiest and most popular ways to personalize your tennis shoes is to add a pop of color with paint. You can use any color you like, and you can even mix colors together to create new shades. But before you start painting your shoes, there are a few things you need to do to prepare them. With a little bit of prep work, your shoes will be ready for a makeover that will last for months.
##Heading:What You’ll Need
##Expansion:
-Tennis shoes
-Newspaper or drop cloth
-Masking tape
-Paintbrush
-Acrylic paint in desired colors
-Clear acrylic sealer (optional)
Materials needed
Before you start painting your shoes, you’ll need to gather a few supplies. You’ll need:
-Shoes
-Newspaper or a drop cloth
-Acrylic paint
-Paintbrushes
-Paper plates or foam sheets
-Rubbing alcohol
-Cotton balls
Surface preparation
The first step in any painting project is surface preparation. This is especially important when painting tennis shoes, as the paint will need to adhere to the material of the shoe and withstand the wear and tear of daily use. Rough up the surface of the shoes with sandpaper to provide a good key for the paint to adhere to. Wipe down the shoes with a damp cloth to remove any dust or debris.
If you are painting over an existing pair of shoes, you will need to make sure that the existing paint is in good condition and is not flaking off. If it is, you will need to remove all of the loose paint before proceeding. You can do this by sanding or using a paint stripper. Once the old paint is removed, wipe down the shoes with a damp cloth and allow them to dry completely before proceeding.
Painting
A new paint job can give an old pair of tennis shoes a whole new life. Here are some tips on how to paint tennis shoes the right way.
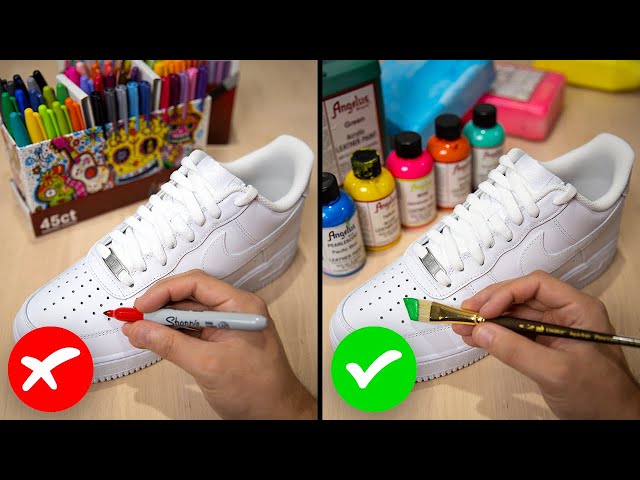
1. Choose the right paint. You’ll want to use a synthetic leather or vinyl paint, not regular acrylic paint. Synthetic leather or vinyl paint is made to adhere to smooth surfaces like leather and vinyl, and it won’t crack or peel like regular acrylic paint can.
2. Prep the shoes. Clean the shoes with soap and water, and then roughen up the surface with sandpaper so the paint will have something to adhere to. Wipe the shoes down with a damp cloth to remove any sanding dust before you start painting.
3. Paint in thin coats. It’s better to paint several thin coats than one thick coat. This will help prevent drips and runs, and it will also help the paint dry evenly without bubbling or wrinkling.
4. Let the paint dry completely between coats, and then give the final coat a few hours to cure before you wear the shoes.
Finishing touches
Once the paint is dry, you’ll want to add a few finishing touches to your shoes. For example, you might want to add glitter or rhinestones to them. You can also paint the shoelaces to match the shoes.
If you’re going to be wearing your shoes a lot, you’ll want to add a clear coat of sealer to them. This will help protect the paint from wear and tear. You can find clear sealer at most craft stores. Simply apply it with a brush according to the package directions.