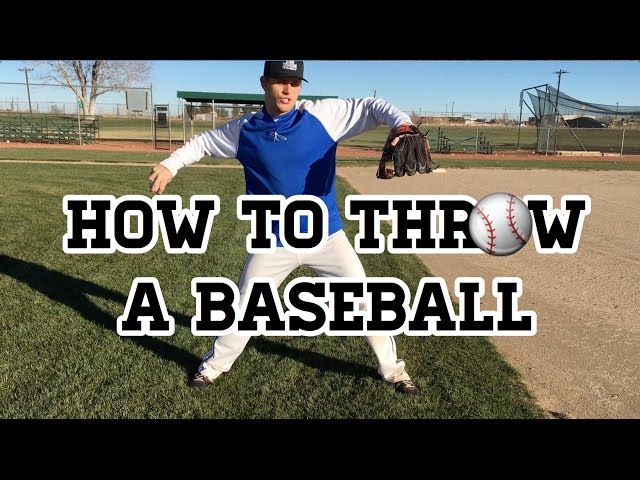
How to Properly Throw a Baseball
Contents
How to Properly Throw a Baseball
Introduction
Throwing a baseball properly is not as easy as it seems. There are many small details that must be taken into account in order to throw the ball with power, accuracy, and control. In this guide, we will go over the proper steps to take when throwing a baseball, so that you can improve your game.
##Heading:Step One – The Grip
##Expansion:
The first step in throwing a baseball properly is to get a good grip on the ball. You will want to place your index and middle fingers across the narrowest part of the ball, with your thumb placed directly underneath. Your ring finger and pinky should be curled underneath the ball. This grip will allow you to throw the ball with more speed and control.
##Heading:Step Two – The Stance
##Expansion:
When you are ready to throw the ball, you will want to start in a balanced stance, with your feet shoulder-width apart. If you are right-handed, your right foot should be slightly ahead of your left foot; if you are left-handed, vice versa. You will also want to bend your knees slightly and cock your hip back behind you. This stance will give you more power when you throw the ball.
##Heading:Step Three – The Wind-Up
##Expansion:
Once you have assumed your stance, it is time to begin your wind-up. This is the motion that you will use to generate power when throwing the ball. For a right-handed pitcher, this involves swinging your arms back behind you and then bringing them forward and up over your head before releasing the ball. A left-handed pitcher would do the opposite motion. As you are doing this, remember to keep your eyes on the target; this will help you improve your accuracy.
##Heading:Step Four – The Release
##Expansion:+4 +4 As you come forward with your arm during the wind-up, you will want to release the ball at around shoulder height. For a right-handed pitcher, thiswill be when your arm is pointing towards third base; for a lefty, towards first base. As you release the ball, snap your wrist forwards; this added movement will help put spin on the ball and make it move more quickly through the air.
The Grip
The grip is the very first thing you need to focus on when throwing a baseball. If you don’t have a good grip, then you won’t be able to throw the ball with accuracy or power. There are a few different ways to grip a baseball, but the two most common are the four-seam grip and the two-seam grip. The four-seam grip is the grip that you want to use when you’re throwing a fastball. To grip the ball with the four-seam grip, place your index and middle finger across the two seams that run parallel to the horsehide.
Two-Seam Fastball
The grip for a two-seam fastball is similar to the grip for a four-seam fastball, but the placement of your index and middle fingers is different. Instead of placing your fingers across the seams, you’ll want to place them along the inside of the seams. This grip puts more pressure on the baseball, which gives it a more rotating spin. The two-seam fastball is slower than the four-seam fastball, but it has more movement.
Four-Seam Fastball
The four-seam fastball is the straightest pitch in baseball, and as such, is the easiest to control. It’s also the pitch that gets hit the furthest when thrown up in the zone. Consequently, it’s important to have good movement on your four-seamer in order to keep hitters from sitting on it. To generate more movement, try throwing a two-seam fastball. This grip is especially effective for pitchers with late arm action, as it will help keep hitters off-balance.
To throw a four-seam fastball, start by placing your index and middle fingers along the seams of the baseball. Your ring finger and pinky should be touching the leather of the ball on one side, while your thumb sits on the opposite leather side (this is known as the horseshoe grip). Once you have your fingers properly positioned, raise your thumb slightly and place it opposite your middle finger (as shown in the image below). This will give you better control of the ball and more movement.
The Windup
Assuming you’re right-handed, start by putting your left foot on the rubber of the pitching mound. Place your right foot so that the toes are even with the heel of your left foot. This is your starting position.
The Stretch
To start the stretch, the pitcher sets up with his glove side facing the batter and his feet shoulder-width apart. He then raises his pitching hand above his head, holding the ball in his fingertips so that the fingers are behind and the thumb is over top of the baseball (See Figure 2). The pitchers elbow should be at shoulder level and he should be looking directly at the catcher. Once he is in this position, he will take a small step back with his glove foot (right foot for right-handed pitchers, left foot for lefties) and bring his pitching hand down to his belt, holding it behind his back. This is known as the “windup position” because it winds up the muscles in the Pitchers arm to generate velocity.
The Release
One of the most important aspects of throwing a baseball is the release. The release is the point at which the ball leaves your hand and begins its journey toward the target.
There are several factors that go into a proper release, including grip, arm angle, and follow-through. A pitcher with a good release will have more control over the ball and be able to throw it with more accuracy.
Grip
The grip is the way you hold the ball in your hand. There are many different grips that can be used, but the two most common are the four-seam grip and the two-seam grip.
The four-seam grip is used for pitches that are meant to be thrown with more speed, such as fastballs. To throw a four-seam fastball, place your index and middle fingers along the seams of the ball, with your thumb underneath.
The two-seam grip is used for pitches that are meant to have more movement, such as sinkers and curves. To throw a two-seam fastball, place your index and middle fingers along the seams of the ball, but offset them so that they’re not directly opposite each other. Your thumb should also be underneath the ball.
Arm Angle
The arm angle is how you position your arm when you release the ball. For a four-seam fastball, you will want to have a relatively high arm angle, around three-quarters. This means that your forearm will be pointing upward at a 75 degree angle when you release the ball.
For a two-seam fastball, you will want to have a lower arm angle, around 55 degrees. This means that your forearm will be pointing more toward the ground when you release the ball.
Follow Through
After you release the ball, it’s important to follow through with your pitch. This means that you should continue moving your arm forward until it’s pointing toward the target. Following through ensures that all of the energy from your pitch is transferred to the ball, resulting in more speed and accuracy.
Conclusion
There you have it! A guide to properly throwing a baseball. Remember to keep your grip firm but relaxed, your elbow up, and follow through with your entire body. With practice, you’ll be able to throw that baseball with speed, accuracy, and power!