How to Put a Face Mask on a Baseball Helmet
Contents
- Gather the materials you will need to attach the face mask to the baseball helmet.
- Cut the face mask out of the plastic sheet.
- Make sure the face mask is the right size and shape to fit over the opening of the baseball helmet.
- Trace the outline of the face mask onto the foam sheet.
- Cut out the foam sheet along the traced line.
- Place the foam sheet over the opening of the baseball helmet.
- Use the adhesive to attach the foam sheet to the baseball helmet.
- Place the face mask over the foam sheet.
- Use the zip ties to secure the face mask to the baseball helmet.
How to Put a Face Mask on a Baseball Helmet. You have to be really careful when you do this so that you don’t break the helmet.

Gather the materials you will need to attach the face mask to the baseball helmet.
In order to properly attach a face mask to a baseball helmet, you will need the following materials:
-A face mask
-A baseball helmet
-A Phillips head screwdriver
-4 screws (2 long and 2 short)
Follow these steps to properly attach the face mask to the baseball helmet:
1. Using the Phillips head screwdriver, remove the 4 screws from the baseball helmet. These screws are located on the back of the helmet, near the top.
2. Next, take the 2 long screws and insert them through the holes on either side of the face mask.
3. Then, take the 2 short screws and insert them through the holes on either side of the base of the face mask.
4. Now, align the holes on the back of the baseball helmet with the holes on either side of the face mask.
5. Finally, use the Phillips head screwdriver to screw in all 4 screws until they are tight.
Cut the face mask out of the plastic sheet.
Cut the face mask out of the plastic sheet.
-Trace the face mask shape onto the sheet.
-Use a sharp knife or box cutter to cut out the shape.
-Do not cut yourself!
Try on the face mask to make sure it fits over your nose and mouth.
-If it is too small, trace and cut a larger one.
-If it is too big, trace and cut a smaller one.
mark where the straps will go on the back of the helmet.
-There should be two straps, one on each side of the helmet.
-The straps should be about an inch from the edge of the helmet.
-Mark where you will punch holes for the straps with a pen or pencil.
Punch holes for the straps on the back of the helmet using a leather punch or scissors.
-Make sure that the holes are big enough for the strap to go through easily.
Put the face mask on your baseball helmet, starting with putting the straps through the holes on either side of the helmet.
-Tighten or loosen the straps as needed so that they are tight but comfortable.
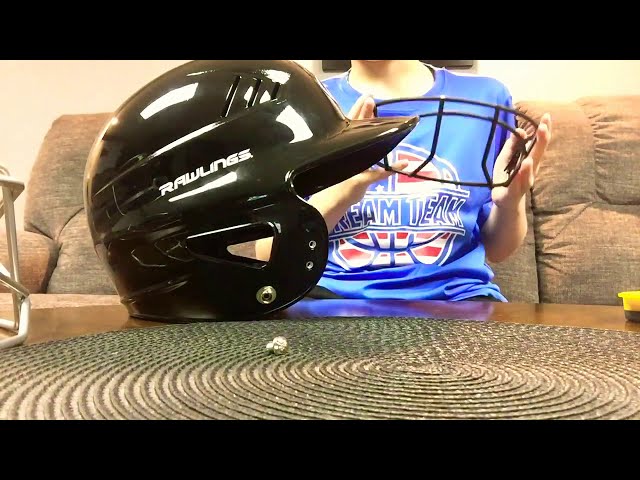
Make sure the face mask is the right size and shape to fit over the opening of the baseball helmet.
There are two main types of face masks for baseball helmets, the full coverage mask and the half coverage mask. The half coverage mask only covers the bottom half of the face, while the full coverage mask covers the entire face. There are pros and cons to both types of masks, so it is important to choose the one that is right for you.
The first step is to make sure that the face mask is the right size and shape to fit over the opening of the baseball helmet. The second step is to put on the baseball helmet. Once the baseball helmet is on, put the face mask over the opening of the helmet, making sure that it covers your nose and mouth. If you are using a full coverage mask, you will also need to make sure that it covers your eyes. Once the face mask is in place, use the straps on the side of the mask to secure it to the helmet.
Trace the outline of the face mask onto the foam sheet.
Using a pen or marker, trace the outline of the face mask onto the foam sheet. Cut out the tracing with a sharp knife or scissors. If the face mask is curved, you may need to heat the foam sheet with a heat gun to make it easier to mold around the helmet.
Cut out the foam sheet along the traced line.
1. Cut out the foam sheet along the traced line.
2. Wrap the foam sheet around the back of the helmet, and secure it with duct tape.
3. Cut out a hole for the face mask, and then attach the face mask to the helmet with duct tape.
4. Your baseball helmet is now complete!
Place the foam sheet over the opening of the baseball helmet.
Cut a foam sheet to the size of the opening of the baseball helmet. Next, cut a hole in the center of the foam for the player’s mouth. Make sure the hole is large enough for the player to breathe comfortably. Finally, tape or glue the foam sheet in place over the opening of the baseball helmet.
Use the adhesive to attach the foam sheet to the baseball helmet.
Use the adhesive to attach the foam sheet to the baseball helmet. The foam sheet should be big enough to cover the area of the helmet that will touch your face. You can use a thin layer of adhesive or a thicker layer, depending on how much support you want the foam to provide. Allow the adhesive to dry completely before continuing.
Place the face mask over the foam sheet.
The face mask should be big enough to cover the foam sheet completely. If it isn’t, you can trim the excess off with a utility knife. Once the face mask is in place, use a marker to trace around the edges of the mask. Remove the mask and use scissors to cut out the tracing.
Use the zip ties to secure the face mask to the baseball helmet.
Use the zip ties to secure the face mask to the baseball helmet. The first thing you will want to do is put the helmet on your head and adjust it so that it is snug but not too tight. Then, take the face mask and hold it up to your face. Align the top of the mask with the top of the helmet, and then use the zip ties to secure it in place. Start by threading the tie through one of the holes in the mask, and then pull it tight. Repeat this process for all of the holes in the mask. Once you have all of the ties in place, trim off any excess with a pair of scissors.