How to Put On a Tennis Overgrip in 5 Easy Steps
Contents
If you’re looking to improve your tennis game, one of the simplest things you can do is to make sure you have a good overgrip. In this blog post, we’ll show you how to put on a tennis overgrip in just 5 easy steps.
Introduction
In tennis, an overgrip is a layer of thin, absorbent material that is wrapped around the handle of the racket. Overgrips are usually made of silicone, polyurethane, or leather. They are used to increase the size of the handle, absorb sweat, and provide a more comfortable grip. Applying an overgrip is a quick and easy process that can be done in just a few minutes.
What is an overgrip?
An overgrip is a strip of material, usually about 2 to 3 inches wide, that is wrapped around the handle of a tennis racket. Overgrips are often made of synthetic materials such as polyurethane or silicone, and they serve two primary purposes: to increase the size of the handle and to improve grip. Many overgrips also have a textured surface to further improve grip. Overgrips are typically replaced when they begin to show signs of wear, such as fraying or loss of tackiness.
Why use an overgrip?
An overgrip is a thin, absorbent layer that goes over the existing grip on your tennis racket. Overgrips help to absorb sweat, add cushioning, and provide a softer feel. They can also extend the life of your racket’s grip by protecting it from wear and tear. Many players prefer overgrips to replacement grips because they’re less expensive and easier to install.
Installing an overgrip is a quick and easy process that anyone can do at home. All you need is a little bit of time and the right supplies. In just a few minutes, you’ll have a new overgrip on your racket that will help you play your best!
Step One: Prep the Racquet
Before you start, make sure you have the following materials: an overgrip, scissors, and adhesive tape. You’ll also need a clean, dry towel and a racquet with an old overgrip that needs to be replaced. If your overgrip is too slippery, you may want to sand it lightly with sandpaper before beginning.
Remove the old overgrip
If you’re using an overgrip for the first time, you’ll need to remove the old overgrip first. Start at the top of the grip and peel it off slowly, being careful not to tear the new overgrip. If the old grip is particularly stubborn, you can use a hairdryer to heat it up and make it easier to remove. Once the old grip is off, slightly rough up the surface of the racquet with sandpaper to help the new grip adhere better.
Clean the racquet’s handle
To start, you’ll need to make sure the handle of your racquet is clean and dry. Any dirt or grime will make it harder for the overgrip to adhere, so give it a good wipe-down with a towel before you start. If your racquet has an old overgrip that needs to be removed, use a sharp knife or scissors to cut it off as close to the base of the handle as possible. Be careful not to cut yourself!
Step Two: Place the Overgrip on the Racquet
In this step, you will need to take your overgrip and place it on the throat of your racquet. Make sure that the overgrip is positioned so that the writing is facing you. Once you have the overgrip in place, you can start wrapping it around the racquet.
Align the overgrip with the bevels on the handle
Once you have the overgrip in your hand, it’s time to start putting it on the racquet. Begin by holding the overgrip at the end of the handle, making sure that the overgrip is aligned with the bevels on the handle. If you are right-handed, this means that the overgrip will be angled towards the back of the racquet head; if you are left-handed, it will be angled towards the front of the racquet head.
Wrap the overgrip around the handle
Start at the bottom of the handle and wrap the overgrip around it. Make sure that the adhesive side is not touching anything as you wrap. You want to avoid having any air bubbles when you apply pressure later.
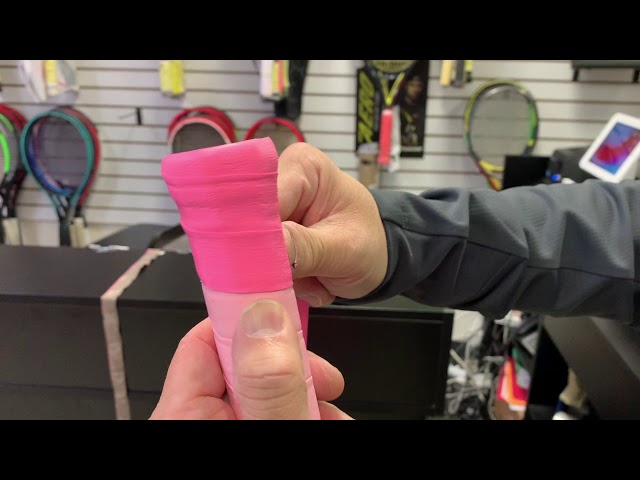
When you get to the top of the handle, overlap the overgrip by about an inch (2.5 cm). Then, take the end of the overgrip and tuck it underneath the overlapping section. This will create a seamless transition and make sure that the overgrip doesn’t come undone.
Step Three: Secure the Overgrip
To put on a tennis overgrip, you’ll need the following items: a tennis overgrip, a roll of tape, and scissors. Once you have these items, you’ll be able to put on the overgrip in just a few easy steps. Let’s get started!
Use adhesive tape to secure the overgrip
Place the beginning of the roll of adhesive tape on the bottom of the racket handle. Wrap the tape around the handle, making sure to overlap the edges of the tape as you go. When you get to the end of the grip, cut the tape and secure it in place. Trim any excess tape with a sharp knife or scissors.
Step Four: Trim the Overgrip
By now, the overgrip should be snug against the bottom of the grip and the end of the overgrip should be sticking out about an inch from the top of the grip. If it’s not, you can adjust it by gently pulling on the overgrip until it’s in the right position. Once it’s in the right position, take a sharp pair of scissors and trim off the excess overgrip.
Trim the overgrip to the desired length
To trim the overgrip to the desired length, use a sharp knife or scissors. If using a knife, be sure to grip the overgrip firmly in one hand while you cut it with the other. If using scissors, hold the overgrip still with one hand while you cut it with the other. Whichever method you use, take care not to cut yourself!
Once you have trimmed the overgrip to size, hold it in place on the racket handle and begin wrapping it around the handle. Start at the bottom of the handle and work your way up, making sure that each rotation is snug against the previous one. When you reach the top of the handle, trim any excess overgrip and tuck the end underneath the bottom layer of overgrip.
Conclusion
Now that you know how to put on a tennis overgrip, you can extend the life of your racquet and improve your game. Putting on an overgrip is a simple process, but it’s important to do it correctly. Use the tips in this article, and you’ll be playing with a new grip in no time.