How to Re-tape a Tennis Racket Handle
Contents
Learn how to re-tape a tennis racket handle with this easy-to-follow guide. All you need is a little time and some supplies from your local sporting goods store.

Preparation
In this heading, we are going to discuss the process of re-taping a tennis racket handle. This will include the tools and materials you will need as well as the process step-by-step. Re-taping your racket handle is a relatively easy process that only takes a few minutes. However, it is important to do it correctly in order to maintain a good grip on your racket and to protect your hand from blisters.
Gather the necessary materials
To re-tape a tennis racket handle, you will need the following materials:
-Tape measure
-Ruler or straight edge
-Scissors
-Tennis racket grip (or old towel/grip you are replacing)
-Sandpaper (optional)
-New racket strings (optional)
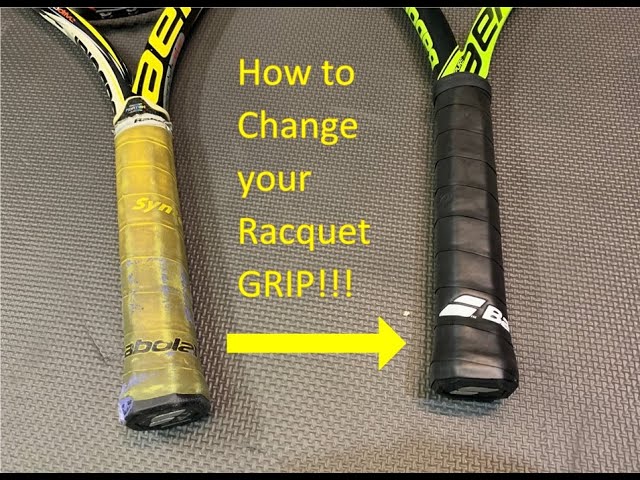
Clean the old tape off the racket
Start by removing the old, worn out grip tape from your racket. You can do this by peeling it off or using a utility knife to carefully cut it away. If the old tape is particularly stubborn, you may need to use a solvent such as acetone or mineral spirits to loosen it up. Be careful not to damage the racket’s handle while you’re removing the old tape.
Applying the New Tape
Before beginning, you will need to gather the following supplies: tennis racket, handle, old tape, new tape, scissors, and a Phillips head screwdriver. Make sure to have a clean work surface to avoid dirt and debris from getting caught under the new tape. It is also important to have a partner to help with this process.
Wrap the handle with the new tape
The first step is to lay the racket down on a flat surface, and start wrapping the new tape around the bottom of the handle. Wrap it tightly, and be sure to smooth out any bubbles as you go. You can use your fingers or a blunt object (like a pencil) to help with this.
Once you get to the top of the handle, begin wrapping the tape around the top in a spiral pattern, working your way down. Again, be sure to smooth out any bubbles.
When you get to the bottom of the handle, cut off the excess tape with a sharp knife or scissors. Be careful not to cut into the racket itself!
Secure the end of the tape
With the end of the tape in one hand, use your other hand to hold it in place on the racket handle. You can use your teeth to hold the end of the tape while you secure it with your other hand. If the tape is sticky side up, make sure the sticky part is facing down so it will adhere to the racket handle. If the tape is sticky side down, make sure the sticky part is facing up so you can easily peel it off when you’re finished. Wrap the end of the tape around the handle and secure it with a piece of clear tape or a rubber band.
Finishing Up
You’ve done it! Your tennis racket handle is now re-taped and ready for action. You may want to give the handle a few practice swings to get a feel for the new grip. If the grip feels too loose, you can always add more tape. If it feels too tight, you can undo the taped sections and start again. Thanks for following along!
Trim the excess tape
Once you have the racket handle wrapped and the end overlapping the starting end by about an inch, it’s time to trim the excess tape. You can do this with scissors or a sharp knife, but be careful not to cut into the racket handle itself.
Now would also be a good time to make any adjustments to the wraps if necessary. If the wraps are too loose or too tight, you can either add or remove wraps until you get the desired fit.
Test the racket’s grip
Now that the handle is re-taped, it’s time to test the racket’s grip. To do this, hold the racket in your hand and make sure that you can comfortably grip it. You should be able to hold the racket in your hand without it slipping or feeling too loose.