How to Rewrap a Tennis Racket in Five Steps
Contents
If you’re a tennis player, you know that rewrapping your racket is an important part of taking care of your gear. Here’s a quick how-to guide on rewrapping your racket in five steps.

Introduction
Whether you play tennis for fun or competitively, your racket is an important part of the game. Not only does it help you play your best, but it also represents a significant investment. That’s why it’s important to take care of your racket and keep it in good condition.
One way to do that is to regularly replace the grip tape. Over time, the grip tape will start to wear down and won’t be as effective at absorbing sweat and providing traction. When that happens, it’s time to re-wrap the grip.
Rewrapping a grip is a relatively simple process, but it does require some time and effort. In this article, we’ll walk you through the process step-by-step so you can get back to playing your best in no time.
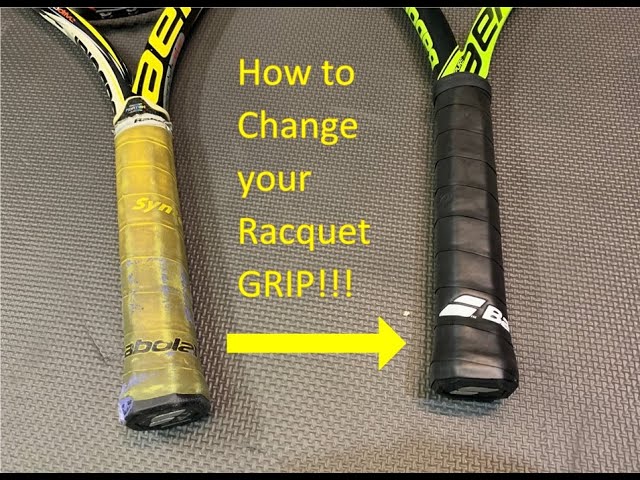
Step One: Remove the Old Grip
The first step is to remove the old grip from the racket. You can do this by either cutting it off with a sharp knife or carefully peeling it away. Be careful not to damage the underlying layer of tape.
Step Two: Clean the Racket
Once the old grip is removed, you’ll need to clean the racket before applying the new one. This will help ensure that the new grip adheres properly and lasts for a long time. You can clean the racket with a mild soap and water, or with rubbing alcohol.
Step Three: Cut the New Grip
Next, you’ll need to cut the new grip to size. The easiest way to do this is to lay the grip over the racket and use a pencil or pen to mark where you need to cut it. Then, simply use a sharp knife or scissors to cut along the line.
Step Four: Apply the New Grip
Now it’s time to apply the new grip. Start by peeling off the backing paper from one end of the grip. Then, align the grip on the racket and slowly start applying it, working your way from one end to the other. Once you reach the other end, use your fingers to smooth out any wrinkles or bubbles.
Step Five: Trim Excess Grip
Once you’ve applied the new grip, there will likely be some excess material hanging off of each end. Simply use a sharp knife or scissors to trim this off flush with the rest of the grip. And that’s it! You’ve now successfully rewrapped your tennis racket
Step Two: Clean the Racket
Once you have the old grip off, give your racket a good cleaning. Wipe away any dirt, dust, or debris that may have accumulated on the racket’s surface. If you plan on reusing the same overgrip, you can skip this step.
Step Three: Cut the New Grip to Size
Now that you have your grip taped in place, it’s time to cut it to size. You’ll want to leave about an inch of excess grip at the butt end of the handle and about a half-inch of excess at the top. With your scissors, carefully cut the grip along the lines of the existing one. Once you have a basic shape, you can trim it down to get a better fit.
Step Four: Apply the New Grip
Now that the old grip is off and the surface is clean, you can apply the new grip. Start by peeling the paper backing off of the grip. Then, align the top of the grip with the top of the handle, and wrap it around in a clockwise direction. Apply pressure to adhere the grip to the handle as you wrap. Continue until you reach the bottom of the handle, then trim off any excess material.
Step Five: Trim the Excess Grip
Once you have the grip tight against the bevel and you are happy with the grip job, use a sharp blade to trim the excess grip off flush with the bevel. If you find that the bevel is not flush with the grip, you can use a heat gun or lighter to slightly shrink the grip. Be careful not to burn yourself or melt the grip.
Conclusion
We hope this five-step guide has been helpful in rewrapping your tennis racket. A fresh grip can not only improve your play, but also make your racket look and feel new again. Be sure to follow the steps carefully and take your time to ensure a smooth, tight wrap. If you have any questions or concerns, please feel free to contact us. We’re always happy to help!