How to Teach Throwing a Baseball
Contents
If you’re looking to teach your child how to throw a baseball, you’ve come to the right place. In this blog post, we’ll share some tips and tricks on how to teach this essential skill. With a little patience and practice, your child will be throwing like a pro in no time!
Introduction
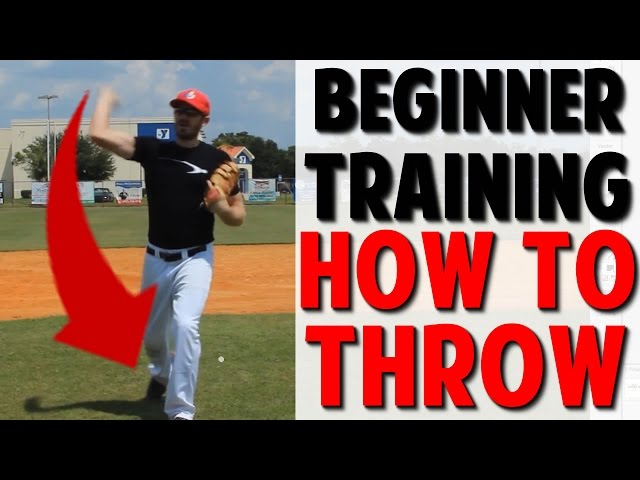
One of the most important skills in baseball is throwing the ball. A well-thrown ball can make all the difference in getting an out or giving up a run. Teaching someone how to throw a baseball correctly can be daunting, but with some patience and practice, it can be done.
Here are a few tips on how to teach throwing a baseball:
-Start by teaching the basic grip. The ball should be held in the glove hand with the fingers slightly apart. The thumb should be placed underneath the ball.
-Next, have the player assume a balanced stance with their feet shoulder-width apart. The weight should be evenly distributed between the feet.
-Once the player is in position, have them raise their arm up so that the hand is level with their ear. The elbow should be bent at a 90-degree angle.
-From this position, have the player push off their back foot and stride forward while keeping their arm level with their ear. As they stride forward, they should start to bring their arm down and release the ball at hip level.
-After releasing the ball, have the player follow through by extend their arm and snapping their wrist. The eyes should remain focused on the target throughout the entire motion.
With some time and practice, anyone can learn how to throw a baseball correctly. These tips should help make the process a little easier.
The Grip
The grip is one of the most important aspects of throwing a baseball. If you don’t have a good grip, you will not be able to throw the ball with accuracy or power. There are two main grips that you can use when throwing a baseball: the four-seam grip and the two-seam grip.
Four-Seam Fastball Grip
A four-seam fastball is the fastest type of fastball a pitcher can throw, and therefore it is also the most difficult to control. The ball grips the air better with four seams cutting through it, creating less drag and more velocity. The trade-off is that this extra speed makes it harder for the pitcher to put the ball where he wants it.
To grip a four-seam fastball, place your index and middle fingers along the narrow seams of the baseball, with your thumb placed directly underneath the ball. Your ring finger and pinky should be curled into your palm. When you throw the ball, you will want to release it with your index and middle fingers slightly ahead of your thumb. This will ensure that the ball spins correctly and doesn’t wobble in flight.
Two-Seam Fastball Grip
If you’re a pitcher, one of the most important things you need to know is how to grip the ball when throwing a fastball. The two-seam fastball is a commonly used pitch in baseball, and there are several different ways to grip the ball when throwing this particular pitch. In this article, we’ll show you one way to grip a two-seam fastball.
To grip a two-seam fastball, start by placing your index and middle fingers along the seams of the ball, with your middle finger slightly higher than your index finger. Then, place your thumb on the bottom of the ball, opposite your fingers. Your thumb should be positioned so that it’s touching the seam that runs directly under your index finger. When you’re ready to throw the pitch, release the ball from your hand bypronating your forearm (turning your palm from facing inward toward your body to facing outward away from your body). As you release the ball, snap your wrist forcefully to generate spin on the ball.
Changeup Grip
The changeup grip is very similar to a fastball grip, except for the positioning of the index and middle fingers. For a changeup, those two fingers should be placed on top of the baseball, instead of next to each other in-between the seams, as they are for a fastball. The rest of the steps for throwing a changeup are the same as for throwing a fastball.
Curveball Grip
A curveball is a type of pitches in baseball thrown with a spin so that its path curves as it approaches the batter. The curveball’s main purpose is to deceive the batter into swinging at a ball that appears to be coming straight toward home plate, but actually breaks out of the strike zone.
To throw a curveball, grip the ball with your middle and index fingers across the seams of the ball, and your thumb underneath it. As you throw the ball, snap your wrist downward and release the ball when your hand is above your hip. The spin from your fingers will cause the ball to break to the left if you’re right-handed (or to the right if you’re left-handed).
The Windup
The windup is the first part of the throwing motion. It starts with the pitcher getting into their stance, and then they bring their back leg up and around while they bring their arm back. The pitcher then brings their front leg up and throws the ball.
The Stretch
Now that the player is in the set position, it’s time to start the windup. The first part of the windup is called the stretch. The pitcher takes a step backwards with the non-pivot foot (For a righty, it’s the left foot. For a lefty, it’s the right foot.), while at the same time raising both arms above his head. The purpose of this is twofold. First, it gets the pitcher’s arms loose and ready to throw. Second, it acts as a timing mechanism. By the time the pitcher gets to this point in his windup, he should already have decided what pitch he’s going to throw and where he’s going to throw it.
Once the pitcher has raised his arms above his head, he brings his throwing arm (For a righty, it’s the right arm. For a lefty, it’s the left arm.) down and across his body while at the same time bringing his non-pivot foot up beside his pivot foot (For a righty, it would be bringing his left foot up next to his right foot. For a lefty, it would be bringing his right foot up next to his left foot.). This puts him in what is called the balanced position. From here, he is now ready to begin driving towards home plate.
The Release
The release is the critical moment in any pitch. As the baseball leaves your hand, a number of things need to happen in order for the pitch to be successful. The most important thing is to snap the wrist as the ball is released. This will give the ball spin and movement.
Four-Seam Fastball Release
Throwing a baseball is not as simple as just throwing it. Different types of pitches are thrown with different techniques, and each type of pitch is meant to do something different to the batter. The four-seam fastball is the most common type of pitch thrown in baseball, and it is meant to be thrown as fast as possible with very little movement. This makes it difficult for batters to hit because they have little time to react.
When throwing a four-seam fastball, grip the ball with your index and middle finger along the laces on either side of the ball. Your thumb should be underneath the ball, and your ring finger and pinky should be off to the side. When you release the ball, your fingers should come off of it at the same time so that it spins evenly. This will give the pitch less movement and make it easier for batters to hit if they make contact.
Two-Seam Fastball Release
The two-seam fastball is a grip that baseball pitchers use to get more spin and movement on the ball. The pitcher holds the ball with the two seams running across the top of the baseball. This grip gives the pitcher more control over the ball and makes it easier to throw a sinking fastball.
To throw a two-seam fastball, the pitcher should start by gripping the ball with the index and middle fingers on either side of the seam. The thumb should be placed on the bottom of the ball, just off-center. The pitcher should then cock their wrist back and turn their palm up so that their index and middle fingers are pointing towards the sky.
Once in this position, the pitcher should then snap their wrist forward and release the ball so that their index and middle fingers are pointing down towards home plate. This release point will give the two-seam fastball more spin and movement.
Changeup Release
Throwing a changeup is all about deception. The goal is to make the batter think they’re about to see a fastball, but then the ball comes in much slower. This can be tough to master, but with a little practice, you can throw an effective changeup.
To start, grip the ball with your middle and index fingers along the seams. Your thumb should be underneath the ball. As you wind up, pretend you’re going to throw a fastball. Then, at the last second, release the ball with your fingers instead of your thumb. This will cause the ball to spin less and appear slower to the batter.
Remember, it’s all about deceiving the batter. If you can make them think they’re about to see a fastball, but then deliver a changeup instead, you’ll be well on your way to becoming an great pitcher.
Curveball Release
The release is the act of throwing a pitch. There are various types of releases, such as the curveball release, the slider release, and the fastball release. Each type of release has a different way of throwing the ball, and each type is used for different types of pitches.
The curveball release is a type of release that is used to throw a curveball. To throw a curveball, the pitcher must grip the ball with his/her index and middle finger along the seam of the ball. The thumb should be on top of the ball, and the pinkie should be underneath. The pitcher then throws the ball using a snapping motion, and releases it at around 3/4 arm extension. The result is a pitch that breaks downwards and to the pitcher’s left (for a right-handed pitcher).
The slider release is a type of release that is used to throw a slider. To throw a slider, the pitcher must grip the ball with his/her index and middle finger along the seam of the ball. The thumb should be on top of the ball, and the pinkie should be underneath. The pitcher then throws the ball using a sweeping motion, and releases it at around 3/4 arm extension. The result is a pitch that breaks downwards and to either side (depending on which waythe pitcher throws it).
The fastball release is a type of release that is used to throw a fastball. To throw a fastball, the pitcher must gripthe ball with his/her index and middle finger alongthe seam ofthe ball. The thumb should be underneaththe ball,and the pinkie can either be underneath or not touchingthe ball at all. Thepitcher then throws the ball usinga overhandmotion,and releases itat around 3/4 armextension.The resultis a pitchthat goesstraight aheadand doesn’tbreak much(if at all).
Drills
Before you can teach someone how to throw a baseball, you must first understand the mechanics of throwing a baseball. This means knowing the proper grip, stance, and follow-through. Once you have this understanding, you can then begin to teach drills to help someone improve their throwing mechanics.
The Wrist Snap Drill
One of the most important aspects of throwing a baseball is the wrist snap. This motion gives the ball its spin and helps to control its movement. Many young players have trouble with this part of their throw, so it’s important to drill it often.
Here’s one way to do the wrist snap drill:
1. Have your player stand in a ready position, feet shoulder-width apart, weight balanced, and eyes on the target.
2. Have them cock their hand behind their head, keeping their elbow close to their ear.
3. From here, they should explosively snap their wrist forward while keeping their arm straight.
4. The ball should be released at the height of the snap, with the fingers pointing down toward the ground.
5. The follow-through should be long and smooth, finishing with the arm pointing toward the target.
The Power T Drill
One of the most important aspects of throwing a baseball is generating power. The Power T Drill is a great way to help young players develop the muscles needed to throw with power.
Here’s how it works:
-Have the player start in their normal throwing stance, then take a small step backward with their back foot.
-Next, have them bring their front foot up so that they are standing on their toes.
-From this position, they should throw the ball as hard as they can.
-After they’ve thrown the ball, have them return to their normal throwing stance and repeat the drill.
The Figure 8 Drill
One way to work on your arm swing and release point is with the figure 8 drill. This can be done with a partner or alone. To start, have your partner stand at a distance of about 30 feet in front of you, or set up a chair at that distance if you are working alone. You will need a baseball to complete this drill.
To begin, start with your arm extended out in front of you and the ball in your hand. Make a small loop in the air with the ball, tracing a figure 8 pattern. As you do this, focus on keeping your arm smooth and relaxed. Once you have made one complete loop, reverse the direction and trace the pattern in the opposite direction. Continue until you have made 10-15 loops in each direction.
After completing the figure 8s, it is time to work on your release point. For this part of the drill, you will again need a partner or a chair set up at 30 feet. Start by holding the ball in your hand with your arm extended out in front of you. This time, as you swing your arm around, release the ball when your hand reaches shoulder level on the opposite side from where you started. As you release the ball, focus on snapping your wrist so that the ball spins quickly and stays on course towards your target. Repeat this 10-15 times.
By practicing this drill regularly, you can help improve both the fluidity of your arm swing and the accuracy of your release point.
The Long Toss Drill
The long toss is a basic baseball drill that helps players to develop their arm strength and accuracy. It can be done with a partner or alone, and all you need is a baseball and a glove.
To start, stand at least 30 feet apart from your partner (or object). If you are doing this solo, find something to mark the 30-foot point.wind up and throw the ball as hard as you can to your partner (or the mark), making sure to follow through with your throw. Your partner should catch the ball and then throw it back to you. Repeat this 10-15 times.
As you get more comfortable with the drill, you can increase the distance between you and your partner (or the mark). Try to work up to throws of 60-70 feet. This drill will help to improve your arm strength and accuracy, both of which are important for pitching.
Conclusion
There are a few key things to remember when teaching someone how to throw a baseball. First, the grip should be firm but relaxed. The ball should be held in the hand with the fingers wrapped around it, not in the palm of the hand. Second, the arm should be raised above the shoulder and then brought down in a smooth, controlled motions. Third, the elbow should be kept close to the body and not allowed to drop below the shoulder. fourth, follow through with the arm after releasing the ball. Finally, remember to practice and have patience!