How To Teach Youth To Pitch Baseball?
Contents
Pitching baseball to youth can be a daunting task. Use these tips to make sure your young players are properly throwing the ball.

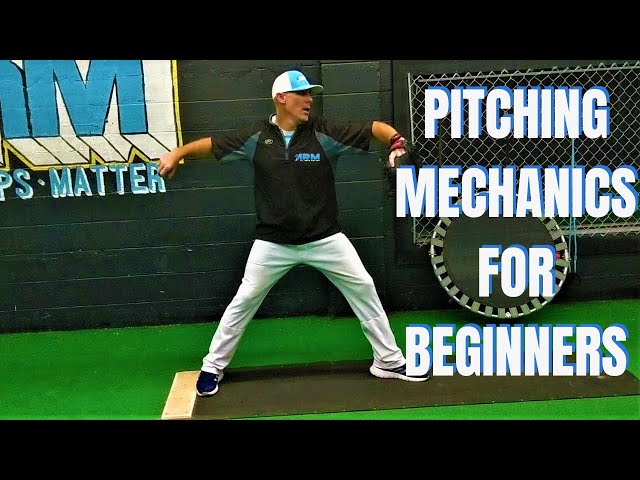
Pitching Mechanics
In order to teach a young player how to pitch, it is important to break down the mechanics of the pitch. When a pitcher steps on the mound, they should be in a stance with their feet shoulder-width apart and their weight balanced. The pitcher should then grip the ball with their fingers on the seams, and raise their arms up in front of them so that the ball is in line with their ear.
The Grip
One of the most important aspects of pitching is grip. The way you grip the ball gives you different kinds of pitches. Different grips also put different kinds of spin on the ball, which affects its movement.
It’s important to experiment with different grips to find what works best for you. But here are a few of the most common grips:
Four-seam fastball: This is the grip you use for your fastball. You hold the ball with your index and middle fingers along the two seams that run parallel to each other on opposite sides of the ball. Your thumb should be underneath the ball.
Two-seam fastball: This pitch is gripped similar to a four-seam fastball, but you place your index and middle fingers along the two seams that intersect at a point on opposite sides of the ball. Again, your thumb should be underneath the ball.
Curveball: For a curveball, you place your index and middle fingers along two seams on opposite side of the ball with your thumb underneath. Then, you cock your wrist toward your forearm so that your fingers are pointing down when you release the ball. When thrown correctly, this will put spin on the ball and make it break (curve) as it approaches the plate.
The Windup
The first thing a pitcher needs to do is get into the proper balance position. This is done by placing the feet shoulder-width apart with the body weight balanced evenly on the balls of both feet. The hands are then placed together in front of the body with the fingertips pointed towards the ground. This is the starting position for all pitches.
From this balance position, the pitcher will then use a short step towards home plate with the lead foot (right foot for right-handers, left foot for left-handers). As this step is taken, the pitching arm will begin to move backwards and upwards. The goal is to get the arm up to shoulder level so that it can be thrown down towards home plate with maximal velocity.
Once the arm is at shoulder level, the pitcher should be in a good position to throw the ball. However, before doing so, they will need to rotate their hips and shoulders so that they are facing home plate. This will give them more power when throwing the ball as it will allow them to use their entire body to generate velocity.
After rotating their hips and shoulders, pitchers should then release the ball towards home plate. As they do so, they should follow through with their pitching arm so that it ends up pointing towards center field. This ensures that all of the energy generated by their body goes into throwing the ball as fast as possible.
The Release
One of the most important aspects of pitching is the release point. The release point is the point at which the pitcher releases the ball from his hand. It is important for pitchers to have a consistent release point so that their pitches are thrown with accuracy.
There are two types of release points: overhand and sidearm. Overhand releases are when the ball is released from above the shoulder, and sidearm releases are when the ball is released from below the shoulder. There are advantages and disadvantages to both types of release points.
Overhand releases tend to be more accurate, but sidearm releases tend to have more movement on the ball. It is important for pitchers to experiment with both types of release points to find what works best for them.
Pitching Drills
You can use a number of drills to teach youth to pitch baseball. Here are a few examples:
The Stride Drill
The stride drill is one of the first drills young pitchers should learn and master. It is designed to teach proper stride and balance, and prepare the pitcher for the weight transfer necessary to pitch with power.
To execute the stride drill, the pitcher places his foot on the power line in his push-off position. He thencrow hops forward, leading with his back leg while keeping his head level. As he lands, he stitches his back foot next to his front foot, making sure both feet are on the line. From this balanced position, he can pitch with proper mechanics andcontrol.
The Balance Drill
One of the most important aspects of pitching is balance. The balance drill is a great way to help young pitchers learn how to find their center of gravity and maintain good balance throughout their pitching motion.
To do the balance drill, set up a small chair or stool in the middle of the pitching mound. Have your pitcher get in their windup position and then balanced on one leg on the chair or stool. From this position, they should be able to pitch without falling off. If they start to fall, they are not properly balanced.
Once they have mastered this drill, you can move on to the next level which is pitching while balancing on two legs on the chair or stool. This will help them learn to pitch with proper balance while also keeping their weight forward over the rubber.
The Separation Drill
One of the most important aspects of pitching is maintaining control over your body and your pitches. This is done in part by keeping your upper and lower body in sync throughout the entire pitching motion. The separation drill is designed to help young pitchers learn to keep their upper and lower body in sync as they go through their pitching motion.
To do the separation drill, have your young pitcher stand with their feet shoulder-width apart and their weight balanced evenly on both feet. From this position, have them raise their lead leg so that their knee is at hip level and Their toe is pointing towards the ground. From here, they should rotate their hips so that their lead shoulder comes across their body while keeping their back straight. Next, they should bring their throwing arm up so that it’s at ear level and then cock their wrist back behind their head. Once they’re in this position, they should explode forward, driving with their legs and throwing arm simultaneously. As they do this, they should release the ball and follow through with their throwing arm towards the target.
Pitching Tips
In this day and age, there are plenty of ways to learn how to pitch a baseball. You can read about it online, or even better, get some professional help. However, the most important thing is to have fun while doing it.
Use Your Legs
Pitching is one of the most important and complex skills in baseball. It takes years of practice to master the art of pitching. Youth pitchers need to learn the proper mechanics and develop the strength and stamina to pitch effectively.
One of the most important aspects of pitching is using your legs. Pitchers should use their legs to generate power and drive off the mound. The leg drive helps pitchers keep their balance and follow-through with their pitches.
Another important pitching tip is to keep your arm close to your body. This will help you generate more velocity on your pitches. You also want to make sure that you release the ball at the top of your throw. This will create more spin on the ball and make it harder for hitters to hit it.
Youth pitchers also need to develop a strong mental game. Pitching is a mentally challenging skill. Pitchers need to be able to control their emotions and focus on executing their pitches. If a pitcher gets too upset or distracted, it will affect his or her performance on the mound.
Pitching is a difficult skill to master, but youth pitchers can become great pitchers by practicing hard and using these tips.
Stay relaxed
One of the most important things for any pitcher to remember is to stay relaxed while pitching. If you are tense, you will not be able to throw the ball as fast as you normally could. Instead, your muscles will be tight and your arm will tire more easily. Relaxing will also allow you to have better control over where you want to place the ball.
Follow Through
One of the most important tips for teaching youth to pitch baseball is follow through. After the ball is released, the pitcher’s momentum carries him/her toward first base. As this happens, the pitching arm should continue moving forward, ending up pointing toward the catcher or batter. Depending on the type of pitch being thrown, the arm may end up above or below shoulder level.