How To Turn Shot Meter On Nba 2K21?
Contents
Looking to add a little more accuracy to your game in NBA 2K21? Then you’ll want to make sure the shot meter is turned on. Here’s a quick guide on how to do just that.
In order to turn on the shot meter in NBA 2K21, you will first need to access the “MyTEAM” menu. To do this, simply press the “MyTEAM” button on the main menu. Once you are in the “MyTEAM” menu, press the “Options” button and then select the “Settings” option. Scroll down to find the “Gameplay Settings” option and select it. finally, scroll down to the “Shot Meter” setting and set it to “On.”
Select “Options/Features.”
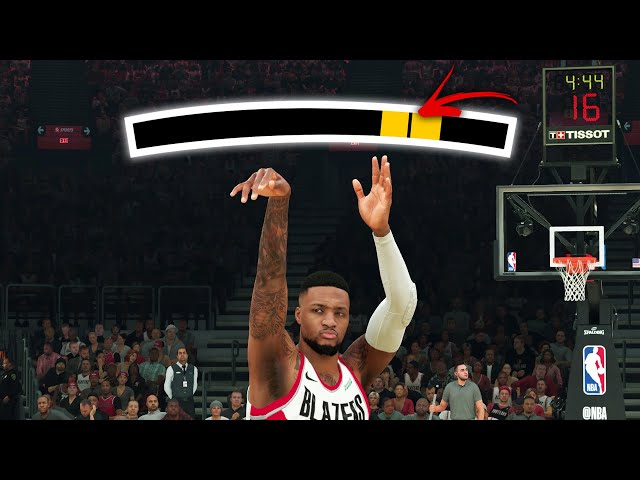
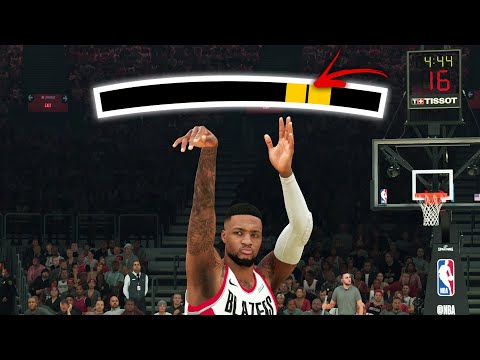
With the game started, pause the action and select “Options/Features” from the pause menu. Doing so will bring up the game settings. In the “Features” tab, scroll down until you see the “Shot Meter” setting. By default, this will be turned off. Simply toggle it to “On” and then back out to the game. The shot meter should now be visible when shooting the ball.
Scroll down to “Gameplay Settings.”
On the “MyCareer” tab, scroll down to “Gameplay Settings.” If you don’t see “Gameplay Settings,” you may need to select “Options” in the menu, and then scroll down to find it.
In Gameplay Settings, scroll over to “Difficulty.” There are a few different ways you can set your difficulty in NBA 2K21. You can choose between Rookie, Pro, All-Star, Superstar, and Hall of Fame.
Select “Shot Meter.”
From the main menu, go to “Features” and scroll to “Shot Meter.” Select “Shot Meter” and choose from the following options:
– RELEASE TIMING
– GREEN RELEASE
– SHOT METER SIZE
Choose “On.”
From the main menu, go to “Options/Features,” then choose the “Gameplay” tab. From there, scroll down to “Shot Meter” and choose “On.”