How to Upload Images to NBA 2K21
Contents
Looking to add some personal touches to your NBA 2K21 game? Here’s a quick guide on how to upload images to the game so you can have your own custom player photos!
Open NBA 2K21
Open NBA 2K21 and select “MyTEAM.” Choose the “Customize” option in the main MyTEAM menu. In the MyPLAYER Hub, select “MyCAREER” at the top of the screen.
Go to “MyCareer”
In order to upload images to NBA 2K21, you will need to go to the “MyCareer” section of the game. Once there, select the “Edit Player” option. This will allow you to access the player creation process, which is where you can upload images for your MyPLAYER.
Select “Player”
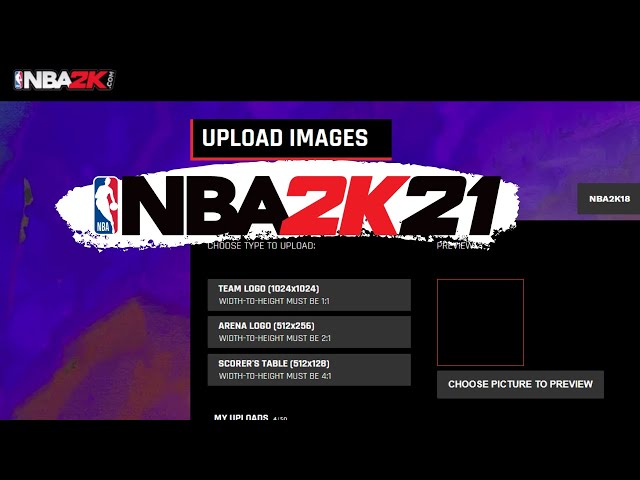
In order to upload images to NBA 2K21, you’ll need to first select “Player” from the main menu. Then, choose the “MyPlayer” option. From there, you’ll be able to select the “Customize Player” option. Once you’ve done that, select the “Edit Headshot” option. Finally, choose the “Upload Image” option and select the image you wish to use.
Choose “Edit Player”
In order to upload images to NBA 2K21, you will first need to choose the “Edit Player” option from the main menu. Once you have done this, you will be taken to a new screen where you will see a variety of options. One of these options will be “My Player Image.” Select this option, and then choose the “Upload Image” option. From here, you will be able to select the image that you would like to upload.
Select the “Gear” icon
From the main menu, select the “Gear” icon in the upper-right corner.
From here, go to “Options.”
Then, select “MyNBA2K21 Options.”
From the MyNBA2K21 Options menu, select “Manage Images.”
You should now be in the Manage Images menu.
Select “Change Photo”
In order to upload images to NBA 2K21, you will need to select the “Change Photo” option from the main menu. This can be done by selecting the “MyPLAYER” tab and then choosing the “Edit Player” option. From here, you will use the left stick to navigate to the “Change Photo” option and press the A button on your controller to select it.
Choose “Upload Photo”
To upload images to NBA 2K21, simply follow the steps below:
1. From the main menu, select “Options.”
2. Navigate to the “Features” tab.
3. Select “MyPLAYER.”
4. Choose “Upload Photo.”
5. From here, you can either upload photos from your console’s hard drive or transfer them from a USB storage device.
Select the image you wish to upload
In order to upload images to NBA 2K21, you will first need to select the image you wish to upload. You can do this by opening the “MyNBA2K21” app and going to the “Settings” tab. Once you are in the “Settings” tab, scroll down until you see the “Upload Image” option and select it.
Press “Confirm”
You’ve taken some amazing screenshots in NBA 2K21 and now you want to show them off to the world. Here’s how to upload images to NBA 2K21 for everyone to see.
1. Go to “MyCAREER” from the main menu.
2. Select “Customize Player.”
3. Choose the “Edit Headshot” option from the list of menu options that appears.
4. Press the “Confirm” button on the image you wish to upload.
5. Your image will now be uploaded for others to see in NBA 2K21!