How To Wrap A Tennis Grip?
Contents
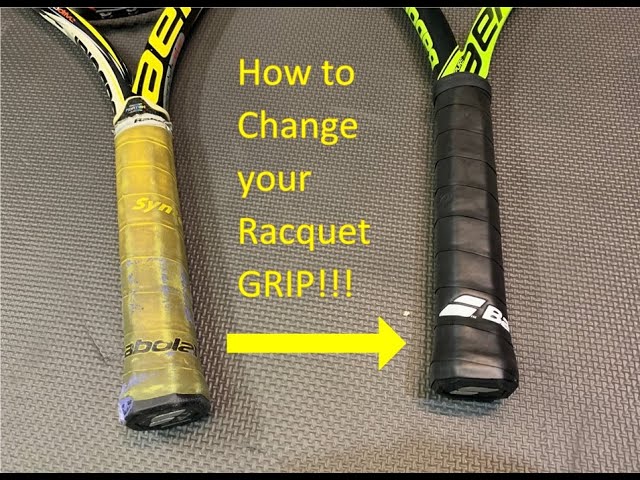
A step by step guide on how to wrap a tennis grip using the must have keywords.

Introduction
Wondering how to wrap a tennis grip? You’ve come to the right place! This guide will show you how to correctly wrap a tennis grip, step-by-step. After reading this guide, you’ll know everything you need to know about wrapping a tennis grip like a pro!
The first thing you’ll need is some supplies. For this project, you’ll need:
-Grip Tape
-Scissors
-Ruler or measuring tape
Once you have your supplies, you’re ready to get started!
Why do you need to wrap a tennis grip?
There are many reasons why you might need or want to wrap a tennis grip. The most common reason is to increase the size of the grip so it’s easier to hold onto the racket. A larger grip can also help absorb vibrations, which can help with tennis elbow. You might also wrap your grip if it’s worn down and you want to extend its life, or if you simply want to change the feel of the grip. No matter your reasons, wrapping a tennis grip is a fairly simple process.
The tools you need
In order to wrap a tennis racket grip, you will need a few supplies. You will need a piece of grip tape, a cutting tool, and an adhesive. You can find all of these supplies at your local sporting goods store.
The first step is to cut the grip tape to the desired length. Next, you will need to apply the adhesive to the back of the grip tape. Then, you will need to apply the grip tape to the racket handle. Start at the bottom of the handle and work your way up. When you get to the top of the handle, be sure to overlap the grip tape so that it is secure.
Finally, you will need to use the cutting tool to trim off any excess grip tape. That’s it! You have now successfully wrapped a tennis racket grip.
The steps
If you have never wrap a tennis grip before, don’t worry. It is not difficult, and you will only get better with practice. Just follow these simple steps and you will be on your way to feeling more comfortable with your racket in no time.
The first step is to select the right size grip. If you are not sure, it is always better to err on the side of too large rather than too small. You can always trim a grip down to size, but you cannot make it larger.
Next, take the grip and slide it onto the handle of the racket, making sure that the end with the adhesive strip is at the bottom. Once the grip is in place, begin wrapping it around the handle, starting at the base and working your way up. Make sure that each successive layer overlaps the previous one by about half an inch.
When you get to the top of the handle, trim off any excess grip material before tucking in the end of the strip. And that’s it! You have now successfully wrapped a tennis grip.
Wrapping a tennis grip with an overgrip
Most players use an overgrip to increase the thickness of their grip. An overgrip is a thin layer of padded material that is applied over the existing grip. This gives the player a better grip on the racket and also makes the racket more comfortable to hold.
When you are ready to apply your overgrip, start by cutting off a piece that is about 8 inches long. Then, peel back the adhesive backing and align the overgrip with the top of the grip. Once the overgrip is in place, begin wrapping it around the grip, making sure to overlap each layer by about half an inch.
Once you have wrapped the entire grip, cut off any excess material and use the adhesive strip to secure the end of the overgrip in place.
Wrapping a tennis grip with an undergrip
Undergrips are the foundation of any tennis grip, and it is important to get this step right before proceeding to the next steps. You will need:
-Undergrip (also called replacement grip, overgrip, or leather grip)
-Scissors
-Grip adhesive (optional)
1. Start by cutting the undergrip to the desired length. It is important to leave about 2 inches (5 cm) of extra undergrip at the end so that you can tuck it into the Palm Wrap later.
2. Unroll the undergrip and place it on top of the old grip, making sure that the extra material is at the bottom of the tennis racket handle.
3. If using grip adhesive, apply a thin line of adhesive along the length of the old grip. This will help to keep the new undergrip in place during subsequent steps.
4. Starting at the top of the racket handle, begin wrapping the undergrip tightly aroundOld Grip Adhesivethe racket handle, making sure to overlap each wrap by about half an inch (1 cm).
5. When you reach the bottom of racket handle, tuck in any extra material and cut off any excess with scissors.
Wrapping a tennis grip with a replacement grip
Grip size is important when finding a replacement grip for your tennis racket. The most important thing is that the new grip is comfortable for you to hold. You can find grips in a variety of sizes, from small to extra large. Once you’ve found the right size, it’s time to replace the old grip. You’ll need a few supplies before you get started:
– Replacement grip
– Grip tape (optional)
– scissors
– tacky or overgrips (optional)
Here’s how to wrap a tennis grip:
1. Start by removing the old grip from your racket. If there is any residue left on the racket, you can use a little rubbing alcohol to remove it.
2. Apply a few strips of grip tape to the handle of your racket, if desired. This will give the new grip something to adhere to and will help extend its life.
3. Unroll the replacement grip and place it over the handle of your racket so that about 2 inches (5 cm) of material hangs over the end of the handle.
4. Wrap one end of the grip around the handle and begin to slowly work your way up, making sure that the material is snug against itself as you go.
5. Once you reach the top of the handle, tuck the remaining material under itself and trim off any excess with scissors.
6. Apply an overgrip or tacky, if desired, for extra comfort and traction.
Conclusion
Once you have your materials, wrapping a tennis grip is a relatively simple process. Just follow these steps:
1. Start by removing the old grip from the racket, if necessary. Use a sharp blade to carefully cut away any adhesive residue.
2. Cut the new piece of grip tape to size, making sure it’s long enough to wrap around the entire handle of the racket.
3. Apply the adhesive side of the tape to the handle, starting at the bottom and working your way up.
4. Wrap the tape around the handle tightly, using a twisting motion to ensure a snug fit. Be sure to overlap each layer slightly so that the grip remains secure.
5. Trim away any excess tape, leaving a small border at the top and bottom of the grip. Apply pressure to all edges to ensure that the tape is firmly adhered.