How to Sew a Baseball Cap Pattern
Contents
New to sewing? Don’t worry, we’ll walk you through every step of the process for sewing a Baseball Cap pattern. You’ll be an expert in no time!

Introduction
In this tutorial, you will learn how to sew a baseball cap pattern. This is a great project for beginners and experienced sewers alike. We will be using a few different techniques to achieve the finished product, so please read through the entire tutorial before beginning.
you will need the following supplies:
-A baseball cap pattern (you can find this at most fabric stores or online)
-1 yard of fabric (we recommend cotton or denim)
-Thread
-A sewing machine
Once you have gathered your supplies, follow the steps below to sew your baseball cap pattern.
What You’ll Need
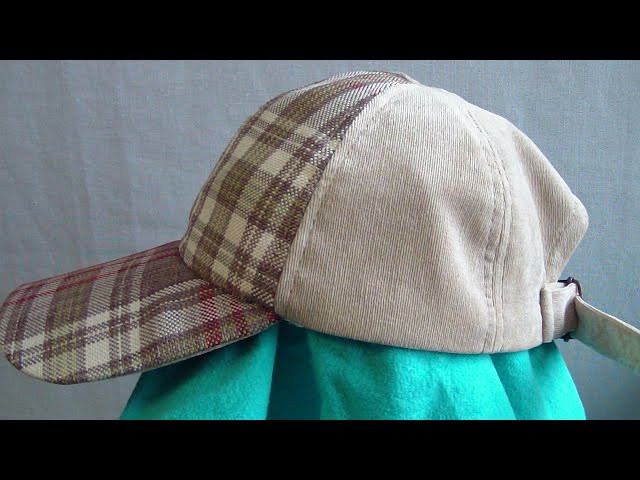
-A baseball cap
-Scissors
-A sewing needle and thread
-1/4 yard of fabric (lightweight cotton or polyester blend)
-A pen or chalk
Start by cutting a circular piece of fabric out that is about 6 inches in diameter. This will be the top of the baseball cap Next, cut a rectangular piece that is about 10 inches long and 6 inches wide. This will be the bill of the cap. Finally, cut a strip of fabric that is about 1 inch wide and 22 inches long. This will be used to create the band of the Baseball Cap
Preparing the Pattern
Use a baseball cap that fits well as a template to make a pattern for the crown and bill. For the crown, trace around the top of the baseball cap onto pattern paper, adding 1/2 inch (1.3 cm) for seam allowance. For the bill, trace around the brim of the Baseball Cap also adding 1/2 inch (1.3 cm) for seam allowance.
Cut out the two pattern pieces. Place the crown pattern piece on fold of fabric and cut out one piece. Do the same for the bill, except cut two pieces from fabric since the bill is double-layered.
Cutting Out the Pattern
Before you start cutting out the pattern, make sure you have the following materials:
-a baseball cap
-a sharp pair of scissors
-a piece of tissue paper or tracing paper
-a pencil
-a ruler or a straight edge
Once you have all of your materials, you will need to find a well-lit work space. You will also need to make sure the baseball cap is clean and dry. If it is not, you can clean it with a mild soap and water solution. Once the baseball cap is clean and dry, you can begin tracing the pattern onto the tissue paper or tracing paper.
To do this, you will need to remove the bill of the Baseball Cap Once the bill is removed, flatten out the crown of the cap. Next, use a pencil to trace around the circumference of the crown. Be sure to trace around both the inside and outside of the crown. Once you have traced around the circumference of the crown, determine where you want the brim of your new baseball cap to fall. Use a ruler or a straight edge to draw a line perpendicular to the circular line you just drew. This will be your brim line.
Now that you have traced your pattern onto the tissue paper or tracing paper, you can use scissors to cut out your pattern. Once your pattern is cut out, you can use it to cut your fabric. When cutting your fabric, be sure to add seam allowance around all edges of your pattern piece. A seam allowance is an extra amount of fabric that is used to sew two pieces of fabric together. A typical seam allowance is 1/2 inch (1.3 cm).
Assembling the Pieces
Now that you have all your pattern pieces cut out, it’s time to start sewing! Begin by assembling the pieces of the crown. If you are using a printable pattern, tape the pieces together first before cutting them out. This will make it easier to line everything up.
Next, take the two side panels and sew them together at the short edge. Then, take the top panel and sew it to the side panels at the long edges. Sew slowly and carefully around the curves.
Finally, sew the bill onto the front of the cap. Make sure that the right sides of the fabric are facing each other before sewing. Start at one end of the bill and sew around all three sides, leaving the straight edge open. Trim any loose threads and turn the bill right side out.
Sewing the Cap
Sewing the baseball cap pattern is a fairly simple process. Start by cutting out the top and bottom fabrics according to the provided pattern. Then, sew the two fabrics together along the edge with a sewing machine. Next, cut a hole in the center of the top fabric, and sew around the edge of the hole to create a opening for your head. Finally, decorate the Baseball Cap as desired!
Adding the Bill
After you have your crown and band sewn together, it’s time to add the bill! If you are using a purchased baseball cap you can skip this step. If you are making your own pattern, you will need to draft a bill and add it to your pattern pieces.
To draft a bill, start with a rectangle that is 8″ wide and 4″ tall. Fold the rectangle in half width-wise and cut out a curved edge along the top. Unfold the bill and your pattern piece is complete!
To add the bill to your pattern pieces, line up the raw edges of the bill with the raw edge of the front band. Pin in place and trace around the bill with a pencil or chalk. Cut out your new pattern piece, including the bill.
Finishing the Cap
After you have sewn the crown and bill of the baseball cap together, it is time to finish the cap. To do this, you will need to sew on a sweatband and attach a back strap.
Customizing Your Cap
Once you have your Baseball Cap pattern and you’ve decided on the perfect fabric, it’s time to start thinking about customizing your cap. If you want to add a team logo or player number, now is the time to do it. Many people choose to add embroidery to the bill of their cap, but you could also add appliqués or even paint your design if you’re Feeling creative.
If you want to add a little extra protection from the sun, you can line your baseball cap with UV-resistant fabric. This is also a good opportunity to add a pop of color or pattern to your cap if you’re using a solid-colored fabric for the exterior.
Once you’ve decided on all your customizations, it’s time to start sewing! Follow the instructions in your pattern to cut and assemble your baseball cap making sure to include all your custom details. If you’re new to sewing, don’t worry – there are plenty of resources available to help you through the process. And once you’ve made one, sewing a baseball cap will be a breeze!
Troubleshooting
##
One of the most common problems people have when sewing a baseball cap pattern is that the bill doesn’t end up being the right size. If your bill is too small, it will make the entire cap look disproportionate. If it’s too big, it will stick out weirdly and make the cap uncomfortable to wear. Here are a few tips for troubleshooting this issue:
– Make sure you’re using the correct pattern piece. The bill pattern piece should be wider at the top than the bottom.
– Check your seam allowance. Seam allowance is the extra fabric that you leave on each side of a seam that you’re going to sew. If your seam allowance is too small, it will make the bill smaller. If it’s too big, it will make the bill bigger.
– Adjust your stitching. If you’re stitching along the curve of the bill, try decreasing your stitch length. This will make the stitches tighter and help the fabric to lay flatter. If you’re stitching around the edge of the bill, try increasing your stitch length. This will make the stitches looser and help to prevent gathers.
If you’re still having trouble getting your bill to look right, try taking a look at some tutorials online or asking a friend for help.