How to Embroider a Baseball Cap
Contents
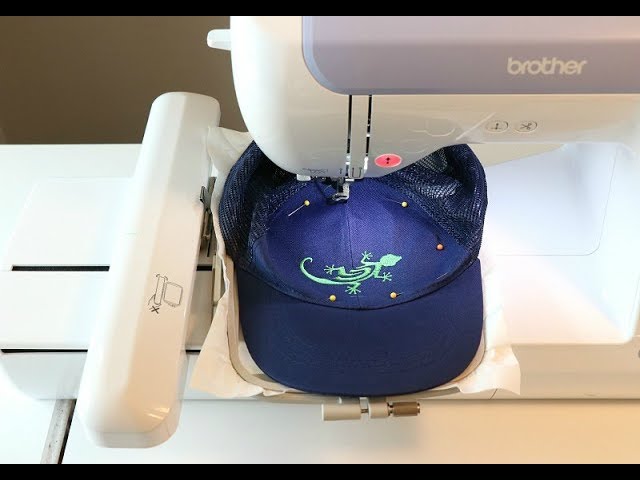
Learn how to embroider a Baseball Cap with this easy step-by-step guide. You’ll be able to personalize any baseball cap with this technique.

Materials needed
To embroider a baseball cap you will need a hoop, stabilizer, an embroidery needle, and thread. You will also need a water-soluble pen and a design.
Step-by-step guide
If you’re looking to add a personal touch to your baseball cap why not try embroidering it? Embroidering a baseball cap is a great way to show your team spirit or to simply add a unique and stylish design to your favorite hat. In this article, we’ll walk you through the steps needed to embroider a Baseball Cap so you can get started on creating your own custom hats.
To start, you’ll need to gather a few supplies. You’ll need an embroidery hoop that is slightly larger than the area you want to embroider, as well as embroidery floss and a needle. You’ll also need a piece of transfer paper, which you can find at most craft stores.
Once you have your supplies gathered, you’ll need to prepare your baseball cap for embroidery. To do this, simply remove the bill from the cap. Next, place the transfer paper onto the front of the cap, and use a pencil to trace the design you want to embroider onto the paper. Once your design is traced onto the paper, carefully cut it out.
Now that your design is ready, it’s time to start embroidering! Begin by threading your needle with about 18 inches of floss. Tie a knot in one end of the floss, and then insert the needle through the back of the fabric where you want your design to start. Pull the needle through until the knot stops it from going any further, and then trim away any excess floss.
To stitch your design onto the fabric, start by bringing the needle up through the fabric at point A in your design. Next, take the needle back down through point B. Continue this process until your entire design is complete. Once you’re finished stitching, knot off the end of the floss and trim away any excess.
Now that your stitching is complete, it’s time to remove the transfer paper from under your stitches. To do this, simply hold a piece of scrap fabric over top of your work and gently rub until all of the paper has been removed. And that’s it! You’ve now successfully embroidered a baseball cap!
Tips and tricks
Whether you’re a beginning stitcher or a seasoned professional, embroidering a baseball cap is a fun and easy project. With just a few tips and tricks, you can add a personal touch to your favorite headwear.
Before you begin, it’s important to choose the right type of thread and needle for the job. A good rule of thumb is to use a polyester thread in a size that is appropriate for the fabric weight. For example, if you are embroidering a lightweight cotton cap, you would use a size 60 thread. If you are embroidering a heavy wool cap, you would use a size 40 thread. As for needles, you will want to use either an embroidery needle or a sharp needle in sizes between 9 and 11.
Once you have gathered your supplies, it’s time to start stitching! When embroidering on a Baseball Cap it’s best to start with the brim. This will give you a flat surface to work on and will prevent the fabric from bunching up as you stitch. To secure your thread, make a small knot at the end and then insert your needle through the fabric from the wrong side of the brim. Come up through the fabric about ¼ inch from where your thread is knotted.
Now it’s time to start stitching! For this project, we recommend using a basic stitch such as the running stitch or backstitch. These stitches are easy to execute and will give your design a nice finished look. To create a running stitch, simply bring your needle up through the fabric and then back down in one continuous motion. Repeat this process until you have completed your design. To create a backstitch, bring your needle up through the fabric and then insert it back into the fabric about ¼ inch from where it first emerged. Now repeat this process in reverse – bring your needle up through the fabric ¼ inch from where it last came up and then insert it back into the fabric at the original starting point Continue until you have completed your design!
Once you have finished stitching, take care not to pull your threads too tight – this could cause your brim to pucker or distort. Instead, gently wet your threads with water and allow them to dry before trimming them close to the surface of the fabric. And that’s it – congrats on completing your first Red Baseball cap!
Common mistakes
One of the most common mistakes people make when embroidering a baseball cap is not stabilizing the fabric properly. The result is an uneven, puckered stitch. To avoid this, use a piece of stabilizer on the wrong side of the fabric. Another common mistake is not centering the design on the cap. Be sure to mark the center of both the cap and the design before you start stitching.
Variations
There are a few variations on the basic baseball cap embroidery technique. You can embroider just the bill, just the front of the cap, or stitch an all-over design. You can also add embellishments such as sequins or beads.
If you want to embroider just the bill of the cap, remove the top part of the hoop. Place the bottom part of the hoop over the fabric so that the needle will stitching in a downward direction when you start to sew. Start at one end of the bill and work your way around.
To stitch just the front of the cap, remove the back part of the hoop. Start at one side of the fabric and work your way across. When you get to the other side, stop and turn the fabric over before continuing to sew. This will ensure that your stitches are not visible from the back of the cap.
To stitch an all-over design, leave the entire hoop intact. Start sewing at any point on the fabric and continue until you have stitched your design completely.
Related projects
You can use embroidery to personalize just about any kind of fabric, including a Baseball Cap It’s a great way to add your own unique style to a plain cap, or to show support for your favorite team player, or club. You can purchase an embroidered baseball cap kit that contains everything you need to get started, or gather the supplies separately. Either way, with a little patience and practice, you’ll be able to produce professional-looking results.
More information
In this article, we’ll show you how to embroider a baseball cap using a few different techniques. We’ll also provide some tips on choosing the right design and thread for your project.
FAQ
Q: What is the best type of embroidery thread to use on a baseball cap?
A: Polyester thread is the best type of thread to use for embroidering a Baseball Cap because it is strong and durable. It is also resisting to fading from sunlight and other harsh elements.
Comments
Assuming you would like an expansion on the heading “comments”, there are a few different types of comments that can be made on a baseball cap The most common embroidery designs on caps arelogos and team names, but other personalization options include names, monograms, and slogans. If you are looking to add personalization to a ballcap, here are some tips on how to embroider a baseball cap
Embroidery designs
There are many different ways to embroider a Baseball Cap You can either purchase an embroidery design or create your own. If you decide to create your own design, you will need to use an embroidery software program. Once you have created your design, you will need to transfer it to your baseball cap You can either use an iron-on transfer or stitch it directly onto the cap.