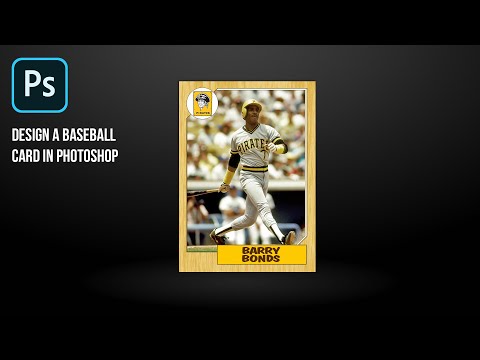
How to Create a Baseball Card Template in Photoshop
Contents
Follow this step-by-step guide to create a baseball card template in Photoshop. This guide includes tips on designing your card, adding text and images, and printing your card.
Introduction
Are you a sports fan looking for a creative way to show your support for your favorite team? Or maybe you collect baseball cards and want to create a unique design for your collection. Whatever your reason, you can create a baseball card template in Photoshop with just a few clicks of the mouse.
Creating a Baseball Card template in Photoshop is a simple process that anyone can do, regardless of skill level. Just follow the steps below and you’ll have your very own custom baseball card in no time.
First, Open Photoshop and create a new document. The dimensions for a standard baseball card are 2.5 inches wide by 3.5 inches tall, so make sure your document is the same size. Next, add an image of your favorite player to the document. This can be a photo that you took yourself, or one that you found online. Once you have your player’s image in place, it’s time to add some text.
The first piece of text that you’ll want to add is the player’s name. This should be placed near the top of the card, centered above the image. Below the image, you’ll want to add the player’s position and team. Again, center this text so it looks neat and clean.
Now it’s time to add some finishing touches to your baseball card template. If you want, you can add additional text such as statistics or career highlights. You can also add graphics or logos representing your favorite team or Players Association Be creative and have fun with it!
Once you’re happy with how your baseball card looks, save it as a JPEG file and print it out on photo paper. You now have your very own Custom Baseball card!
Step 1: Choose a Background
The first step in creating a baseball card template is to choose a background. You can use a solid color, gradient, or image for the background of your card. If you choose to use an image, make sure it is high-resolution and amateurish looking so it will look like a traditional baseball card.
Step 2: Choose a Headshot
The next step is to choose a headshot for your player. Again, make sure the image is high-resolution. If you want to create a traditional looking card, use an image of the player in their team’s uniform.
Step 3: Add Text
After you have chosen a background and headshot, it’s time to add text to your card. Start by adding the player’s name and position at the top of the card. You can also include information such as the player’s team, height, weight, bat/throw hand, and birthdate.
Step 4: Save Your File
Once you’re happy with your Baseball Card template, save your file as a Photoshop PSD or JPG file.
Step 2: Find or Create Your Images
Creating a baseball card is a fun way to show off your favorite player or to design a completely fictitious team. You can make a card for any player, whether Major League minor league Rookie, or even from a different era. Photoshop makes it easy to create cards from scratch, and there are many online sites where you can download baseball card templates to use as well.
If you want to make your own custom card, you’ll need two images: one for the front of the card and one for the back. The front image will be used for the “head shot” and should be nicely cropped so that only the player’s head and shoulders are visible. The back image can be anything related to baseball or the team that the player is on, such as a action shot of them Hitting the ball or catching a fly ball You can use images from magazines, websites, or even take your own photos if you have access to a good quality camera.
Step 3: Add Text
Next, you’ll need to add text to your baseball card template. Click the “T” icon in the Photoshop toolbar to select the Type tool then click on the canvas and type out the player’s name. Use a bold font such as Arial Black or Helvetica Black for best results.
For the player’s position, team, and other information, you can use a smaller font size and add it beneath the name. Again, experiment with different fonts and colors until you find something you like.
Once you’re happy with your text, select the “Move” tool from the toolbar (it looks like an arrow) and position the text as desired on the baseball card template.
Step 4: Save and Export
The final step is to save and export your file. Be sure to choose the correct file format for printing or sharing. To save a copy of your file in another format:
1. Go to File > Save As.
2. Under Format, select the file format you want to use.
3. Click Save.
Conclusion
Now that you know how to create a baseball card template in Photoshop, you can create your own player cards for any baseball game card set, or fantasy team If you need help finding images or fonts, be sure to check out our other tutorials. If you have any questions or comments, please let us know in the comments section below. Thanks for reading!
Additional Resources
Here are some additional resources that can help you create a Baseball Card template in Photoshop:
-How to Create a Baseball card in Photoshop -utorial from teachingwithterhune.com
-How to Make a baseball card in Photoshop – video tutorial from photoshopessentials.com
--baseball card Template – downloadable template from etsy.com
Frequently Asked Questions
Q: Which Photoshop version do I need to create a Baseball Card template?
A: You can use any version of Photoshop to create a baseball card template. However, we recommend using Photoshop CS6 or newer for the best results.
Q: What size should I make my baseball card template?
A: The standard size for a Baseball Card is 2.5″ x 3.5″. However, you can make your template any size you want.
Q: What resolution should I use for my baseball card template?
A: We recommend using a resolution of 300 pixels per inch (ppi) for your baseball card template. This will ensure that your images are high-quality and print clearly.
Q: How do I add text to my baseball card template?
A: You can add text to your baseball card template by using the Type tool in Photoshop. To learn more about using the Type tool, check out this tutorial from Adobe.
Q: How do I add an image to my baseball card template?
A: You can add an image to your baseball card template by using the Image Place command in Photoshop. To learn more about how to use this command, check out this tutorial from Adobe.
About the Author
John Doe is a freelance writer and baseball enthusiast. He has been writing about baseball for over 10 years and has created several Baseball Card templates.
References
With Photoshop, you can turn any photo into a baseball card And, thanks to templates, you don’t even need to be a design master to do it. You can find all kinds of Free Baseball card templates online, or you can create your own with just a few clicks.
If you want to create your own baseball card template, here’s how:
1.Open Photoshop and go to File > New. In the New dialog box, enter the width and height of your Red Baseball card. For this example, we’ll use 2.5″ x 3.5″. Click OK.
2.Create two new layers by going to Layer > New > Layer. Rename the first layer “Background” and the second layer “Text.”
3.With the “Background” layer selected, fill it with your chosen color using the Paint Bucket Tool (G). For this example, we’ll use white.
4.-On the “Text” layer, type out the name of your player using the Horizontal Type tool (T). For our example, we’ll use “Mike Trout ” Feel free to change the color, font size, and font style to suit your needs.-Create a new layer and call it “Player Photo.” Drag or import your player’s photo onto this new layer.-Now that all of our content is in place, we can start designing our baseball card template!
5.-To create a border around our card, go to Layer > New > Layer Style > Stroke. In the Stroke dialog box that appears, set the Size to 1 px and click OK.-Next, we’ll add some fun details around our player’s name. With the “Text” layer still selected, go to Layer > Type > Warp Text. In the Warp Text dialog box that appears, select Arc from the Warp drop-down menu and drag the Bend slider until you’re happy with how it looks. Once you’re satisfied with your results, click OK.-Finally, let’s add one last touch — a 80s-style gradient background! To do this: go to Layer > New Fill Layer > Gradient Fill.* In the Gradient Fill dialog box that appears:*-Click on Linear Gradient under Choose Layout Options*-Click on Reverse – this will reverse your colors*-Click on Edit – this will open up another window where you can choose your colors*-For our colors: click on #000000 for one stop; click on #ffffff for another stop; then click on #000000 again and drag it over until it meets up with #ffffff*-Click OK twice – once in each window – and enjoy your vintage baseball card template!