How to Make a Baseball Pinata
Contents
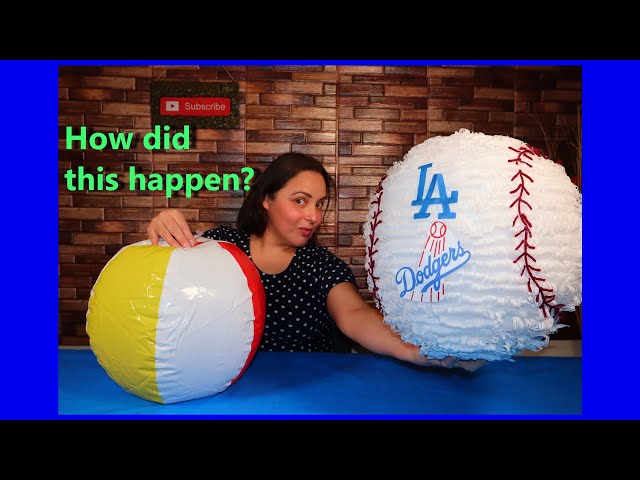
It’s baseball season and what better way to celebrate than by making your own baseball pinata! Follow these simple steps and you’ll have a fun decoration for your next baseball-themed party

Introduction
A pinata is a fun addition to any baseball party and they’re not as difficult to make as you might think! With a little bit of time and effort, you can create a masterpiece that will have all the kids at the party begging for a turn.
Here’s what you’ll need:
-A large balloon
-Newspaper
-Flour
-Water
-Scissors
-Candy or small toys
-String
To start, fill the balloon with air and tie it off. Then, use the scissors to make a small hole in the top of the balloon. Next, mix together equal parts flour and water to create a paste. Dip strips of newspaper into the paste, then lay them on top of the balloon. Continue until the entire balloon is covered.
Note: It’s important to make sure that the layers of paper are nice and thin, otherwise they will be too heavy and your pinata will break.
Once the paper has dried, use the scissors to make two small holes near the top of the pinata (this is where you’ll insert the string later). Then, carefully poke a hole in the bottom of the pinata and begin filling it with candy or small toys. Once it’s full, use tape or glue to seal off the bottom.
Finally, insert a piece of string into each of the holes near the top of the pinata and tie them off. Hang your pinata from a tree or ceiling beam, then let the fun begin!
What You’ll Need
To make a baseball pinata, you will need the following items:
-1 ball
-2 pieces of cardboard
-Masking tape
-Aluminum foil
-Scissors
-Paper mache paste
-Crepe paper or tissue paper
-String
-Candies or small toys
Step One: Making the Base
The first step to making a baseball pinata is to create the base. You can use a balloon as the base, or you can use a paper mâché base. If you are using a balloon, blow it up to the desired size and then tie it off. If you are using a paper mâché base, you will need to create a frame out of cardboard that is the desired size and shape of your baseball. Once you have your frame, cover it in strips of newspaper dipped in a mixture of flour and water. Allow the paper mâché to dry completely before moving on to the next step.
Step Two: Making the Sides
Now that the top and bottom of your pinata are complete, it’s time to move on to the sides. Cut two more sheets of newspaper into strips, about 1-2 inches wide. You’ll need enough strips to go around the entire circumference of your pinata, with a bit of overlap.
To attach the strips, start at the bottom edge of your pinata and use a glue stick to attach one end of a strip to the edge of the pinata. Continue adding strips until the entire circumference is covered. Once all of the strips are in place, use a second layer of strips to reinforce the sides and make sure everything is secure.
Step Three: Making the Top
Using the scissors, make a one-inch cut into the end of each triangle. This will be where you insert the candy later on. Next, take your strip of white crepe paper and glue it around the top edge of the triangles, making sure to leave about an inch of extra crepe paper at the end so you can tie it off later. Once you have wrapped all six triangles, take the remaining crepe paper and glue it around the bottom edge of the triangles.
Step Four: Assembling the Pinata
Now that you have all of your materials, it’s time to start putting your pinata together!
1. Begin by taking your cardboard tube and cutting it in half with a sharp knife. You should now have two halves that are each about 18 inches long.
2. Next, use the duct tape to secure one end of one half of the cardboard tube to the bottom edge of one side of the cardboard rectangle. Make sure that the tube is placed perpendicular to the rectangle, so that it forms a “T” shape.
3. Once the first half of the tube is secure, do the same with the other half of the tube on the other side of the cardboard rectangle. You should now have a “X” shape, with two pieces of cardboard forming the base and two tubes forming the sides.
4. Next, take one of your tissue paper streamers and tape one end to the top Inside Edge of one side of the pinata “X”. Wrap the streamer around and around until you reach the top inside edge of the opposite side, then secure it with tape. Repeat this step with all four streamers, placing them evenly around the sides of the pinata so that they form a “cage”.
Your pinata is now assembled and ready to be filled!
Step Five: Decorating the Pinata
Now that the pinata is fully assembled, it’s time to decorate! This is the fun part where you can really let your creativity shine. You can use any kind of craft supplies you have on hand to decorate the pinata, but we recommend using paper or fabric streamers, tissue paper, and pom poms.
Start by wrapping the streamers around the base of the pinata. You can use one color or multiple colors – it’s up to you! Once you’ve wrapped the streamers around the base, use scissors to cut slits all around the pinata. Then, take your tissue paper and stuff it into the slits. This will give the pinata a fun, colorful look.
Finally, use hot glue or tape to attach pom poms around the top of the pinata. Once again, you can use one color or multiple colors – it’s totally up to you! We also recommend adding a few extra pom poms inside the pinata before sealing it up. This way, when kids hit the pinata and it breaks open, a shower of pom poms will fall out!
Step Six: Hanging the Pinata
The easiest way to do this is to use two sturdy pieces of string or twine, each about three feet long Cross the strings over the top of the pinata so they form an X, and tie them together securely. Make sure the knot is big and bulky so it won’t pull through the paper. Then, simply tie the loose ends of the string to something sturdy – a tree branch, a clothesline, or even a doorknob.
Step Seven: Filling the Pinata
The next step is to fill the pinata. You can use any type of candy or small toy that will fit through the opening. Once you have your fillings, tie the end of the twine around the opening of the pinata to secure it shut.
Conclusion
You can use a baseball pinata as a fun and festive decoration for a baseball-themed party They are also great for teaching children about the Game of Baseball Baseball pinatas can be made from paper mache or cardboard, and they can be decorated with paints, markers, or construction paper.