How to Create a Baseball Uniform Template
Contents
Whether you’re starting a new baseball team or simply want to give your current team a fresh look, creating a baseball uniform template is a great way to get started. Follow these simple steps to create your own baseball uniform template that you can use for years to come.

Introduction
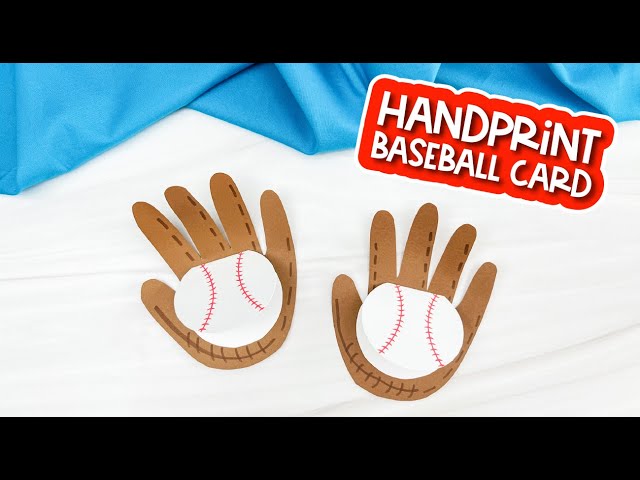
Creating a baseball uniform template can be a fun and easy way to show your support for your favorite team You can use a variety of materials to create your template, but construction paper is usually the best option. You’ll also need scissors, glue, and markers or crayons.
First, trace a baseball diamond onto your construction paper. Then, cut out the diamond shape.
Next, trace the outline of a baseball onto another piece of construction paper. Again, cut out this shape.
Now you should have two shapes: a baseball diamond and a baseball.
Glue the baseball onto the center of the diamond shape. This will be the body of your uniform template.
Next, use your markers or crayons to add details to your uniform template. For instance, you could color in the sleeves and neckline of the uniform. You could also add a player’s name and number to the back of the uniform template.
Once you’re finished adding details, your baseball uniform template is complete!
What You’ll Need
To create a Baseball Uniform template, you’ll need the following items:
– A printer
– White poster board or heavy cardstock
– Straight edge or ruler
– Pencil
– Scissors or exacto knife
– Glue or tape
Instructions:
1. Use your ruler and pencil to draw a basic outline of a baseball jersey on your poster board. You can make the jersey as simple or as detailed as you like. Keep in mind that you’ll need to leave space to add the player’s number later on.
2. Cut out your jersey template. If you’re using an exacto knife, be sure to use a straight edge to guide your cuts.
3. Trace around your template onto another piece of poster board or cardstock. Cut out this second jersey – this will be the back of your uniform template.
+ You can also add additional details to the back of the jersey, such as the player’s name or a team logo.
+ If you’re adding adhesive details like these, it’s best to do so before attaching the front and back halves of the uniform together. Otherwise, you risk peeling off any details that extend over the seam between the two halves. And no one wants a wonky looking baseball uniform!
4. Use glue or tape to attach the two halves of your uniform template together along the sides and sleeves (if applicable). Make sure that all edges are lined up neatly before attaching – otherwise, your final product won’t look as polished. Allow the glue or tape to dry completely before proceeding to the next step.
5 Penalty minutes for each number not worn by any of team’s players on field at same time!
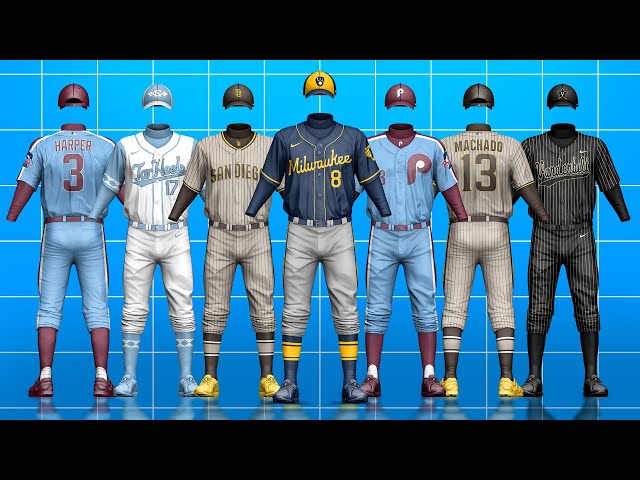
Step One: Choose a Base Template
The first step in creating a baseball uniform template is to choose a base template. There are many sites that offer free templates, but it is important to make sure that the template you choose is compatible with the software you will be using to create your uniforms. Once you have found a compatible template, download it and open it in your software program.
Step Two: Edit the Template
Once you have opened the template in your software program, you will need to edit it to fit your team’s needs. Start by adding your team’s colors, logo, and player names. You can also add any special instructions or notes that you would like your players to see when they put on their uniforms. When you are finished editing the template, save it as a new file.
Step Three: Print It Out
The last step in creating your baseball uniform template is to print it out. Make sure that you print out enough copies for each player on your team so that they can each have their own uniform. Once you have printed out the uniforms, cut them out and Tape or pin them onto each player’s shirt. Now you are ready to play ball!
Step Two: Find or Create Images
The next step in creating your baseball uniform template is to find or create images. If you have a logo or other image that you want to use, you can search online for free Clip Art or stock photos. There are also many sites that offer free printable logos. If you don’t have a specific image in mind, you can browse through these options until you find something that suits your needs.
Once you have found the perfect image, print it out on heavy cardstock so that it will be durable enough to last through multiple uses. If you are using a royalty-free or public domain image, be sure to print out the license information so that you can keep it on hand in case you ever need it.
Step Three: Assemble Your Template
Now that you have all the necessary measurements, you can start putting together your baseball uniform template. Use a sheet of graph paper or a design program to sketch out the basic silhouette of the jersey and pants. Include all the features you want, such as button placements, belt loops, and pockets. Once you’re happy with the overall look, add in the specific measurements you took earlier. Make sure to include seam allowances so that your finished product will fit properly.
Now is also a good time to think about what kind of fabric you want to use for your uniform. If you’re looking for a traditional look, use a white cotton fabric for the jersey and grey flannel for the pants. For a more modern look, try using performance fabrics in team colors Remember that darker colors will absorb more heat from the sun during those hot summer games so keep that in mind when making your selection.
Once you have your template assembled, it’s time to start construction!
Step Four: Customize Your Template
Now that you have your baseball uniform template, it’s time to customize it to fit your team. Here are some things you’ll need to consider:
-Your team’s colors
-Your team’s mascot
-Your team’s home state or country
-Your team’s league (if applicable)
Once you have considered all of these factors, you’re ready to start customizing your template. You’ll want to add your team’s colors, mascot, and home state or country to the template. You may also want to add your team’s League logo if applicable.
Step Five: Save and Export
Now that you have your baseball uniform template complete, you need to save and export it so that you can use it for printing. To do this, click on the “File” menu and then select “Save As.” Choose a name for your file and then select “JPEG” from the file type drop-down menu. Click “Save” and then choose a location on your computer to save the file. Once the file has saved, you can now print it out or email it to whoever needs it.
Conclusion
After you have chosen the design of your baseball uniform template, it is time to finalize the colors and adding details. You can either use a pre-defined color palette or create your own. Make sure you have enough colors to represent all the different elements in your design. Once you are happy with the colors, start adding details such as names, numbers, and team logos.
Credits
Design by Sue Rowe
The baseball uniform template shown here was created by Sue Rowe, a former High School and college player who now designs uniforms for teams across the country. The template can be used for both little league and adult teams.
Sue Rowe has been designing baseball uniforms for over ten years. She has worked with teams at all levels, from little league to professional. In addition to her work with baseball teams Sue has also designed uniforms for football, basketball, and Hockey teams
Further Reading
If you want to learn more about Baseball Uniforms and how to create templates for them, check out these resources:
-The Unofficial Guide to baseball uniforms by Marc Okkonen
-Designing baseball uniforms by Chris Creamer
-Creating Your Own baseball uniforms by Jackie Schiffer