How to Customize Your Baseball Cards
Contents
You can now customize your baseball cards with our new online tool. Follow these simple steps and you’ll have a one-of-a-kind card in no time!

Introduction
Looking to add a personal touch to your baseball cards? Customizing your cards is a great way to show off your unique style, and it can be easier than you think! Here are a few ideas to get you started.
What You’ll Need
To get started, you’ll need the following supplies:
-Baseball cards
-Scissors
-Glue or tape
-Markers, crayons, or colored pencils (optional)
Now that you have your materials, you’re ready to begin customizing your baseball cards!
Step One: Choose Your Design
The first step in customizing your baseball cards is to choose the right design. You’ll want to consider the overall look and feel of the cards, as well as any special features or elements that you want to include. There are a variety of design software programs available that can help you create professional-looking cards, or you can create your own design from scratch.
Once you’ve decided on a design, you’ll need to select the paper stock that will be used for your baseball cards There are a variety of paper stocks available, and each has its own benefits and drawbacks. You’ll want to choose a paper stock that will give your cards a professional look and feel, but that is also durable enough to withstand repeated handling.
After you’ve selected your design and paper stock, you’ll need to print your Baseball Cards You can print your cards yourself using an inkjet or laser printer, or you can have them printed professionally. Professional printing services can provide high-quality prints, but they will be more expensive than printing your cards yourself.
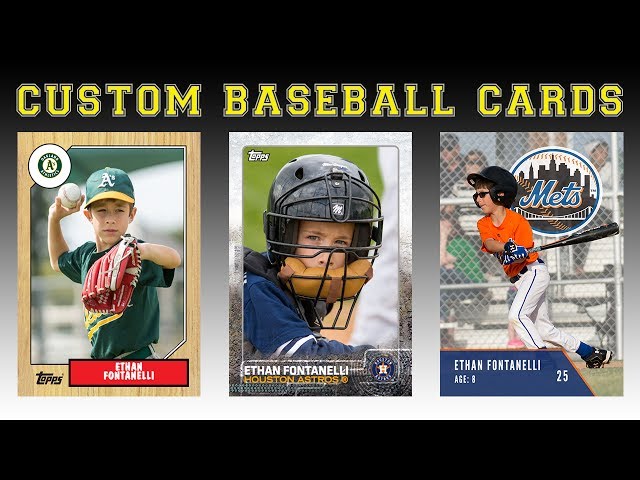
Step Two: Find or Create Images
The next step is to find or create images for your baseball cards If you have a digital camera, you can take your own photos of family members, friends, pets, or anything else you want to put on your card. If you don’t have a digital camera, you can use images from the internet (just be sure to save them as .jpg files), orscan pictures from magazines or other sources. You can also find free online images by doing a Google search for “free clip art” or “free images.”
Step Three: Print Your Cards
The fun part! You’ve spent time getting to know your market, you’ve designed attractive and professional-grade Baseball Cards and now it’s time to get them printed. Ideally, you should look for a printing company that specializes in sports cards alternatively, any reputable printing company should be able to do a great job.
Before you print your baseball cards though, there are a few things to keep in mind. First, unless you’re planning on selling your cards or giving them away as Promotional items, there’s no need to get them printed on the highest-quality paper stock available. It’ll just cost you more money without adding any real value to the card.
Second, make sure that the company you’re using offers some sort of Satisfaction Guarantee; that way, if you’re not happy with the quality of the finished product, you can get your money back or have the cards reprint
Step Four: Cut Out Your Cards
Now that you have your materials, it’s time to start cutting out your baseball cards Using a sharp knife or a pair of scissors, carefully cut out each card, being sure to not damage the surrounding paper. Once you have all of your cards cut out, you can begin customizing them to your liking.
Step Five: Add Finishing Touches
After you have designed and printed your baseball cards it is time to add the finishing touches. You can choose to add a glossy or matte finish to your cards. If you are adding a glossy finish, make sure that you use a laminating machine or photo paper to protect your card. You can also choose to add a protective sleeve to your card. This will help keep your card in mint condition.
Step Six: Store or Display Your Cards
Now that you have your delicious cards, it’s time to choose how you want to store or display them. If you are a competitive player, you will want to keep your cards in some sort of protective case so that they stay in mint condition. You can buy special baseball card cases at most hobby shops. If you’re not worried about condition and just want to show off your sweet collection, then there are a few different things you can do. You could get a album and put transparent plastic pockets on the pages to hold your cards, or get a three-ring binder with plastic sheets. Another option is to frame some of your favorite cards and hang them up on your wall like mini-posters. Whatever method you choose, make sure you enjoy looking at your baseball cards as much as possible!
Conclusion
In conclusion, there are many ways to customize your baseball cards You can choose to add text, images, or both. You can also select the perfect font and colors to match your team or favorite player. With a little creativity, you can create one-of-a-kind cards that are sure to be a hit with any baseball fan
FAQs
Q: How can I customize my baseball cards?
A: You can customize your baseball cards by adding text, images, or both. To add text, simply click on the “Text” button in the upper right-hand corner of the card editor. To add images, click on the “Images” button. You can also add images by dragging and dropping them onto the card.