How to Draw a Baseball Bat
Contents
Looking to add a baseball bat to your drawing repertoire? Here’s a step-by-step guide on how to draw a baseball bat that will have you feeling like a pro in no time!
Introduction
Assuming you would like an expansion on the heading “Introduction”:
In baseball, the bat is often referred to as the “tool of the trade.” Bats are made from a variety of materials, including wood, metal and composites. They come in different sizes, weights and lengths to fit the needs of every hitter. If you’re interested in learning how to draw a baseball bat follow these steps.
What You Will Need
-Construction paper
-Scissors
-Glue
-Markers or crayons
Instructions:
1. Cut a rectangle out of the construction paper. This will be the barrel of the bat.
2. Cut a smaller rectangle out of the construction paper and glue it to the top of the first rectangle. This will be the handle of the bat.
3. Use markers or crayons to add details to your bat.
Step One
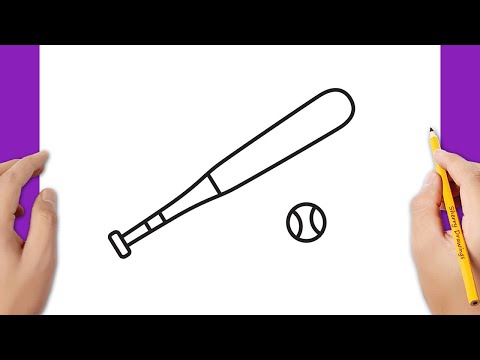
Start by sketching a clue shape in pencil. This doesn’t need to be exact, but should be close to the guide you want your baseball bat to look like. From there, begin drawing the barrel of the bat. The barrel is the wide part of the bat near the top.
Step Two
After you have evenly divided the circle into fourths, it is time to start drawing the baseball bat The first thing you will want to do is draw a curved line from the top right corner of the circle to the bottom left corner. This will be the bat’s handle. Next, draw a line straight up from the center of the handle. This will be the beginning of the barrel of the bat. Finally, start drawing a curve from the top of the barrel down to where it meets the handle. Remember to make this curve fairly wide, as it will be the sweet spot of the bat!
Step Three
Use a path to extend the line from the top of the oval to the bottom. This will be the bat’s handle.
Step Four
Now that you have the basic shape of the bat, you can start adding in the details. First, draw a horizontal line across the bat about 1/3 of the way down from the top. This will be the “label” line, where the brand name of the bat will go. Then, add two small rectangles on either side of the bat near the top for the grip.
Next, start drawing the contours of the barrel. The barrel is the wide part of the bat near the bottom. Make it flared at the bottom so it’s wider than it is at the top. Then, add a few lines going down the length of the barrel to indicate its round shape.
Finally, draw in some small details like rivets or screws on either side of the bat near where the grip is. You can also add a few lines on the barrel to make it look like it’s made of wood planks. Erase any pencil lines that are showing through and you’re done!
Step Five
Now that the basic shape of the bat is complete, it’s time to add some details. Start by drawing a line down the center of the bat. This will help you place the details evenly on both sides.
Next, draw two lines perpendicular to the center line, about 1/3 of the way down from the top and 1/3 of the way up from the bottom. These lines will help you place the Baseball Stitches evenly.
Now, using a curved line, enclose a half-circle at the top of the bat. This is where the baseball will sit when it’s hit.
Finally, add two small circles at the top of the bat for the knob.
Conclusion
Now that you know the basics of drawing a baseball bat you can get creative and add your own personal details. Remember to have fun and experiment until you find a style that suits you. With a little practice, you’ll be drawing Baseball Bats like a pro in no time!
Credits
The following people contributed to this project:
– Designer
– Developer
– Tester