How to Paint a Baseball Bat
Contents
Looking to add a personal touch to your baseball bat? Check out our step-by-step guide on how to paint a baseball bat!
Introduction
Welcome to our guide on how to paint a baseball bat This project is perfect for anyone who wants to add a personal touch to their baseball equipment With a few basic supplies and a little bit of time, you can create a one-of-a-kind bat that is sure to stand out on the diamond.
Before you get started, it is important to select the right type of paint for your project. We recommend using acrylic paint, as it is specifically designed for use on wood surfaces. Once you have your paint and other supplies, you are ready to begin!
Tools and Materials
In order to paint a baseball bat you will need a few supplies. These include:
-A baseball bat
-Painter’s tape
-Newspaper or a drop cloth
-Acrylic paint in the color(s) of your choice
-A paintbrush
-A sealant (optional)
Once you have gathered all of your supplies, you are ready to begin painting your baseball bat!
Preparing the Bat
The first step is to sand the bat down with medium-grit sandpaper. Be sure to get rid of any roughness or splinters. If you’re starting with a brand new bat, you may not need to do this step.
Next, you’ll need to apply a coat of primer to the bat. This will help the paint adhere better and give you a more even finish. Use a brush or a roller to apply the primer evenly over the entire surface of the bat.
Once the primer is dry, you’re ready to start painting!
Painting the Bat
Now that you have your bat all prepped and ready to go, it’s time to start painting! To get started, you will need:
-A can of primer
-A can of paint
-A paintbrush
-Masking tape
-Newspaper or a drop cloth
1. Cover the area where you will be painting with newspaper or a drop cloth.
2. Mask off the handle of the bat with masking tape. You don’t want to get paint on the part of the bat that you grip when you swing!
3. Give the entire bat a light coat of primer. This will help the paint to stick better and give you a nice, even finish.
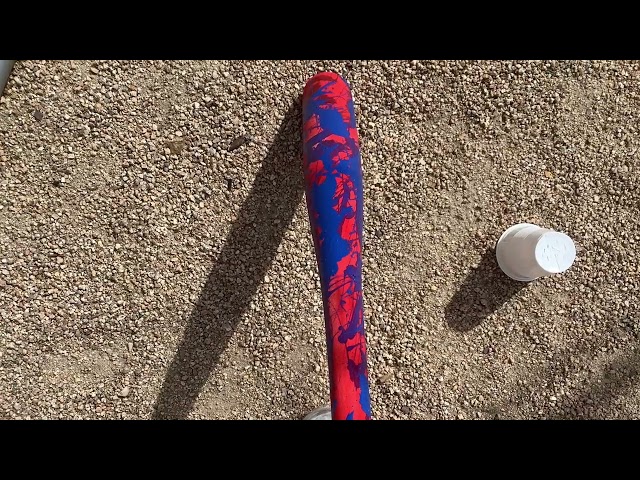
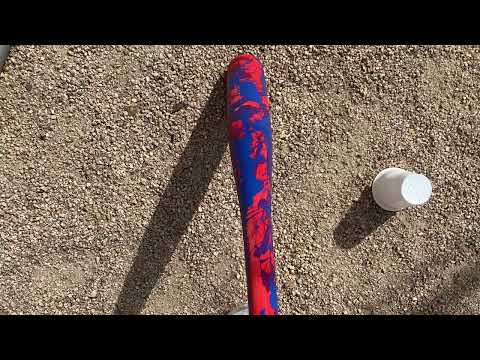
4. Once the primer is dry, start painting your bat with whatever color you like! We recommend using a brush designed for painting hard surfaces like this one. You may need to apply two coats of paint to get full coverage.
5. Let the paint dry completely before unmasking the handle and using your new bat!
Finishing the Bat
The next step is to finish the bat. To do this, you will need to sand the bat down with fine sandpaper. Once the bat is sanded down, you will need to apply a clear coat of paint to protect the bat from the elements.
Cleaning Up
You will need to gather a few supplies before you start painting your baseball bat You will need a clean surface to work on, so make sure your bat is free of dirt and other debris. You will also need a paintbrush, paint, and protectant. Once you have gathered your supplies, you are ready to begin painting your baseball bat
Tips and Tricks
There are a few things you need to keep in mind when painting a baseball bat Here are some tips and tricks to help you get the perfect paint job
First, sand the bat down with fine-grit sandpaper. This will create a smooth surface for the paint to adhere to. Next, wipe the bat down with a damp cloth to remove any dust particles.
Now it’s time to prime the bat. This will help the paint to stick better and prevent it from chipping or flaking off later. Use a quality primer designed for use on wood surfaces. Apply the primer evenly and allow it to dry completely before moving on to the next step.
Once the primer is dry, you can start painting your bat. Choose a paint that is specifically designed for use on wood surfaces. Apply the paint evenly, using long, smooth strokes. Allow the first coat of paint to dry completely before applying a second coat. Once the second coat is dry, your bat is ready to use!
Frequently Asked Questions
-How long does it take to paint a baseball bat?
-What kind of paint should I use?
-Do I need to prime the bat first?
-What is the best way to apply the paint?
-Should I use a brush or a roller?
-Can I paint the bat with a sprayer?
-What kind of paint finish should I use?
Conclusion
After you have chosen the perfect baseball bat it is important to paint it to protect it from the elements. Here is a guide on how to properly paint a Baseball Bat
You will need:
-1 can of primer
-1 can of paint
-1 paintbrush
-1 clear coat sealer (optional)
Instructions:
1. Start by sanding down the entire bat. This will help the paint to better adhere to the bat.
2. Next, apply a layer of primer to the bat. Allow the primer to dry completely before moving on to the next step.
3. Once the primer is dry, begin painting the bat with your desired color of paint. It is important to apply several thin layers of paint, rather than one thick layer. Allowing each layer of paint to dry in between coats will produce the best results.
4. Once you are happy with the color of your bat, you may optionally apply a clear coat sealer for extra protection from the elements.
5. Allow the bat to dry completely before using it in game play!
Further Reading
If you’re looking for more information on painting Baseball Bats check out the following resources:
-How to Paint a baseball bat A Step-by-Step Guide: This guide provides a step-by-step overview of how to paint a baseball bat
-Choosing the Right Paint for Your baseball bat This article discusses different types of paint that can be used to paint a baseball bat and how to choose the right paint for the job.
-Painting Tips for baseball bats This article offers helpful tips on how to get the best results when painting a baseball bat