How to Make a Baseball Bat
Contents
A baseball bat is a piece of equipment used by baseball players to hit the ball It is also used by softball players. The bat is a long, round, smooth-surfaced stick that is made of wood or metal.

Introduction
Baseball Bats are made of wood, and each one is unique. The manufacturing process of a baseball bat involves choosing the type of wood, cutting it to the correct size, and then shaping it into a bat. There are many different ways to make a baseball bat but all of them require careful planning and craftsmanship.
To make a baseball bat you will need:
-Wood
-A saw
-A lathe (optional)
-Sandpaper
-Paint or varnish (optional)
1. First, you need to choose the type of wood you want to use. Different woods have different properties, so it’s important to pick one that will work well for your needs. Some good options for baseball bats include ash, maple, and birch.
2. Once you’ve chosen your wood, you need to cut it to the correct size. The standard dimensions for a baseball bat are 2.61 inches in diameter and 42 inches long. However, you may want to adjust these dimensions depending on your personal preferences or the requirements of your league.
3. Once your wood is cut to size, it’s time to shape it into a bat. This can be done with a saw or a lathe. If you’re using a saw, be sure to make slow, even cuts so that the bat is symmetrical. If you’re using a lathe, follow the manufacturer’s instructions carefully so that you don’t damage the wood.
4. Once your bat is shaped, sandpaper any rough edges and then paint or varnish it if desired.
5 .Your baseball bat is now ready to use!
Materials
You will need:
-a piece of wood measuring 36 inches long and 2.75 inches in diameter
-a saw
-a sander
-a drill
-wood glue
-clamps
-a dowel (optional)
To make a Baseball Bat you will first need to cut the piece of wood to the desired length. It is important to sand the edges of the wood so that they are smooth. Next, you will need to make a hole in the center of the bat using a drill. The dowel is optional, but it can be used to reinforced the bat. Once the hole has been made, you will need to apply wood glue around the circumference of the hole. Finally, you will need to insert the dowel (if using) and clamp the bat until the glue dries.
Tools
You will need a few tools to make your own baseball bat A handsaw, a drill, and a hammer are a good start. You will also need some sandpaper to smooth out the edges of your bat. If you want to paint your bat, you will need paint and a brush.
Step 1: Cut the Wood
The first step to making a baseball bat is to cut the wood. You will need a piece of wood that is about 2 feet long and 3 inches in diameter. You can find this kind of wood at a hardware store.
Step 2: drilled a Hole
Next, you will need to drill a hole in the center of the piece of wood. This hole should be about 1 inch in diameter.
Step 3: Inserting the Barrel
Now, you will need to insert the barrel into the hole that you drilled. The barrel is the part of the bat that will make contact with the ball. It is important that this part of the bat is made from high-quality materials.
Step 4: Secure the Barrel
Once the barrel is inserted into the hole, you will need to secure it in place. You can do this by using screws or nails. Make sure that the screws or nails are driven into the wooden part of the bat, not into the barrel itself.
Step 5: Attach the Handle
The next step is to attach the handle to the bat. The handle should be made from a comfortable material such as leather or plastic. It should also be wide enough to provide a good grip Once you have attached the handle, you can begin using your bat!
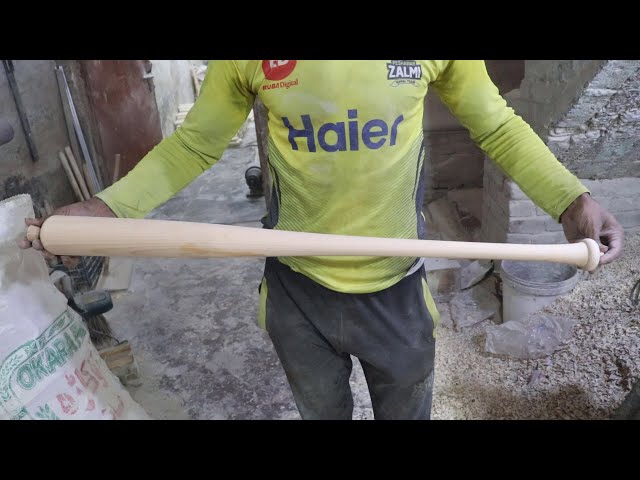
Step 2: Shape the Bat
After you’ve cut the wood to the correct size, it’s time to start shaping your baseball bat To do this, you’ll need to use a bat shaping tool. These can be found at most Sporting Goods stores, or online.
Position the bat shaping tool on the end of the wood, and then start turning it. As you turn, the tool will shape the wood into a round barrel. Keep turning until the barrel is the desired size.
Step 3: Smooth the Surface
Now that you have the basic shape of your bat, it’s time to smooth out the surface. You can use a variety of tools to do this, but we recommend starting with a hand sander.
Begin by sanding down any rough spots or bumps on the surface of the bat. You want to create a smooth, even surface. Once you have sanded down the rough spots, you can begin working on creating a smooth, glossy finish.
To do this, start by sanding the bat with a medium-grit sandpaper. Work your way up to a finer grit sandpaper until you have achieved the desired results. Once you are happy with the finish, you can apply a coat of paint or sealant to protect the wood and give it a more finished look.
Step 4: Apply the Finish
The fourth and final step is to apply the finish. The wood needs to be sealed in order to protect it from the elements and prevent it from warping or splintering. Apply a thin layer of sealer with a brush or roller, working in the direction of the grain. Allow the sealer to dry completely before using or storing the bat.
Step 5: Let the Bat Dry
After the bat has been coated with varnish, it needs to be left to dry in a warm place. A garage or shed is ideal, but if you don’t have either of those, you can try drying the bat in your house. Just make sure that the area is well-ventilated so that the fumes from the varnish don’t build up too much. Once the bat is dry, it’s ready to use!
Conclusion
Thanks for trying out our guide on how to make a baseball bat! We hope you found it helpful and informative. If you have any questions or comments, please feel free to reach out to us.