How to Make WWE Belts for Action Figures
Looking to add some flair to your action figures? Why not make them their very own WWE belt? Check out this tutorial to learn how!

Introduction
If you are a fan of WWE wrestling, then you may want to consider making your own WWE belts for action figures. This can be a fun and easy project, and it will allow you to have belts that are unique and custom-made. You can make WWE belts out of many different materials, but the most common material is felt. Felt is easy to work with and it comes in a variety of colors, so you can create any type of belt that you want.
To make a WWE belt out of felt, you will need:
-A sheet of felt
-Scissors
-A hot glue gun
-Ribbon or fabric trim (optional)
– sequins or other decorations (optional)
Begin by cutting a strip of felt that is about 2 inches wide and 18 inches long. This will be the main part of the belt. If you want the belt to be longer or shorter, you can adjust the size of the strip accordingly.
Next, fold the strip in half lengthwise and glue the two sides together with a hot glue gun. Then, cut a piece of ribbon or fabric trim that is about 2 inches wide and 18 inches long. This will be used to create the border around the edge of the belt. Center the strip on one long side of the belt and glue it in place with a hot glue gun.
Finally, decorate the belt any way you like. You can add sequins, jewels, or other decorations using hot glue. Once you are finished decorating, your belt is complete!
What You’ll Need
– belts
-leather
-felt
-foam
-needle and thread
-scissors
-hot glue gun and glue sticks
-paint (optional)
Making the Belt
Materials:
-1/4 inch elastic
-Ruler or measuring tape
-Scissors
-1 1/2 inch wide ribbon or belt webbing
-Large needle and thread OR hot glue and glue sticks
-Beads, charms, and other decorations (optional)
Instructions:1. Decide how long you want the belt to be. WWE belts are usually about 18 inches long, but you can make yours any length you want. Just remember that you’ll need to be able to tie the belt around your waist, so don’t make it too long or too short. 2. Cut a piece of 1/4 inch elastic that is twice the length of the belt plus 2 inches. 3. Fold the piece of elastic in half and sew the two ends together with a needle and thread OR with a hot glue gun. 4. Once the ends are securely sewn together, turn the elastic right side out so that the seam is on the inside. 5. Place the end of a ruler or measuring tape at one end of the tube of elastic and measure down 18 inches (or whatever length you want your belt to be). Make a small mark at this point with a pen or pencil. 6. Cut the tube of elastic at this point with scissors, being careful not to cut off any more than you need to. 7. Now you need to add decoration to your belt! If you’re using ribbon or belt webbing, simply glue it around the outside of the tube of elastic, making sure to cover up the seam. You can also add beads, charms, sequins, or anything else you can think of! Be creative! 8. Once your belt is decorated to your liking, tie it around your waist and enjoy!
Adding the Details
Now that the basic shape of the WWE belt is complete, it’s time to add some details. Use a black Sharpie or other permanent marker to draw a row of small rectangles along the bottom edge of the belt. These will represent the rivets that hold the leather strap together. Add a few more rectangles at random intervals along the length of the belt. Allow the ink to dry completely.
Next, use a silver Sharpie or other metallic marker to add two parallel lines running down the center of the belt. These will represent the stitches that hold the two halves of the belt together. Add a few more lines at random intervals along the length of the belt. Allow the ink to dry completely.
Finally, use a black Sharpie or other permanent marker to add a WWE logo to the center of the belt. You can either freehand this or print out a small logo and trace it onto the belt. Allow the ink to dry completely before moving on to the next step.
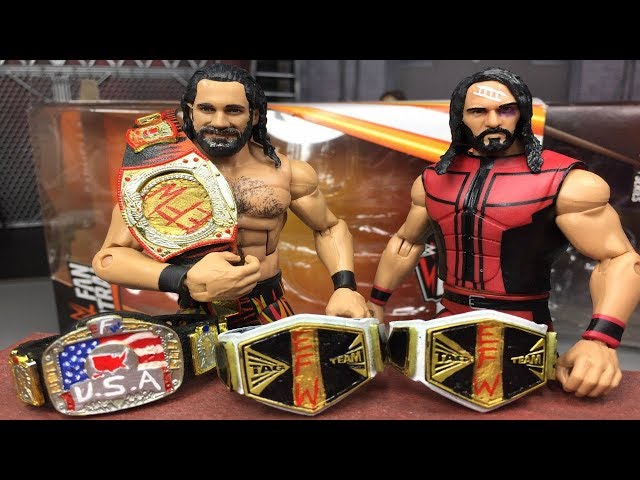
Finishing Up
The final step is to finish up your belt. You can do this by adding any desired embellishments, such as rhinestones or beads. Once you are happy with your design, glue the pieces together and allow the glue to dry completely. Your belt is now ready to be enjoyed by your action figure!