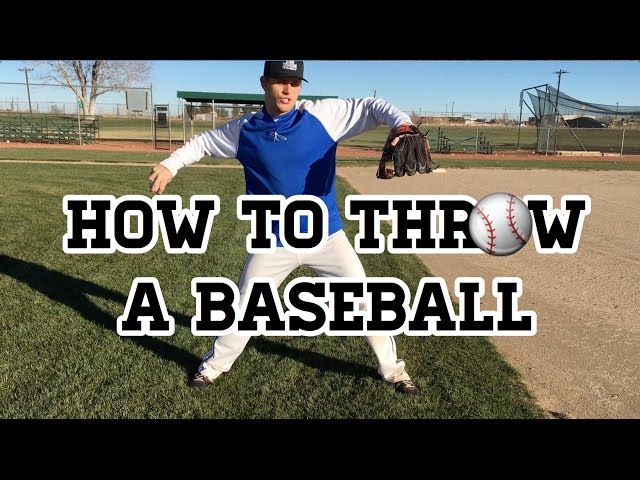
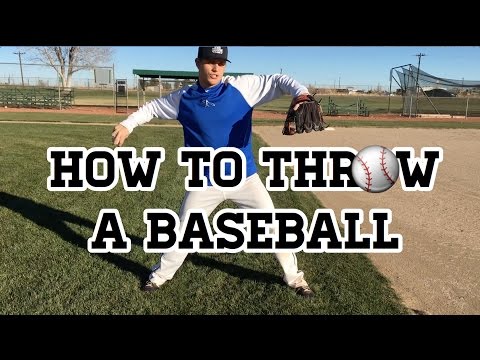
How to Throw a Baseball
Contents
Throwing a baseball may seem like a simple task, but there is a proper technique that must be followed in order to throw the ball with accuracy and power. In this blog post, we’ll show you how to throw a baseball the right way.
Picking the right baseball
The size, weight and material of a baseball can affect how well you can grip it and how fast you can throw it. Baseballs come in three main sizes: regulation, intermediate and training. They also come in different weights and made from different materials. The size of the ball is important because it needs to fit comfortably in your hand. The weight is important because a heavier ball will be easier to throw faster. The material is important because a softer ball will be easier to grip and a harder ball will be easier to throw more accurately.
Regulation baseballs are the standard size for all official baseball games They are 9 inches in circumference and weigh 5 ounces. Intermediate baseballs are slightly smaller than regulation baseballs. They are 8 inches in circumference and weigh 5 ounces. training baseballs are the smallest size of baseball. They are 7 inches in circumference and 3 ounces.
Baseballs can be made from synthetic materials or leather. Synthetic materials, like rubber, are often used for training balls because they are softer and easier to grip. Leather balls are used for regulation and intermediate games because they are harder and have a better shape for accuracy when thrown.
The perfect grip for throwing a baseball
There is no single perfect grip for throwing a baseball Different pitchers use different grips depending on the desired outcome of the pitch. The most important thing is to hold the ball securely so that it does not slip out of your hand while you are throwing.
Here are some common grips that pitchers use:
Four-seam fastball: This grip is used for pitches that are intended to be thrown straight with little or no movement. To throw a four-seam fastball, place your index and middle fingers across the narrowest part of the ball, with your thumb underneath the ball.
Two-seam fastball: This grip is used for pitches that are intended to have movement towards the pitcher’s glove side (for a right-handed pitcher). To throw a two-seam fastball, place your index and middle fingers along the seams of the ball, slightly off center.
Cutter: This grip is used for pitches that are intended to break towards the pitcher’s glove side (for a right-handed pitcher). To throw a cutter place your index finger and middle finger along opposite seams of the ball, with your thumb underneath the ball.
The windup
There are many different ways to throw a baseball, but the most common pitching motion is called the windup. This is the style that most Major League pitchers use, and it’s the one that you’ll learn in this guide. Before you start practicing your windup, it’s important to understand the basic principles behind it.
Your pitching arm should be at shoulder level when you start your windup. As you lift your leg, bring your arm up so that your hand is above your head. As you come down, bring your arm down and around in a circular motion. When you release the ball your arm should be fully extended and aimed at the target.
The key to a successful windup is timing. You need to make sure that your body is in the proper position before you release the ball. If you release the ball too early or too late, it will not go where you want it to.
Practice makes perfect, so don’t get discouraged if it takes a while to get the timing down. With a little practice, you’ll be Throwing strikes in no time!
The pitch
The most important thing to remember when throwing a baseball is to grip the ball correctly. The way you grip the ball will determine how much spin is on the ball when you release it, and that will in turn determine its flight path. For a fastball, you want to grip the ball across the seams so that your index and middle fingers are right on top of the seams. For a curveball, you want to grip the seam between your index and middle finger so that your middle finger is higher on the seam than your index finger.
Once you have the ball properly gripped, raise your arm up so that your elbow is level with your shoulder. You don’t want to raise your arm any higher than that or you’ll start putting unnecessary strain on your shoulder. From this raised position, bring your arm down and forward so that your hand is in line with your hip. As you bring your arm down, cock your wrist back so that your hand is behind the ball.
At this point, you should be in what’s called the power position. Your elbow should be pointing down at an angle of about 45 degrees, and your hand should be cocked back behind the ball ready to unleash all kinds of speed and spin. To throw the pitch, simply uncock your wrist and snap it forward while keeping your elbow pointed in at that 45-degree angle. As you release the ball, try to snap your wrist so that your hand ends up pointing directly at the target.
The follow-through
Slowly bring your arm back to the wing position As your arm reaches the top of your backswing, quickly snap your wrists, bringing your hand over your head. As you do this, step forward with the leg on the same side as your throwing hand. This forward momentum will help increase the speed and power of your throw. bring your arm forward and release the ball when your hand is even with your ear.
Tips for increasing velocity
As any baseball coach will tell you, one of the most important skills for a pitcher is velocity. Many young pitchers focus on throwing the ball as hard as they can, but there are a few things you can do to increase your velocity without jeopardizing your control.
One way to increase velocity is to increase the distance between your body and the point of release. This may seem counterintuitive, but it’s actually a result of physics. The longer the lever (in this case, your arm), the more momentum you can generate. Another way to increase velocity is to use a heavier ball. This will help you develop more strength in your pitching arm.
Of course, increasing velocity comes with some risks. The most common injury in pitchers is called ” Tommy John surgery ” which is caused by overuse of the elbow ligament. If you feel pain in your elbow when pitching, be sure to see a doctor or coach immediately. With proper care and training, you can still be an effective pitcher even if you don’t throw the ball as hard as some of your counterparts
Improving accuracy
One of the main keys to throwing a baseball accurately is to have good mechanics. Good mechanics means that you are using the right muscles in the right order to achieve the desired result, which in this case is throwing the ball accurately.
There are a few things that you can do to help improve your accuracy. First, make sure that you are holding the ball correctly. The way that you grip the ball will have an effect on how well you can control it. Second, pay attention to your body position and make sure that you are not crossing over your body when you throw. This will cause the ball to veer off course. Finally, focus on your release point and make sure that you are releasing the ball at the same spot each time. If you can master these things, you will be well on your way to throwing strikes!
Dealing with arm pain
Whether you’re a weekend warrior or a professional, arm pain is something that all athletes have to deal with at some point in their careers. Although there is no surefire way to prevent arm pain, there are some things you can do to minimize your risk. First and foremost, be sure to warm up properly before you start throwing. A good warm-up will help loosen your muscles and get your blood flowing. It’s also important to stretch regularly, both before and after you throw. Stretching helps keep your muscles flexible, which reduces your risk of injury.
If you do start to feel arm pain, it’s important to rest and ice the affected area. You may also want to take over-the-counter pain medication if the pain is particularly severe. If the pain persists for more than a few days, or if it gets worse instead of better, it’s important to see a doctor. You may have developed a more serious injury that needs medical attention
Playing catch
Most roasters have specialized names for their favored roasts and there is very little industry standardization. This can cause some confusion when you’re buying, but in general, roasts fall into one of four color categories — light, medium, medium-dark and dark.
Many consumers assume that the strong, rich flavor of darker roasts indicates a higher level of caffeine, but the truth is that light roasts actually have a slightly higher concentration. The perfect roast is a personal choice that is sometimes influenced by national preference or geographic location. Within the four color categories, you are likely to find common roasts as listed below. It’s a good idea to ask before you buy. There can be a world of difference between roasts.
Light roasts
Light brown in color, this roast is generally preferred for milder coffee varieties. There will be no oil on the surface of these beans because they are not roasted long enough for the oils to break through to the surface.
-Light City
-Half City
-Cinnamon
Medium roasts
This roast is medium brown in color with a stronger flavor and a non-oily surface. It’s often referred to as the American roast because it is generally preferred in the United States
-City
-American
-Breakfast
Throwing drills
Throwing a baseball is not as easy as it may seem. It takes practice and repetition to perfect the technique. Here are some drills that can help you improve your throwing form and accuracy.
1. Start by standing in an athletic stance, with your feet shoulder-width apart and your weight evenly distributed.
2. Grip the ball with your fingers on top of the seam, and place your thumb underneath the ball.
3. Bring the ball up to shoulder level, and then cock your wrist back so that your thumb is pointing behind you.
4. As you begin to uncoil your body, release the ball from your hand and snap your wrist forward so that your thumb points down toward the ground.
5. Follow through with your arm after you release the ball, letting it extend out in front of you and toward your target.