How to Create an NBA 2K Logo
Contents
How to Create an NBA 2K Logo – A tutorial on how to create a realistic NBA 2K logo using Photoshop

Introduction
Creating a NBA 2K logo is easy and only requires a few minutes of your time. You can create a logo for your MyTEAM or for your created player. To create a logo, follow the steps below.
What You’ll Need
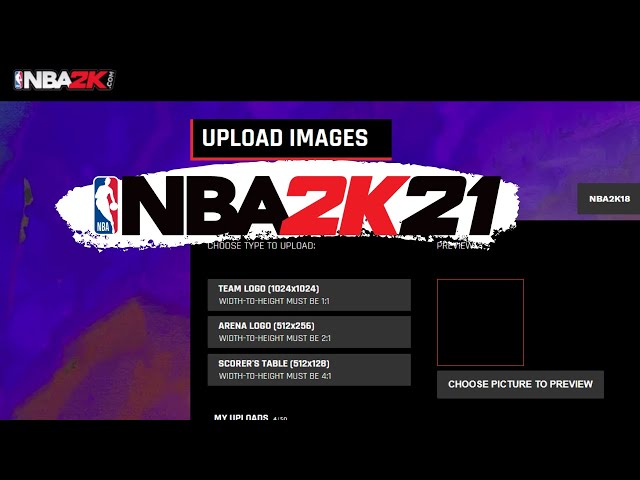
In order to create an NBA 2K logo, you’ll need the following:
-A copy of Adobe Photoshop
-An image of an NBA team logo
-A blank canvas or document
-A black and white version of the NBA team logo
-The 2K font (can be downloaded for free online)
Once you have all of these items, you’re ready to start creating your NBA 2K logo!
Step One: Choose a Template
Step One: Choose a Template
The first step in creating your NBA 2K logo is to choose a template. There are a variety of templates available online, so you can choose one that best suits your needs. Once you have chosen a template, you will need to download it and save it to your computer.
Step Two: Customize the Template
Once you have downloaded the template, you will need to open it in a graphics editor such as Adobe Photoshop or Microsoft Paint. From here, you can begin to customize the template to better suit your team. You can change the colors, add text, and even upload your own images.
Step Three: Save the Logo
Once you are satisfied with your logo, you will need to save it in a format that can be used by NBA 2K. The most common format is .png, but you may also be able to use .jpg or .gif formats. Be sure to check with the game before saving your logo in another format.
Step Two: Customize Your Template
Creating a logo for your team in NBA 2K19 is a pretty simple process, but it’s one that’s worth taking the time to do right. A good logo can make your team look more professional and it can also be a fun way to show off your creative side.
The first step in creating a logo is to find a template that you like. There are a ton of different options out there, so take some time to browse and find one that you think will work well for your team. Once you’ve found a template, you can start customizing it to make it your own.
One of the most important things to do when customizing your logo is to choose the right colors. The colors you use will play a big role in how your team is perceived, so choose wisely. Try to stay away from using too many different colors, as this can make your logo look busy and confused. Stick with two or three colors that complement each other well and that will help give your team its own unique identity.
Once you’ve chosen your colors, it’s time to start adding some personal touches to your logo. If you’re not very artistically inclined, don’t worry – there are still plenty of things you can do to make your logo look great. Try adding some textured elements or patterns, or even incorporating something that represents your team’s city or home state. By putting some thought into your design, you can create a logo that’s both unique and memorable.
Step Three: Save and Export
Saving and exporting your new NBA 2K logo is easy! Just click on the “File” menu and select “Save As.” Choose a filename and file format, then click “Save.” That’s it – you’re done!
Tips and Tricks
Creating an NBA 2K logo can be a fun and creative way to show your support for your favorite team There are a few things to keep in mind when creating your logo, such as the color scheme the size and placement of the logo, and the overall style. Here are some tips and tricks to help you create an NBA 2K logo that will look great on any device.
1. Choose a color scheme that represents your team. The colors should be bold and easy to see.
2. Keep the logo simple. Too many details will make it difficult to see on a small screen.
3. Make sure the logo is proportionate. You don’t want it to be too small or too large.
4. Place the logo in the center of the screen. This will help it stand out and be easily visible.
5. Use high-resolution images so that the logo looks sharp on any device.
Conclusion
After you have decided on a design and color scheme, it’s time to create your NBA 2K logo. To do this, you’ll need to use a 2D design program like Adobe Illustrator or Photoshop.
Once you have your design program open, you’ll need to create a new file that is 300x300 pixels. This is the standard size for an NBA 2K logo.
Next, you’ll want to add your team name to the file. If you’re using Photoshop, you can do this by clicking on the “T” icon in the toolbar. If you’re using Illustrator, you can click on the “Text” tool in the toolbar.
Once you have your team name added, you’ll want to add your team’s initials. You can do this by creating a new layer and adding your initials in a separate color.
Now it’s time to add your team’s colors. To do this, you’ll want to create two rectangles that are each 150x150 pixels. One rectangle should be your primary color and the other should be your secondary color.
Once you have your colors added, it’s time to export your logo. To do this, go to File > Export > Export As and choose a format that will work for NBA 2K (PNG or JPG are both good options).
And that’s it! You now have a completed NBA 2K logo that is ready to be used in the game!